Wednesday, December 30, 2009

16

Tiramisu Cake

tiramisu cake
I hope everyone had a wonderful Christmas! This year, my Christmas was pretty quiet as my family ditched me for a holiday in Taiwan, whilst I spent three days alone at home revising and eating instant ramen for my Christmas dinner. The most enjoyable thing I did was probably going to my dear dear dear friend, YTH's birthday party.

tiramisu cakeYTH is one of my high/secondary school friends, but over these 6-7 years, I think we've become pretty close friends. (YTH: I hope you agree!) She's one of those people that will know what I am thinking of on one moment of eye contact, and we usually share the same views and thoughts on the many things we discuss. She's also the first one I always consult when I have a problem, and she's always there to listen when I come across baking disasters. She also loves to write - take a look at her blog, and she'll take you through the torturous IB journey we're on right now, but not without hints of humour and sarcasm that always make me smile when I read.

Of course, I wouldn't even dream of showing up without a birthday cake. Since most of us are pretty sleep deprived and rely heavily on caffeine, I thought I'd might as well include it in the cake. Originally I wanted to make an Espresso Fudge Cake (since YTH always gets a Mocha whenever we're at Starbucks or PCC), but I didn't have much time on my hands, so I settled on making a simpler - but equally caffeine loaded - Tiramisu Cake.

tiramisu cakeThis time the production of the cake went quite well, as only two main components were needed to be made - the yellow cake layer, and the filling/frosting mascarpone cream. I found the yellow cake to be a little dense and dry, and I think by soaking it with more espresso-rum syrup it will give a texture that is more similar than the classic Tiramisu.
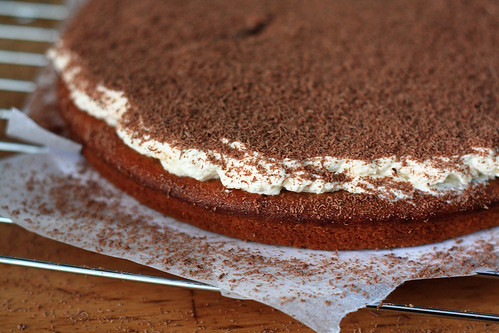
tiramisu cakeAs for the filling and frosting, I can only say that I should have doubled the amount, because it is the best part of the cake! A smooth and creamy mascarpone concoction that is lightened with whipped cream and spiked with kahlua and espresso, I found it hard to restrain myself from eating it by the spoonful! Assembled along with the soaked cake layers and some finely chopped dark chocolate, the cake did resemble the flavour and texture of Tiramisu.

I really do like the idea of Tiramisu in the form of a cake, but next time I think I'll just go back to using lady fingers, but assemble the dessert inside a cake ring.
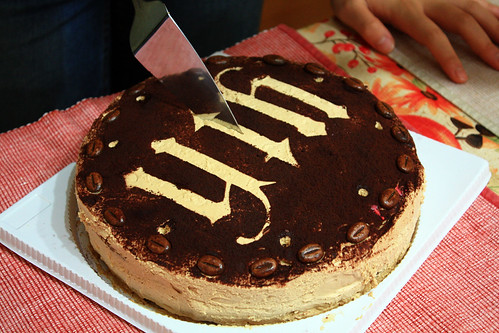

tiramisu cakeAlthough the cake itself tasted pretty good overall, the thing I'm most proud of is the decoration. Try looking at the first photo upside down - the design looks the same, because it's an ambigram! The idea was inspired by an ambigram that YTH drew a long time ago....Did I mention that she's an amazing calligrapher? The neatness of her handwriting is pretty scary, our Physics teacher once said that he thought it was typed!

The decoration was made by using a paper stencil. First I printed off an ambigram (from an ambigram generator that found using Google) and carefully cut out the text. Then I simply placed it onto the cake, and sieved over copious amounts of cocoa powder. Then comes to difficult bit - removing the paper stencil without spilling cocoa powder over the design. I found that the best way to do this is to use a pair of thin wire 'pliers' (pardon my English, I don't know what's the exact name of the tool), pinch one end of the stencil, and remove it quickly and swiftly in one direction so the cocoa spills on the 'dark' bit of the design, and not onto the 'light' bits.

tiramisu cake
This way of decorating probably works best for simple designs and shapes - hearts, stars smiley faces, or a single alphabet letter and numbers.

Or, you can make this cake for your New Year parties, and use a design saying '2010' for the decoration! And speaking of 2010, this will be the last post of 2009 - so I'll see you all again in 2010, and cheers to a better, happier and more fruitful year with more baking for everyone!

tiramisu cakeTiramisu Cake
From Dorie Greenspan's Baking: From My Home to Yours

For the cake layers:
2 cups (250g) cake flour
2 teaspoons baking powder
1/8 teaspoon baking soda
1/4 teaspoon salt
1 1/4 sticks (10 tablespoons, 142g) unsalted butter, room temperature
1 cup (200g) sugar
3 large eggs
1 large egg yolk
1 1/2 teaspoons pure vanilla extract
3/4 cup (180g) buttermilk

For the espresso extract:
2 tablespoons instant espresso powder
2 tablespoons boiling water

For the espresso syrup:
1/2 cup water
1/3 cup (66g) sugar
1 tablespoon amaretto, Kahlua, or brandy (I used rum)

For the filling and frosting:
1 8-ounce (224g) container mascarpone
1/2 cup (60g) confectioners’ sugar, sifted
1 1/2 teaspoons pure vanilla extract
1 tablespoon amaretto, Kahlua, or brandy (I used Kahlua)
1 cup(238g) cold heavy cream
2 1/2 ounces (70g) bittersweet or semisweet chocolate, finely chopped, or about 1/2 cup store-bought mini chocolate chips

Chocolate-covered espresso beans, for decoration (optional)
Cocoa powder, for dusting

Getting ready:
Center a rack in the oven and preheat the oven to 350 degrees F. Butter two 9×2 inch round cake pans, dust the insides with flour, tap out the excess, and line the bottoms of the pans with parchment or wax paper. Put the pans on a baking sheet.

To make the cake:
Sift together the cake flour, baking powder, baking soda, and salt.

Working with a stand mixer, preferably fitted with a paddle attachment, or with a hand mixer in a large bowl, beat the butter on medium speed until soft and creamy. Add the sugar and beat for another 3 minutes. Add the eggs one by one, and then the yolk, beating for 1 minute after each addition. Beat in the vanilla; don’t be concerned if the mixture looks curdled. Reduce the mixer speed to low and add the dry ingredients alternately with the buttermilk, adding the dry ingredients in 3 additions and the milk in 2 (begin and end with the dry ingredients); scrape down the sides of the bowl as needed and mix only until the ingredients disappear into the batter. Divide the batter evenly between the two pans and smooth the tops with a rubber spatula.

Bake for 28 to 30 minutes, rotating the pans at the midway point. When fully baked, the cakes will be golden and springy to the touch and a thin knife inserted into the centers will come out clean. Transfer the cakes to a rack and cool for about 5 minutes, then run a knife around the sides of the cakes, unmold them, and peel off the paper liners. Invert and cool to room temperature right-side up.

To make the extract:
Stir the espresso powder and boiling water together in a small cup until blended. Set aside.

To make the syrup:
Stir the water and sugar together in a small saucepan and bring just to a boil. Pour the syrup into a small heatproof bowl and stir in 1 tablespoon of the espresso extract and the liqueur or brandy; set aside.

To make the filling and frosting:
Put the mascarpone, sugar, vanilla, and liqueur in a large bowl and whisk just until blended and smooth.

Working with the stand mixer with the whisk attachment or with a hand mixer, whip the heavy cream until it holds firm peaks. Switch to a rubber spatula and stir about one quarter of the whipped cream into the mascarpone. Fold in the rest of the whipped cream with a light touch.

To assemble the cake:
If the tops of the cake layers have crowned, use a long serrated knife and a gentle sawing motion to even them. Place one layer right-side up on a cardboard round or a cake plate protected with strips of wax or parchment paper. Using a pastry brush or a small spoon, soak the layer with about one third of the espresso syrup. Smooth some of the mascarpone cream over the layer – user about 1 1/4 cups – and gently press the chopped chocolate into the filling. Put the second cake layer on the counter and soak the top of it with half the remaining espresso syrup, then turn the layer over and position it, soaked side down, over the filling. Soak the top of the cake with the remaining syrup.

For the frosting, whisk 1 to 1 1/2 tablespoons of the remaining espresso extract into the remaining mascarpone filling. Taste the frosting as you go to decide how much extract you want to add. If the frosting looks as if it might be a little too soft to spread over the cake, press a piece of plastic wrap against its surface and refrigerate it for 15 minutes or so. Refrigerate the cake too.

With a long metal icing spatula, smooth the frosting around the sides of the cake and over the top. If you want to decorate the cake with chocolate-covered espresso beans, press them into the filling, making concentric circles of beans or just putting some beans in the center of the cake.

Refrigerate the cake for at least 3 hours (or for up to 1 day) before serving – the elements need time to meld.

Thursday, December 24, 2009

2

Last Minute Christmas Cookies

Actually this post is a little late - I was meant to publish this before I went Christmas carolling, but I couldn't upload my photos and I was running late, so here I am posting this on the early minutes of Christmas Day! But any rate, enjoy these cookies :)
---

Following on to my previous post - Yes, I did have time to cram in a few more cookie baking sessions! Since we only have a day or so left until Christmas, I thought I'd summarise the three other cookies I baked for this year's holidays in one, short post.

I think any of these recipes would be perfect as a last minute addition to your cookie can, or to be packed as gifts (I baked the latter two recipes in one morning and they are set to be given off tonight), or just to be bookmarked and made another time next year!

World Peace Cookies


Man, who hasn't heard of these before? A rich, crumbly cookie loaded with dark chocolate bits, everyone is bound to like them. The dough can be stored in the freezer, and baked straight from their frozen state after slicing, so you can enjoy fresh cookies anytime your heart desires this holiday! The recipe can be found on Smitten Kitchen.

Lemon Cranberry Shortbreads


Recently I've learned to like dried cranberries, after eating a bun from a local bakery that had cranberries with linseeds. Anyway, I knew I had to bake these the moment I saw the recipe - I mean, a citrusy, fragrant lemony shortbread - one of my favourite flavours, since it balances the richness of the butter - is bound to appeal, and with my latest favourite food - dried cranberries added? It went straight onto my holiday cookies list. The original recipe asks for the dough to be pressed into a pan, baked and then sliced into bars. I didn't have such a big pan (even if I did it wouldn't fit into my puny oven anyway), so I chilled the dough, rolled it out and cut them into hearts instead.

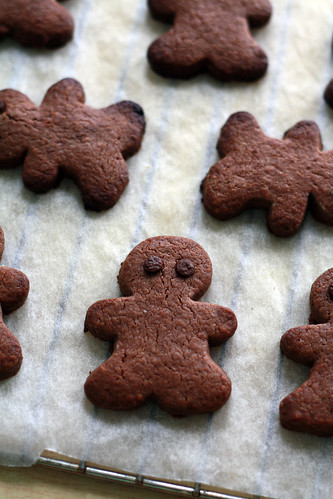
Chocolate Shortbread Men


This can be said as my substitute for gingerbread men, since I really haven't
acquainted a taste for the spiced cookie yet. The shortbread recipe used to make these men have been tried out by me for a billion times - it is definitely fool proof. Only involving four basic ingredients, the dough is very versatile indeed and tastes wonderful. I've included the original recipe below and some of the variations I've tried before.

And lastly, a warm Merry Christmas to you all! Whilst I may be hiding behind my books and revising for my mock exams this holiday, I hope everyone of you will enjoy the holiday with your loved ones!

Lemon Cranberry Shortbreads
Adapted from dandysugar

3 lemons
3/4
cup (1 1/2 sticks) (170g) butter, at room temperature
1/4
cup (50g) granulated sugar
1/2
cup (60g) confectioners’ sugar
2
cups (250g) all-purpose flour
1/2
cups (60g) dried cranberries, roughly chopped
1/8 teaspoon salt


1. Preheat oven to 300° F (150 C). Line a baking tray with baking paper, set aside.
2. Grate all the zest from the lemons and combine with the granulated sugar in a small bowl. Rub the two together until sugar is moist and fragrant.
3. In a large bowl, cream the butter and sugars together until creamy. Add flour and mix on low speed until a crumbly dough appears. Add the cranberries and use your hands to form a soft dough. Shape the dough into a disk, wrap in plastic wrap and chill for 1 hour
.
4. Roll out the dough tp around 1/2 cm (1/4 inch) thickness. Cut out shapes, transfer onto the lined tray and bake for 10-12 mintues until golden brown. Cool on a wire rack before packing.


Basic Shortbread Recipe

Adapted from BBC Good Food

325g plain flour
200g chilled salted butter
125g/4½oz golden caster sugar
2 tsp good-quality vanilla extract
2 large free range egg yolks


1.Tip the flour into a food processor. Cut the butter into small pieces and drop them into the bowl, then whizz until the mixture looks like breadcrumbs.
Add the sugar, vanilla and egg yolks and whizz to a small dough. Chill the dough for an hour.
For those like me who don't have a food processor:
Put the flour into a large bowl, and cut butter into 1cm cubes. Rub the butter into the flour until incorporated and the mix looks like coarse breadcrumbs. Mix in the sugar, vanilla and egg yolks and use your hands to press everything into a dough. If it is too dry, add a couple drops of water. Chill the dough for an hour (or shape into a log beforehand for slice/bake cookies).
2. Preheat oven to 180 C. Roll out the dough and cut out shapes or slice the dough, arrange on lined cookie sheets. Bake for 15-20minutes until golden brown.

Variations:
Chocolate: Replace 2tbsp of the flour with cocoa powder. Decorate cookies with chocolate chips if desired.
Lemon: Grate in the zest of one lemon into the sugar and rub until moist and fragrant before combining with everything else. Omit the vanilla.
Coffee: Add in 1-2 tsp espresso powder to the dough along with the sugar.
Pinwheel Cookies

Saturday, December 19, 2009

11

Christmas Stained Glass Cookies

Every year at Christmas, I try to bake or make something special for my friends. The last few days of school before the holidays just seems incomplete without giving out my edible presents to everyone - it's equally important as singing in the Carol Concert, writing Christmas cards and adorning ourselves in Christmas colours! Last year I made Kahlua and plain chocolate truffles, and the year before were iced shortbread cookies. Because I'm school life is still pretty hectic now, I thought I'd stick to simple cookies that everyone would be sure to like.

First up are Stained Glass Cookies, the classical combination of shortbread with a clear pane of coloured sugar that lets whatever light shine through. I vividly remember seeing these cookies in a cookbook way back at my primary school library, and wondering how on earth do you make cookies with a translucent red, yellow or green centres. Back then, hammering fruit candies in a plastic seemed very daunting to the 10-year old me, which is probably why I haven't attempted these Christmas cookies until now.
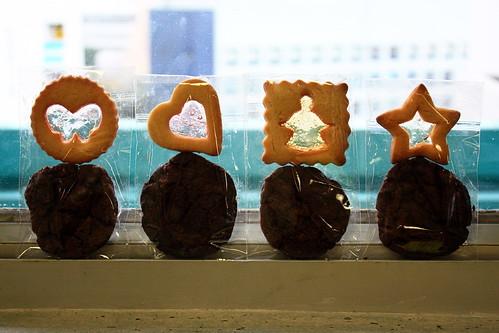
I must admit that making these cookies were very fiddly indeed - the clumsy me just had to let something slip along the way, so I had candy shards falling onto the floor (well at least it wasn't the hammer falling onto my toes) and fingers accidentally touching hot trays from the oven. Sometimes I messed up the smaller cookie cutout and had to scrap that and start rolling again. The cookies are removed from the oven halfway through the baking time to put the candy in the space (this avoids the colours being discoloured and too many bubbles forming), and pushed into every nook and cranny using a toothpick.

But the end product was worth all the effort. Even though my cookies were not as pretty as the ones I saw in that cookbook, and the colours were not as vivid as I envisioned it to be (maybe because the Fox fruit candies I used were light in colour), I was thankful that they actually looked like a cookie with a window of glass in the middle. I couldn't help but grin with satisfaction as saw the beautiful cookies as I pulled out each batch.

To be honest, I took a bit of risk in making these cookies as the purist within me kept on saying that the buttery and crumbly cookie would clash with the fruity flavours of the candy, but my taste buds and my everyone that tasted it confirmed that it did not. The flavours melded together well and was a delight to eat up those stars, angels and hearts.

I also had fun in tricking some of my friends when they asked 'Oh my goodness, how did you transparent thing in the middle? It's so pretty!!', and I informed them that it was glass - and some believed! Of course, I assured them that it was just candy, or else no-one would have dared to try them!

And on the last note, I'd like to thank the readers who commented on my last post - it did give me a lot of encouragement to blog regularly (fingers crossed) again - I really appreciate it! Here's a virtual cookie for you, you and you for reading My Buttery Fingers :)

Stained Glass Cookies
Adapted from Simply Recipes

Makes 20-40 cookies, depending on size (I got 44 cookies)

1/2 cup (1 stick. 114g) butter
1/2 cup (100g) sugar
1/4 cup (36g) brown sugar
1 tablespoon maple syrup (Original recipe called for molasses - I don't have or know what it is, would anybody like to enlighten me?)
1/2 teaspoon vanilla extract
1 egg
2 cups (250g) flour
1/4 teaspoon salt
3/4 teaspoon baking powder
30-40 hard candies, preferably in several flavors/colors (I used Fox fruit candies)

1. Pre-heat oven to 375°F (190C). Line two baking sheets with parchment paper or Silpat.
2. In a large bowl, using an electric mixer, cream together butter and sugars until fluffy, about 2 minutes. Add maple syrup and vanilla extract, mixing until incorporated. Add egg and mix until light and smooth, about 1 minute on medium speed.
3. Sift together flour, salt, and baking powder. Fold dry ingredients into wet mixture. Use electric mixer to blend just until flour is incorporated. Divide dough in half and flatten into two disks. Wrap disks in plastic wrap and refrigerate at least an hour and up to 2 days.
4. Remove any wrappers on candies and separate them by color into plastic bags (Place a towel in between to avoid bag tearing). Using a mallet to crush candies (they don't need to be all powdered - slightly larger shards will still melt fine).
5. Place one disk onto a floured surface (Elise suggests rolling in between waxed paper, which is of course less messy -but I stick to rolling on a floured surface to save paper) and roll to 1/4-inch (0.5cm) thickness. Use cookie cutters to cut dough into desired shapes.
6. Transfer cookies to prepared baking sheets, about 1 inch apart. Using a smaller cookie cutter or a knife, cut shapes into centers of cookies, reserving these center bits to add into extra dough. If cookies will be hung as ornaments or decorations, poke a small hole in the top of each cookie before baking
7. Bake for 4 minutes and remove from oven. Use a spoon to sprinkle the crushed candy into the hollowed-out centers of the cookies, using a toothpick to fill up to the edges. Carefully remove candy that has landed onto the cookie to avoid colouring of the dough.
8. Bake for 5-6 minutes more. The candy should be melted and bubbling and the cookies just barely beginning to brown. Remove baking sheets from oven and place on wire racks to cool. Allow cookies to cool on pans at least 10 minutes; otherwise, the candy centers may separate from the dough. When cookies are completely cooled, remove and store in an airtight container. String with ribbon if you want to hang as an ornament.

Friday, December 4, 2009

17

Cookie-topped Cream Puffs (and a little rant)

I feel guilty. I feel ashamed. I feel uncommitted to my blog, because it's been more than a month since I've opened up this post editor and written something. After watching 'Julie & Julia' two weeks ago (yes, it finally is screening in Hong Kong! And Meryl Streep is awesome), it reminded me that I was a food blogger too. Not that I totally forgot the fact that I had a blog, but I felt that I had neglected it. And I felt real bad.

Baking was meant to be a passion. It is still, but sometimes I simply do not have any time or energy left after school work. But trust me, after spending hours and hours working on an Extended Essay in the library, and trooping back home heaving a boulder-weighing school bag, the welcoming hot shower and cozy bed is way more attractive than say, the butter in the fridge. Which is why I've completely abstained from baking, and blogging, for so long.

---

Alright, enough ranting. I feel so much happier after I've vented out my frustration, and I'm sure you all understand! Thank you for the patience in reading the un-baking-related words above :)

Back to this post's main intention, which is to present some delectable cream puffs I made, the moment I threw down my school bag after EE deadline day. My first attempt at choux pastry was nearly half a year ago. The cream puffs from that attempt were good, but real ugly in appearance! Quoting myself from that time - "can't wait to recreate a cream puff that tastes as good as, or better, than the ones from beard papa!", I was indeed determined to get the hang of making a neat cream puff.

And I sort of succeeded! On this second attempt, I chose to make Cookie-topped Cream Puffs, a replication of the same flavour they sell at Beard Papa. It's a classic choux pastry shell, filled with vanilla pastry cream and a cookie topping.


My rendition turned out to be pretty identical to the store bought ones, as all my friends from fellowship (where I bought them to) were squealing "Oh!! They taste just like the ones from Beard Papa!!". Which is when I decided to grab one myself before the were all gone and bit into it. The choux shell's flavour was enhanced with the chocolatey cookies sablee-like crumbs on top and the rich, vanilla bean-speckled pastry cream helped meld the whole thing together perfectly.


So if you, like me, have a special affinity for cream puffs, please do try this twist on it! I'm sure you'll love it these scrumptious little sweets!

Cookie-topped Cream Puffs
Adapted from Chou Cream No Hon by Junko Iida (Original recipe in Chinese)

For the choux pastry
30g cake flour, sifted
30g bread flour, sifted (If you don't have cake and bread flours, I'd suggest just using 60g all-purpose)
40g unsalted butter, cut into cubes
100ml water
5g sugar
1g salt
2 eggs (around 100g)

1. Preheat oven to 200C. Line a baking sheet with baking parchment.
2. Place water, butter, sugar and salt into a small saucepan and heat over medium flame until butter is all melted and water is at a rolling boil.
3. Remove from heat, and add in the flours in one go. Mix together with a heatproof spatula until a dough forms.
4. Back on the heat, stir the dough continously until a thin layer of dough coats the base of the pan.
5. Transfer dough into a large metal bowl. Slowly add in the egg whilst mixing with a spatula until the egg is absorbed and formes a soft dough. An indicator is the formation of a 'triangle' when you lift the dough up using a spatula. Set aside the left over egg if not all of it was added.
6. Using a piping bag with a 1-cm tip (I just snipped off the end of a plastic bag), pipe around 10 mounds of dough, each around 4cm in diameter.
7. Brush over the left over egg, and with a wet finger, lightly press down any peaks on the dough.
8. Bake at 200 C for 30 minutes until golden brown.

For the chocolate cookie topping
20g cake flour
5g cocoa powder
25g unsalted butter, softened
25g sugar

1. In a small bowl, cream together the butter and sugar.
2. Fold on the flour and cocoa powder.
3. Press together the dough, and shape it into a log with 2-cm diameter. Wrap in plastic wrap and chill for at least 30 minutes.
4. Slice into 10 portions (or enough slices for the number of puffs you got using the recipe above). Place them on each mound of dough, and bake as per instructions above.

For the pastry cream
1/2 vanilla pod
250ml milk
40g sugar
3 egg yolks
25g cake flour
20g unsalted butter, cut into chunks

1. Split the vanilla pod lengthwise and scrape out the seeds.
2. Place the vanilla seens and pod into the milk in a small saucepan, along with half the sugar. Heat until the mill is just about to boil.
3. Whisk together the egg yolks and remaining sugar in a large bowl. Sift in the cake flour and whisk until well incorporated.
4. Remove the vanilla pod from the milk. Add the milk into the egg yolks in portions, stirring well after each addition.
5. Strain the mixture back into the saucepan. Cook mixture over low heat, stirring constantly until the mixture thickens into the consistency of thick cream and bubbles start to form.
6. Remove from heat and beat in the butter chunks.
7. Let cool completely before chilling and filling the cream puffs.

Friday, November 6, 2009

5

Alfajores


It seems like my excuses to bake are getting more and more ridiculous. This time, it's something along the lines of "I made two cans of dulce de leche and I can't go on eating it on toast every morning for a month even though it tastes great. Therefore I must bake alfajores." I'm glad that I decided to bake them, but another baking glitched occured!

On a whim, I decided to make dulce de leche again, using the boiling can method. I've tried the oven method, but I think that it's a more waste of energy as the oven has to be on for a long time, whilst the boiling method allows you to make a few cans at once AND I can actually do homework whilst it cooks by itself! Win-win! Yes, some say that boiling the cans are prone to explosion - but fortunately it hasn't happened to me yet, so I'm sticking to the pot method.

But the first time I made dulce de leche, I was so anxious for the result I forgot to let the cans cool before opening them, so the moment my can opener cut through the top, a squirt of hot, sweet, sticky caramelised milk spewed out. Thank God it hit the wall and not my face.


So one day, me being a less-than-attentive student during English class, I got distracted and typed in 'alfajores' into food blog search, spending a a good 15minutes sifting through the pages until I found a recipe that sounded like my imagination of an alfajor - a slightly crunchy shortbread with a tender crumb, melding into the lovely sweet, caramelly filling.


The components of my dream alfajor were made without any problems. The cookies were perfectly fine - buttery, tender and all. The dulce de leche was heavenly - I ate a good portion of a can just by the spoon or on saltine crackers. But my final product was a bit disastrous.


I have no idea why, but after I sandwiched the cookies together, the filling seemed to 'melt' and a few seconds later, the cookies were sliding off each other! I frantically tried adjust them properly, and used much less filling in my remaining ones - but they still slipped off. I have no idea why, maybe my cookies weren't completely cool yet. Or maybe because I store my dulce de leche in fridge, the temperature difference was too big so it softened quickly. Aghh - I was a bit annoyed at that point as my dream alfajores have been ruined, not to mention that there was dulce de leche dripping everywhere :(

But despite their ugly appearance, the alfajores were really delicious! It was everything I imagined it to taste like. To make them more easy to handle and eat (as by now, the filling has leaked to coat the sides sticky), I placed each alfajor into a paper muffin case to give out at school.


Some friends asked what the filling was, and I think I answered a tad too enthusiastically as I started to babble on about how good dulce de leche is, how easy it is to make, and urging everyone to make it. I also had a very intersting conversation in Biology class where I insisted on the correct pronounciation of 'alfajores' (ah-faa-ho-res) and 'dulce de leche' (dul-chay-de-lay-chay), as well as asking my friend who studies Spanish how to say "Ugly But Tasty Alfajores"...if I had remembered what she said, it would have been the title of this post!


Alfajores
Adapted from Desert Candy

Makes around 16 sandwich cookies

115g butter, room temperature
55g sugar
1 egg
1tbsp dark rum
1/2tsp vanilla essence
140g all-purpose flour
65g cornstarch
1tsp baking powder
1/4tsp salt

around 1/2 cup dulce de leche, for filling (see below)

1. In a large bowl, with a mixer on medium speed, beat the butter and sugar until smooth. Add the egg, rum and vanilla and beat until well blended.
2. In a medium bowl, mix the flour, cornstarch, salt and baking powder. Beat into butter mixture until well blended. Press the dough into a disk, wrap in plastic wrap, and chill until firm, about 30 minutes.
3. Preheat oven to 170º C. Unwrap dough. On a lightly floured surface, with a floured rolling pin, roll out dough to about 1/8 inch thick. With a floured, 2- to 3-inch round cutter, cut out cookies. Place about 1 inch apart on greased or lined baking sheets. Gather excess dough into a ball, re-roll, and cut out remaining cookies. Chill cookies in the freezer for around 5 minutes until dough is firm.
4. Bake until cookie edges just begin to brown, about 10-15 minutes. Let the cookies cool on sheets for 5 minutes, then use a spatula to transfer them to racks to cool completely.
5. Turn half the cooled cookies bottom side up and spread each with around a teaspoon dulce de leche. Top with remaining cookies. Cookies are best on the second day, they keep well for 2 weeks in an air-tight container at room temperature.

Dulce de Leche
Place one can of condensed milk (or any number of cans you can fit in your pot) into a large pot and fill with water until the cans are completely submerged. Turn on the stove and let the water boil. After water has boiled, turn down to low heat and let the heat work its magic - remove after 2.5 hours. Make sure the cans are always completely submerged during cooking.

Let the cans cool completely before opening to avoid hot sticky caramel landing on yourself or anywhere else. Then, take a spoon and eat a spoonful of bliss before transferring the rest into a jar to keep in the fridge.

Saturday, October 31, 2009

8

Spider Cupcakes

This may be a bit late for Halloween - it's still the 31st here, so maybe just in time! Halloween's not a huge thing here in Hong Kong - I've never even dressed up before for Halloween! Usually my friends and I would go to the annual Halloween Bash at Ocean Park (a theme park), but this year we're just all too busy, so I baked a batch of Spider Cupcakes to mark the occasion.

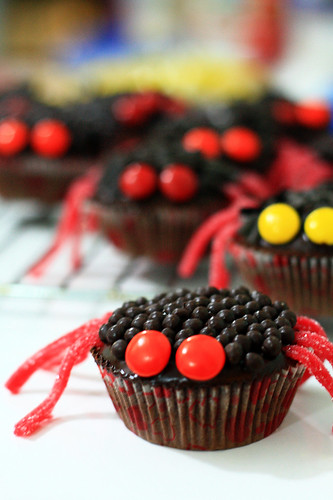
Of course, the last thing I'd like to dress up as, or see during Halloween are spiders. But I wouldn't mind having a spider morphed from a chocolate cupcake, with a generous slather of chocolate frosting, and sprinkled with more chocolate. I think they look cute, no?

The chocolate cupcake recipe I used was from Dorie Greenspan's Baking from My Home to Yours, and the idea for decorations were from Bakerella. I was a bit disappointed with the cupcake because the crumb was very loose and the chocolate flavour was not deep enough. I defiantly going to stick to my favourite chocolate cupcake recipe in the future. The glaze, however, was nice and hassle-free to make. Made up of simply 3 ingredients - melted chocolate, butter and icing sugar - it tasted wonderful and had a lovely sheen to it.
To transform the cupcakes into scary, chilling arthropods, I used chocolate shavings or Varlhona crunchy pearls as the 'exo-skeleton', strawberry licorice for the legs and M&Ms for the eyes. I know that the heart-studded cupcake liners are hardly Halloween-ish, but that's all I had at home!

So after the transformation, I preserved them in a box in the fridge over night, and bought them to school for my friends to catch and devour. (In fact, some of my friends actually ate REAL spiders in Cambodia during Challenge Week! Cool, right?)

And finally as a Biology student, I do actually know that spiders have 8 legs (...but not without asking a friend first!), but I couldn't fit on 4 pairs - so theoretically all my spiders were disabled spiders!

I'm amazed by some of the Halloween creations other food bloggers have created. Here are some of my favourites: Brain Clot Cupcakes from Annie's Eats, Sugar Cookies from Sweetopia and Coffin Cookeis from Bake at 350. I'd love to try out some of those next year!

Here's me being a 'ghost', taken by myself using the self timer on my camera. If you're out for Halloween, it'd be something fun to do! Check out Photojojo for the tutorial. Aaand, Happy Halloween to you all!

(I'm not writing this post at home, so I do not have the cookbook with me - I'll update the recipe later. If you would like to see my favourite chocolate cupcake recipe, see my old post.)

Thursday, October 22, 2009

9

Black and White Chocolate Birthday Cake

What's a birthday without a cake, right? Usually, if time permits, I'd try my best to bake cakes or other treats for my friends when their birthday comes. Hmm, let's count. The last one was a chocolate chiffon cake. Then it was a chocolate cheesecake. Oh, and the chocolate espresso mousse cake. Two of those, in fact. Chocolate cupcakes, chocolate tarts...Can we sense a theme here? :D

But for A., whom this cake was for, of course it had to be chocolate too - only both Black and White chocolate. As this year is the last time I'm going to celebrate my friends' birthdays with them before we go our own ways for uni, I promised myself that I have to bake them each a big, special birthday cake.

But making it special is not as easy as it sounds. This is the first time I've ever made a birthday cake with mulitple layers and fillings and frostings. Heck, I only bought my first offset spatula two days before! Even with my planning beforehand, I still encountered some problems, partly due to my clumsiness but mainly because I've never made such a cake before, I totally did not know what to expect and I panicked alot when...

...I was slicing the cake layers. I held the knife in one hand, and stared at the cake layer that was barely an inch high. How on earth do I slice that in half without accidentally slashing in the wrong direction? I took a deep breath, and gently sawed through the cake later. Phew. Although the layers were not particularly even, at least they held up! As the cake layers are quite soft and fluffy, I quickly stuffed them into the freezer to make sure they didn't snap in half of something. So the first scare was over.

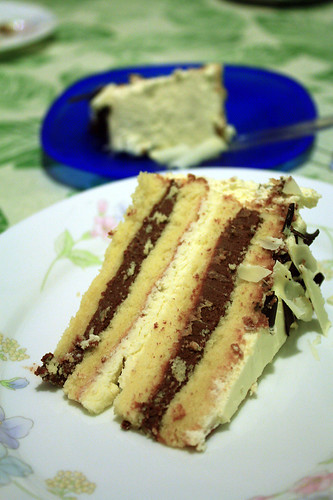
...I frosted the layers. I'm not sure why, but I had a huge problem with the white chocolate whipped cream. See that ugly white layer in the photo above? Yeah, that. It was perfectly fine after I initially whipped it up - it was smooth and just firm enough to spread, but as per the recipe's instructions, I chilled it for around 2 hours. And after that, I took it out. I prodded it through the plastic wrap. The surface was firm. Not good.

It turned out that somehow, the cream had curdled in fridge, and I didn't have a backup plan. So I went ahead and used it for the middle layer, but it just looked too way bad and unappealing to be the frosting. So I sprinted down to the supermarket, grabbed another carton of whipped cream, ran back and whipped up some lightly sweetened cream and used it to frost the cake instead. It took me ages to get the frosting right, as I've never frosted a big cake before and it was hard to get the crumb coat right, to get the top and sides smooth.

But finally, the cake was done. The top was simply decorated with homemade white chocolate curls and some store bought dark chocolate shavings. I quickly photographed it, and went to sleep - tired, yet happy that I found an alternative to the white chocolate cream disaster. But I was anxious too, as I was very very scared that the white chocolate cream I used for the filling would separate over the night, and mess up the whole cake.

But the next night, after our long day of Challenge Week golfing, 9 holes, a barebeque... it was cake time! We took the photos, sang the song, the birthday girl made her wishes...and finally it was time for me to slice and serve the cake. I took a deep breath in my brain, and cut the cake into slices. All was well. I simply cannot describe how relieved I was to see that the slices came out nicely and the white chocolate cream filling was perfectly fine! And it was actually somewhat symmetrical with the layers looking fairly intact!

So everyone had their slice, and everyone said it was goooood. I felt satisfied and bubbly and excited and happy to see that everyone enjoying it, and that my first layered cake was successful, that everything turned out fine eventually albeit the glitches in the process. So I rightfully dug into my slice to taste the fruit of my labour.

Well, since the cake was made with a fluffy buttermilk white cake, a rich dark chocolate pastry cream, real white chocolate cream and well, more sweetened whipped cream (and of course the love and effort I put in too), it was just simply decadent. The smooth creams complemented the cake well, and the sweetness was just right so the flavours of both chocolates came through. In fact, I was glad that I used whipped cream for the frosting, as it helped round all the layers together nicely and so the cake is not too heavy and cloying.

If you're a chocoholic for both chocolates that's looking for a cake to bake, why not this? The recipe is from Dorie Greenspan's Baking from My Home to Yours. The recipe can be found on this site. (Sorry, I'm too tired to type it all up :P In fact, A. was the person who helped me order this book from Amazon, so what's better to bake a cake from that book for her?)

Happy Birthday for the nth time A.! I'm really really glad you liked the cake!

Although layered cakes are probably a no-brainer for practically everyone but me, to myself, it seems like I've reached a mini baking milestone. And honestly? I can't wait to bake the next big-special-birthday cake!

P.S. Actually I had my 17th birthday a few weeks ago too, in case anyone wondered why the 'About Me' section has changed :)

Wednesday, October 14, 2009

1

My Favourite YouTube Channel - Cooking with Dog

Apart from baking, I enjoy cooking very much too. One thing I like the most that you do in cooking but not baking is chopping. I feel empowered with a nice, sharp kitchen knife - for example, there's a sense of satisfaction I get when I manage to chop up an onion into a neat mince, despite having tears rolling down my face! Another important thing is that I get to learn a lot from my mum when we're working together in the kitchen. The tips and tricks that are passed down the family from daughter to daughter is always valuable, as you probably won't be able to find them anywhere else.

Occasionally I'd be in charge of making dinner, using the opportunity to try dishes that made my mouth water the instant I saw them on the Internet, or say, practice cooking more so I don't have to survive on just instant noodles when I get to uni! This is what I made for dinner last night:


So, back to my favourite YouTube channel. I stumbled across it a few months ago, and after watching my first video - I was hooked. Literally. I have been known to procrastinate by watching video after video on Cooking with Dog. In short, the videos teach you how to make everyday Japanese dishes, demonstrated by a lovely Japanese woman, and hosted by a dog called Francis.In this post I'd like to introduce you to this wonderful channel and show you some of the dishes I've made:

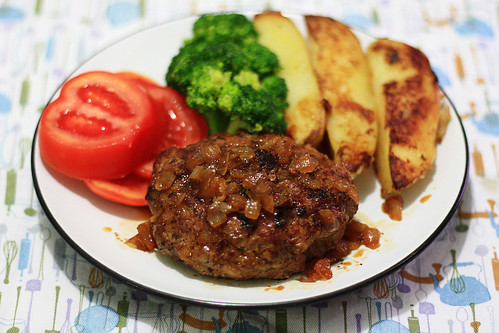
Hamburg Steak, also known as Hanbagu - my latest dish. It's a Japanese recreation of the American Hamburger, but it's a little thicker and very juicy, and is served as a main dish.


I think my go at it was pretty good - the patty was indeed very juicy and the onion gravy was absolutely delicious - it smelled great with the addition of butter, but wasn't very oily or heavy. The potato wedges were also pan fried, but the potato was parboiled, cooled slightly then cut. I was surprised that even by cooking them in a pan, the exterior was still very crispy and it's much quicker than roasting them in an oven. However, a glitch did occur - I severely over salted the broccoli, so it was inedible. Oops!

Yaki Gyoza (Pan fried dumplings). My sister and mum helped out a bit with this as we wrapped them together one afternoon. Frying them in sesame oil gives a lovely, enticing fragrance to the gyozas and by using the method, the skin crisped up very nicely. Hard to resist eating a whole plateful! I like to dip them in some soya sauce mixed with Chinese black vinegar and a dash of sesame oil.


Omurice, which was my first attempt at making something from CWD. Okay, the ketchup blob was a fail, because I was pouring from the bottle, not from a squeeze bottle. But apart from that, I remember that the tomato fried rice was delicious even on its own. I was so glad that the omurice came together well - i.e. I didn't tear the egg or overly brown the surface. The lady makes it seem so easy on the video, but in fact, it's actually really hard to control the size of the egg sheet, how much rice to put in, and keeping it intact when flipping it over is actually very hard!


Technically, a dessert: Shiratama (chewy glutinous rice balls). There isn't an actual video on it, but one day I had a huge urge to try make shiratama, and I followed the instructions on their video on Tofu Dango. I simply mixed roughly equal amounts of Japanese glutinous flour (shiratamako) and water, shaped them into balls and boiled them until they floated and were cooked.

These little balls are chewy, the perfect accompaniment with ice cream as it provides a great textural contrast. Here, I ate them with Goma (black sesame) ice cream that was scooped with a mini ice cream scoop so they are around the same size as the shiratama, and with a sprinkling of ground black sesame seeds. An alternative to the normal wafers or cookies, adding a nice twist to your otherwise plain bowl of ice cream!

So, I hope that you will watch some of the videos from that channel too and try your hand it some of the dishes!

Do tell me if you have any other favourite cooking channels that you would recommend! I'm never tired of watching videos on cooking or baking :)

Sunday, October 11, 2009

7

Sun Dried Tomatoes - Pastas and Flatbread

I love tomatoes. Whether it be just eating them in raw slices, or cooked with eggs (Stir fried tomato eggs, a Chinese dish), or in tomato soup, or in the sauce in a pasta dinner...but one thing I have been longing to try is sun dried tomatoes. I've come across this ingredient many times before both in cooking and baking recipes, but I only bought my first jar of sun dried tomatoes in oil and the dried ones a month or so ago, after years of wanting to try one (although it may be a basic staple in western households, they were actually really hard to get hold of in Hong Kong!)

When I got home with my beloved jar, I immediately popped open the lid, snipped half a tomato, and ate it. Mmmm. The flavour is hard to describe - sweet, yet a little sour, with a deep flavour that I was hooked with at the first instant. With the ones in oil, I made the Sun Dried Tomato Pasta Salad from Pioneer Woman and a Pesto Pasta from Use Real Butter. Both were delicious as they contained my newest favourite condiment and well, Parmesan cheese.

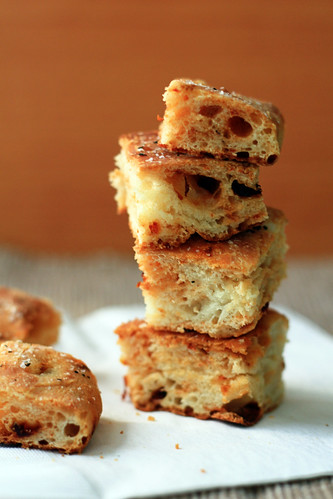
As for the baking side, I bought another variety of the sun dried tomatoes - the dehydrated packaged ones and used them for a Sun Dried Tomato Flatbread. Thinking about it, the last time I made bread was way back in...April! I was sure excited about making this, and I thought the dough wouldn't be hard to handle, but unfortunately, the dough was super sticky and I had to add around a whole extra cup of flour to get the dough firm enough for me to even knead it.

So, when the kneading was done (which took a while, but I'm not complaining - the action of kneading is just so relaxing and allows me to punch, whack and tear it as much as I want) I let it rise (which took a while too, because I forgot to preheat the oven to create the 'warm environment' for the yeast to do its thing) and finally, it was done and the whole flat smelled heavenly! I pulled it out of the oven just to find that the sun dried tomato pieces I placed on top were burnt. But fortunately, it didn't stick down, so I picked them off, resulting in the ugly surface. I immediately cut off a bit to try, and it was so good.

So taste wise, it didn't disappoint! The mildly sweet tomato pieces in the bread was a great contrast to the crunchy sea salt on the surface, and the dried basil really rounds the whole thing off with a lovely, mellow, Italian flavour. And the texture is something between a thick crust pizza and bread, but slightly crunchy crust is definitely the best bit!

I still have a few dried tomatoes left, so I think I'm going to make more bread with them too - maybe some tomato buns. Since I'm on Challenge Week and half term holiday (which means no school for two weeks, but nonetheless, a heap of work to be done), hopefully I can set aside more time to bake and update this space more!

Sun Dried Tomato Flatbread
Adapted from Donna Hay Magazine, via Evan's Kitchen Ramblings

2 tsps active dry yeast
1 tsp caster sugar
1 1/3 cup lukewarm milk
2 1/2 cups plain flour (I had to add almost an extra cup of flour)
1 tsp table salt
1 tbsp olive oil + extra for brushing (I used the oil from the jar of oil soaked sundried tomatoes)
1/2 cup/1 oz sundried tomatoes, rehydrated and snipped into small pieces
sea salt, for topping
dried basil, for topping

1. Place the yeast, sugar and milk in a bowl and mix to combine. Set aside in a warm place for 5 mins or until bubbles appear on the surface.
2. Place the flour, salt, tomato pieces, oil and yeast mixture in a bowl and mix until a smooth dough forms. Knead on a lightly floured surface or a standmixer fitted with a dough hook for 5 mins or until smooth & elastic. (I kneaded by hand, took around 20 minutes and adding extra flour to get it to the right consistency)
3. Place dough in an well-oiled bowl and cover with a tea towel and set aside in a warm place for 30 mins or until doubled in size. Punch dough down to release air. Press dough in baking tray, brush with olive oil, sprinkle with sea salt and dried basil. Bake in a preheated oven of 180C for 15 mins or until golden.

Blog Widget by LinkWithin