Showing posts with label cake. Show all posts

Saturday, July 23, 2011

3

Singapore

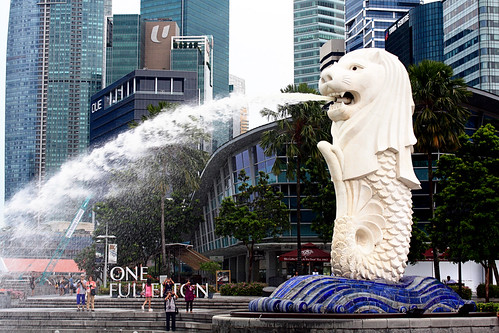
Merlion Park
Hi everyone! I just came back from a trip to Singapore! Since I haven't been baking much lately, I've decided to share some of the delicious food I had there!

Singapore is a multi-cultural city and its cuisine has Chinese, Malay, Indian, Nyonya and Western influences so I was able to eat lots of different things hehe. So we shall let the photos speak for themselves:

Hainanese Chicken Rice: I've had chicken rice three times in Singapore, and in my opinion "Five Star Hainanese Chicken Rice" had the best. Juicy and flavourful chicken + perfectly done rice - good enough to eat by itself or coupled with the chili, ginger or soya sauce.  
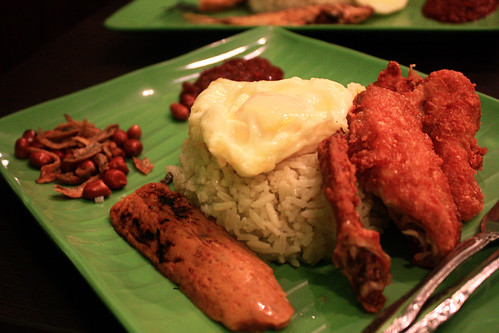
Nasi Lemak: Coconut rice accompanied by ikan bilis (fried anchovies), peanuts, fish cake, fried chicken wings and an egg. And of course a  generous dollop of sambal chilli sauce. The rice is very fragrant, but not too heavy to eat despite the addition of coconut milk to cook the rice.
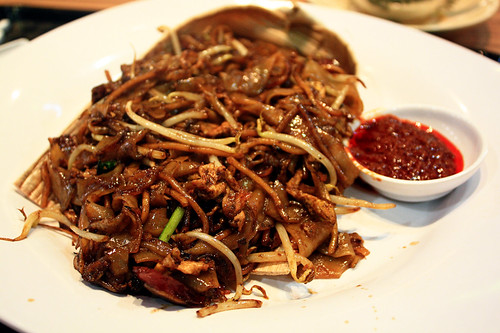
Char Kway Teow: Stir-fried noodles with black sauce, bean sprouts, chives and preserved sausages. It's done over a strong fire so some bits were charred, but in a good way that it makes the noodles more tasty. 
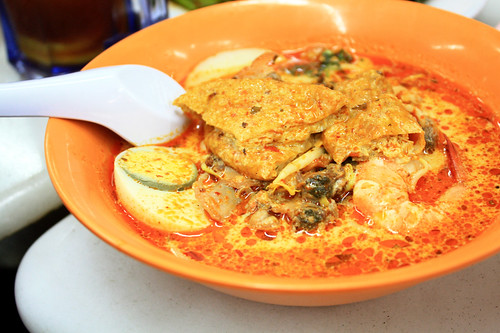
Laksa: noodles, fishcake, prawns, egg, bean curd and sprouts cooked in a spicy coconut milk soup. Slurp slurp. 
And of course, the baker in me had to go try out some famous dessert places in Singapore too :D

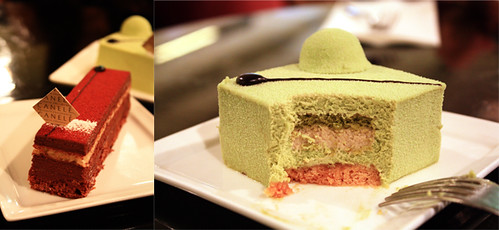
Canele Patisserie Chocolaterie: I sampled two cakes - Le Royale (chocolate hazelnut mousse cake) and the Macha (green tea mousse + matcha biscuit + chestnut cremeux + almond crumble) - they are both heavenly! I wish I could go back and sample all their cakes!
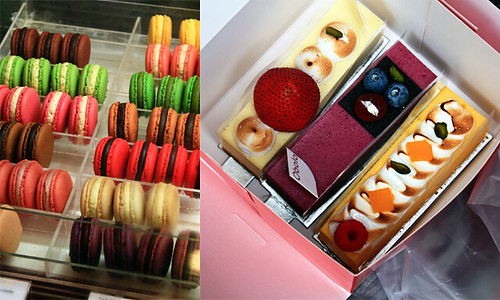
Obolo Patisserie: Their macarons are simply awesome, mostly because of the huge amount of filling in them :)  The cakes here are New York Cheesecake, Le Cassis and Mango Passionfruit Cheesecake. I love how they are all intricately decorated! The cakes did not disappoint either - smooth cheesecakes but not too heavy. 
Flor Patisserie: A shop opened by the Japanese Chef Yamashita. We had the Strawberry Souffle Cheesecake  and the Berry Berries. Both were light and refreshing! 

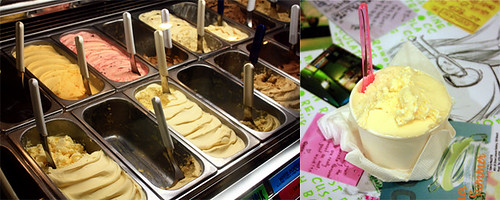
Tom's Palette Ice Cream Parlour: they serve freshly made home-made ice cream, in a myriad of flavours -  salted egg yolk, chamomile, durian, melt and sizzle candy, rosemary and apple....I had the salted yuzu and salted caramel cheesecake flavours - I was in ice cream heaven, nuff said.

I also got the chance to have a chat with the owner, and he really does have a passion for experimenting flavours with ice cream - very inspiring. I say the hour or so spent in that shop was definitely one of the highlights of my trip!

So that's about it with regards to food I had in Singapore! Check out my Flickr Photostream for other pictures I took!

Tuesday, June 14, 2011

4

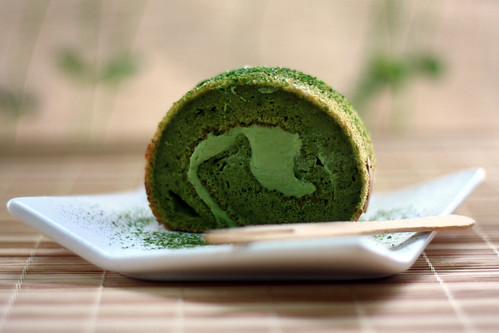
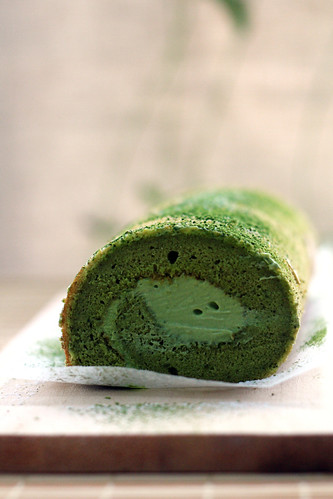
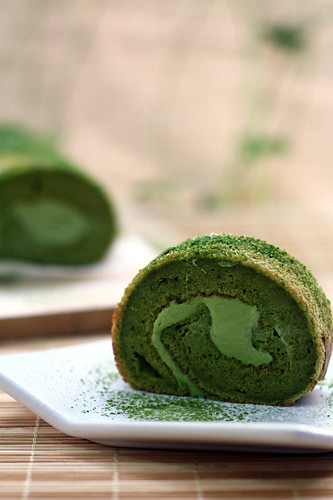
Matcha Souffle Roll Cake


Alrighty, here comes the first food post of 2011! Even if it's already June!

Since I got back to Hong Kong, I've been more keen on making desserts that involve more Asian flavours. I've baked this matcha roll cake and two batches of matcha mochi cakes already! Maybe it's because I've had way too many chocolate and maple glazed doughnuts from Tim Hortons throughout the year that I kind of want to switch to other flavours!


This is my first time making a roll cake because I always found it to be scary, trying to roll up such a fragile cake - I mean, I'm bound to accidentally squish it somewhere or make all the filling leak out!

Flipping through my beloved collection of cookbooks that I couldn't bring to Canada, this was the first recipe that caught my eye. It's another one from a Japanese cookbook that is translated into Chinese. I really like these cookbooks because they often contain recipes that are hard to find online, and usually the flavours are very suitable to the Asian palate as they never too sweet and heavy.


The roll cake turned out to be a success! The cake was really soft and cottony, and since it only uses vegetable oil it was very light but at the same time, it was also quite moist. The filling is a simple sweetened whipped cream spiked with matcha - can't go wrong with that, as it reminds you of matcha ice cream! It complemented the cake very well - a little bite of heaven in your mouth.

Matcha is really one of my favourite flavours in summer because it is just so refreshing, and the vibrant green colour really cheers you up. One tiny complaint is that I couldn't find Japanese canned ed beans (anko) at the grocery stores near me, because a thin layer of red bean filling on the cake, topped with the cream would be perfect!

Oh well, I guess that's another excuse to make this again when I can get my hands on the red beans!

NEW! My Buttery Fingers is now on Facebook!
If you liked this post, go and give it a 'Like' - thank you for your support :)


Matcha Souffle Roll Cake
adapted from 'wa sweet recipe' by Fukuda Junko 

Makes 1 cake roll baked in a 29cm x 29 cm pan

Cake
4 eggs, separated
70g sugar
30ml vegetable oil
60ml water
80g flour
10g matcha powder

Cream Filling
1tbsp matcha powder
2tbsp sugar
1tbsp hot water
150ml whipping cream

Optional: 100g red bean paste (in original recipe, I forgot to buy it), matcha powder and icing sugar for decoration

1. Preheat oven to 190C, sift together matcha powder and flour, line baking pan with parchment paper.
2. Prepare the cake: Whisk the egg yolks and 30g of the sugar together, add in the oil, combine, then water and finally the flour/matcha mixture. Lightly whisk until well combined.
3. Whip the egg whites with half the remaining sugar until frothy, add the remaining sugar and whip until soft peaks form.
4. Using a whisk, mix in 1/3 of the beaten egg whites with the flour mixture. Mix in the remaining egg whites with a light hand to prevent losing air bubbles. Switch to a spatula and fold the mixture until no streaks of white remain.
5. Spread the cake mixture onto the pan and even off the top. Bake at 190C for 12-15 minutes
6. Let the cake layer cool down slightly and cover with cling film or a moist tea towel, let rest until completely cool.
7. Prepare the cream filling: combine the matcha powder, sugar and hot water to form a smooth paste. Let cool.
8. Whip the whipping cream with the matcha paste mixture until it reaches a spreadable consistency.
9. Gently peel off the parchment paper from the cake and lay it on a sheet of cling film slightly larger than the cake itself. If using red bean paste, spread it over evenly onto the cake. Spread the cream filling evenly on, you might not need all of it (eat it - yum yum), leaving a slight border on one edge. Roll the cake up tightly, wrap the cling film around it and chill in the freezer for at least an hour.
10. Sift on icing sugar and matcha powder for decoration if desired.

Friday, April 2, 2010

4

Chocolate Raspberry Cake


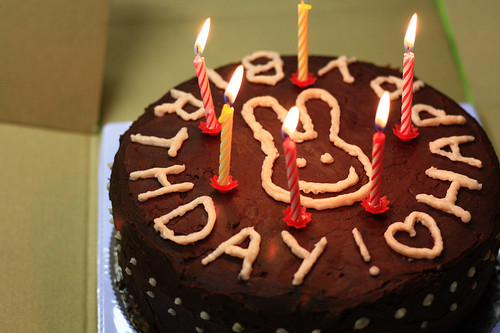
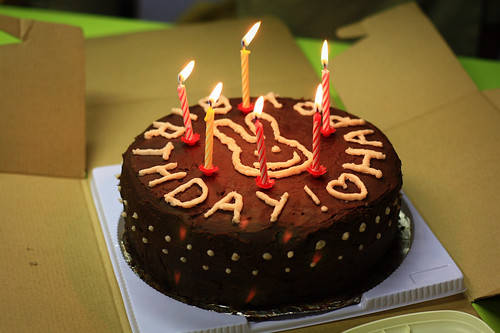
Once upon a time, Wendy had a friend, M. that loves bunnies. She had her 18th birthday a few weeks ago in March. Although officially an adult, she still adores bunnies, but Wendy reckons that she loves chocolate more. So Wendy baked her a chocolate birthday cake...with a silly looking bunny piped on top. M. was happy with her belly full of chocolate cake and a devoured bunny. The End.

Sorry for the lame paragraph above. I am now neck deep into revision for final exams (well at least I should be - only 1 month left!), and my head is full of things to do with chemical reactions, biological processes and mathematical equations and surprisingly, not of cakes, cookies and desserts. Not even chocolate, let alone words and inspiration for blogging. As I tweeted a while ago, this "update-once-a-month" habit is not exactly healthy...I promise to make up for it during summer!

But I did bake a chocolate cake with raspberry filling for M.'s 18th, and it was delicious. The chocolate cake layers were not too heavy yet was full of chocolate flavour, and the tangy raspberry filling paired it really well by balancing the sweetness. The smooth and rich dark chocolate ganache frosting rounded each decadent slice of cake off perfectly.
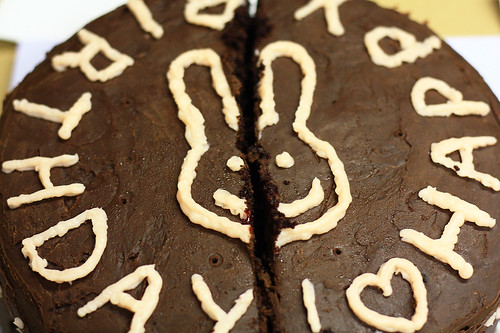

The decoration is a little childish and haphazard...if I had the time I'd probably spend time experimenting with fondant and colours and mould a 3D fondant bunny on a bed of green grass and purple flowers, but the reality is that I had no time and resorted to piping things with a pink-tinted buttercream. Hey, at least the bunny did look like a bunny! :p

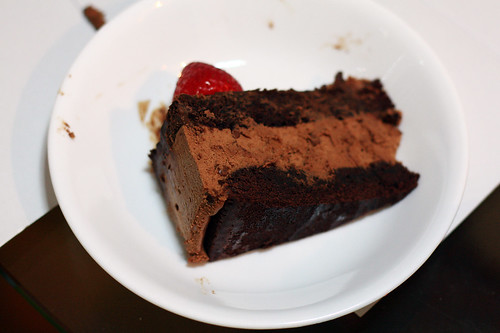
My only complaint that the cake layers are very fragile - I mean very fragile...when handling the layers I broke off quite a huge chunk of one layer and had to cement it on the cake using the ganache. Also, when the cake is sliced, there were a lot of loose crumbs (see above photo), so it seemed like we were eating chocolate soil - but scrumptions chocolate soil!


Nevertheless, I love this raspberry-chocolate combination - I can already foresee raspberry ice cream with chocolate chunks, raspberry-chocolate mousse, or raspberry cream cheese muffins with chocolate chunks....mmmmm!


P.S. - Referring my last post, the Matcha Mochi Cakes - as I said I would bake different flavours after my French Orals, and I did! (But totally forgot about posting the variations on) The chocolate and black sesame variations are now on, so if you enjoyed those mochi cakes as much as I did - have an encore with different flavours :)


Chocolate Raspberry Layer Cake

Adapted from Smitten Kitchen

Printable Version

For me, this made a 9-inch three layer cake

For cake layers

3oz (85g) fine-quality semisweet chocolate such as Callebaut ( I used Varlhona)
1 1/2cups (355ml) hot brewed coffee
2cups (400g) sugar
2 1/2 (313g) cups all-purpose flour
1 1/2 cups (130g) unsweetened cocoa powder (not Dutch process)
2 teaspoons baking soda
3/4 teaspoon baking powder
1 1/4 teaspoons salt
3 large eggs
3/4 cup (177ml) vegetable oil
1 1/2 cups (355ml) well-shaken buttermilk
3/4 teaspoon vanilla

For ganache frosting
1/2 pound (227g) fine-quality semisweet chocolate such as Callebaut
1/2 cup (119g) heavy cream
1 tablespoons sugar
1 tablespoons light corn syrup (I replaced with golden syrup)
1/4 stick (28g() unsalted butter

For raspberry filling
(I'd probably halve this next time; I had alot left over)
2 10-ounce bag (567g)frozen raspberries, thawed (I used the same amount of raspberry puree as fresh or even frozen raspberries are very expensive here)
1/2 cup (100g) sugar
2 tablespoons cornstarch

Special equipment: two 10- by 2-inch round cake pans (I baked three 9-inch layers)

Make cake layers: Preheat oven to 300°F/150°C. and grease pans. Line bottoms with rounds of wax paper and grease paper.

Finely chop chocolate and in a bowl combine with hot coffee. Let mixture stand, stirring occasionally, until chocolate is melted and mixture is smooth.

Into a large bowl sift together sugar, flour, cocoa powder, baking soda, baking powder, and salt. In another large bowl with an electric mixer beat eggs until thickened slightly and lemon colored (about 3 minutes with a standing mixer or 5 minutes with a hand-held mixer). Slowly add oil, buttermilk, vanilla, and melted chocolate mixture to eggs, beating until combined well. Add sugar mixture and beat on medium speed until just combined well.

Divide batter between pans and bake in middle of oven until a tester inserted in center comes out clean, 1 hour to 1 hour and 10 minutes.

Cool layers completely in pans on racks. Run a thin knife around edges of pans and invert layers onto racks. Carefully remove wax paper and cool layers completely. Cake layers may be made 1 day ahead and kept, wrapped well in plastic wrap, at room temperature.

Make frosting: Finely chop chocolate. In a 1 1/2- to 2-quart saucepan bring cream, sugar, and corn syrup to a boil over moderately low heat, whisking until sugar is dissolved. Remove pan from heat and add chocolate, whisking until chocolate is melted. Cut butter into pieces and add to frosting, whisking until smooth.

Transfer frosting to a bowl and cool, stirring occasionally, until spreadable (depending on chocolate used, it may be necessary to chill frosting to spreadable consistency). (Deb says that stirring this over a bowl of ice water does a great job of cooling it off quickly and evenly.)

Make Filling: Puree the raspberries in a food processer, blender or immersion blender. Press the puree through a fine-mesh strainer with the back of a spoon, removing the seeds. Heat the puree in a small pot with the sugar and cornstarch until mixture boils, stirring constantly. As it boils, it should quickly thicken. Let it cool completely.

Assemble: Place one cake layer on serving plate/board. Spread some of the raspberry filling (around 1/2 cup) on one layer. Gently top with another layer, and spread with more filling. (I had alot of filling left over; it can be served with cheesecake or over icecream). Spread the chocolate ganache frosting on top of the cake and sides.

The cake keeps, covered and chilled, for 3 days. Bring cake to room temperature before serving.

Thursday, October 22, 2009

9

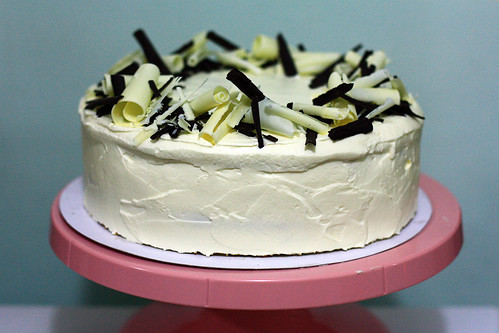
Black and White Chocolate Birthday Cake

What's a birthday without a cake, right? Usually, if time permits, I'd try my best to bake cakes or other treats for my friends when their birthday comes. Hmm, let's count. The last one was a chocolate chiffon cake. Then it was a chocolate cheesecake. Oh, and the chocolate espresso mousse cake. Two of those, in fact. Chocolate cupcakes, chocolate tarts...Can we sense a theme here? :D

But for A., whom this cake was for, of course it had to be chocolate too - only both Black and White chocolate. As this year is the last time I'm going to celebrate my friends' birthdays with them before we go our own ways for uni, I promised myself that I have to bake them each a big, special birthday cake.

But making it special is not as easy as it sounds. This is the first time I've ever made a birthday cake with mulitple layers and fillings and frostings. Heck, I only bought my first offset spatula two days before! Even with my planning beforehand, I still encountered some problems, partly due to my clumsiness but mainly because I've never made such a cake before, I totally did not know what to expect and I panicked alot when...

...I was slicing the cake layers. I held the knife in one hand, and stared at the cake layer that was barely an inch high. How on earth do I slice that in half without accidentally slashing in the wrong direction? I took a deep breath, and gently sawed through the cake later. Phew. Although the layers were not particularly even, at least they held up! As the cake layers are quite soft and fluffy, I quickly stuffed them into the freezer to make sure they didn't snap in half of something. So the first scare was over.

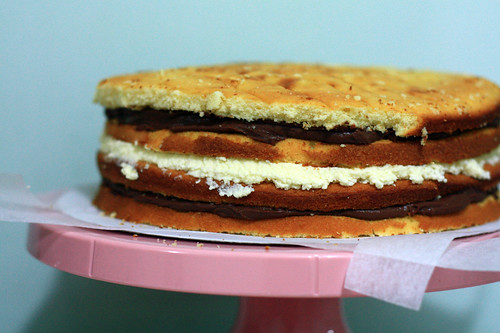
...I frosted the layers. I'm not sure why, but I had a huge problem with the white chocolate whipped cream. See that ugly white layer in the photo above? Yeah, that. It was perfectly fine after I initially whipped it up - it was smooth and just firm enough to spread, but as per the recipe's instructions, I chilled it for around 2 hours. And after that, I took it out. I prodded it through the plastic wrap. The surface was firm. Not good.

It turned out that somehow, the cream had curdled in fridge, and I didn't have a backup plan. So I went ahead and used it for the middle layer, but it just looked too way bad and unappealing to be the frosting. So I sprinted down to the supermarket, grabbed another carton of whipped cream, ran back and whipped up some lightly sweetened cream and used it to frost the cake instead. It took me ages to get the frosting right, as I've never frosted a big cake before and it was hard to get the crumb coat right, to get the top and sides smooth.

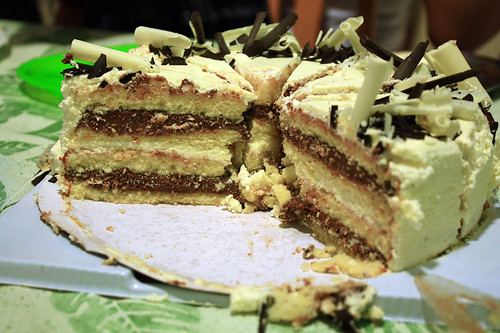
But finally, the cake was done. The top was simply decorated with homemade white chocolate curls and some store bought dark chocolate shavings. I quickly photographed it, and went to sleep - tired, yet happy that I found an alternative to the white chocolate cream disaster. But I was anxious too, as I was very very scared that the white chocolate cream I used for the filling would separate over the night, and mess up the whole cake.

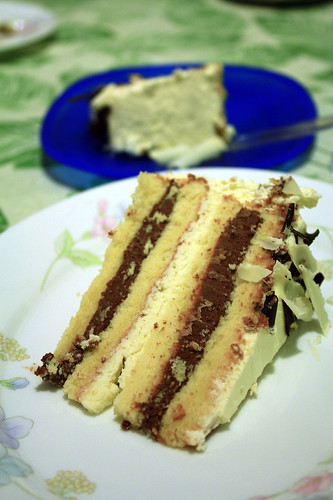
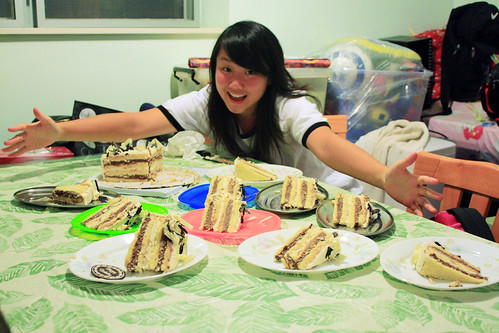
But the next night, after our long day of Challenge Week golfing, 9 holes, a barebeque... it was cake time! We took the photos, sang the song, the birthday girl made her wishes...and finally it was time for me to slice and serve the cake. I took a deep breath in my brain, and cut the cake into slices. All was well. I simply cannot describe how relieved I was to see that the slices came out nicely and the white chocolate cream filling was perfectly fine! And it was actually somewhat symmetrical with the layers looking fairly intact!

So everyone had their slice, and everyone said it was goooood. I felt satisfied and bubbly and excited and happy to see that everyone enjoying it, and that my first layered cake was successful, that everything turned out fine eventually albeit the glitches in the process. So I rightfully dug into my slice to taste the fruit of my labour.

Well, since the cake was made with a fluffy buttermilk white cake, a rich dark chocolate pastry cream, real white chocolate cream and well, more sweetened whipped cream (and of course the love and effort I put in too), it was just simply decadent. The smooth creams complemented the cake well, and the sweetness was just right so the flavours of both chocolates came through. In fact, I was glad that I used whipped cream for the frosting, as it helped round all the layers together nicely and so the cake is not too heavy and cloying.

If you're a chocoholic for both chocolates that's looking for a cake to bake, why not this? The recipe is from Dorie Greenspan's Baking from My Home to Yours. The recipe can be found on this site. (Sorry, I'm too tired to type it all up :P In fact, A. was the person who helped me order this book from Amazon, so what's better to bake a cake from that book for her?)

Happy Birthday for the nth time A.! I'm really really glad you liked the cake!

Although layered cakes are probably a no-brainer for practically everyone but me, to myself, it seems like I've reached a mini baking milestone. And honestly? I can't wait to bake the next big-special-birthday cake!

P.S. Actually I had my 17th birthday a few weeks ago too, in case anyone wondered why the 'About Me' section has changed :)

Monday, August 10, 2009

14

Chocolate Espresso Mousse Cake

This cake was made for a dear friend, that I've known since I was 10. I got to know her in Scouts. We see each other once a week, hangout on Saturday afternoons before our weekly Scout meeting, experienced hikes and camps together and it's been the same for 7 years! And, a few weeks ago it was her 18th birthday.


We just hanged out at her house with our normal group of friends, played some crazy twister and the UNO stacking tower, where the losers had to pick out a punishment from a bag. One of them involved kissing a plant, and I won't mention the crazier and disgusting ones here! We cut the cake at midnight, left a few slices for her parents and polished off the remaining next morning.


The recipe is from Tartlette, but I made a few modifications and additions to it. This chocolate cake is really a keeper, because it's moist and chocolaty, but also with a lovely soft texture that's not too dense. It would work really well with many other cakes. Maybe it's just the clumsy me, but I think its a bit fragile because I always tend to break it a bit when handling it! I brushed on some simple syrup spiked with rum to keep it moist because I made the cake layers one day in advance before assembling it.

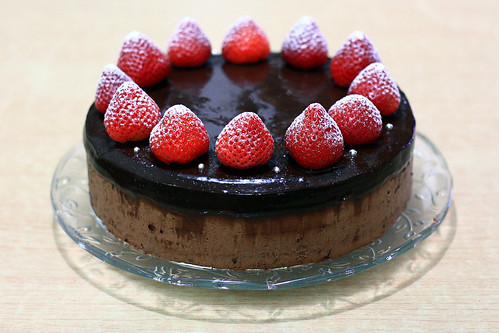
The mousse is really nice too, albeit a bit rich for our palates. I think I'd cut down on the butter next time. However, it is again simple to make - no need to whip any egg whites and such. It also had a great silky and airy texture that accompanied the cake well. Because I was really scared that the mousse would melt or something in the sweltering heat whilst I was transporting it, I added some gelatine to set it a bit. I added some Varlhona crunchy perles for a bit of contrast, and a simple chocolate ganache glaze to top everything off.


And sorry for the lack of posts recently - in less than two weeks time I'm back at school, and I've got way too much stuff I haven't done. In fact, I'm writing this at the Central Libary right now, where I'm supposed to be working hard on my EE. (Hi Peter!)

Anyhow, I have been baking and making things - so I will eventually get around to posting those, so more will be coming soon!

Chocolate Espresso Mousse Cake
adapted from Tartlette

Serves 12

Cake:
1 stick (113gr) butter
1 cup (200gr) sugar
1/2 cup (45gr) natural cocoa powder
2 eggs
1 1/2 cups (185gr) all purpose flour
1 teaspoon (5gr) baking powder
1 teaspoon (5gr) espresso powder
1/2 teaspoon (2.5gr) baking soda
1 cup (250ml) warm water

Preheat oven to 325F. Butter two 8-inch round baking pans, sprinkle some flour into the pans, shake it around and tap the excess off. Line the bottoms with two 8 inch circles of parchment paper. Set aside.
In a mixer fitted with the paddle attachment, mix together the butter and sugar until light and creamy. On low speed, add the cocoa and mix until incorporated. Add the eggs, one at a time, beating well after each addition. Scrape the bowl with a spatula to make sure they are properly mixed in. Add the flour, baking powder, espresso powder and baking soda and mix on medium-low speed while slowly adding the warm water and mix until smooth. Divide the batter between the prepared pans and bake for 30 to 40 minutes or until a toothpick inserted in the middle comes out clean. Let cool to room temperature and unmold the cakes.

Soaking syrup:
15g sugar
15g water
1 tsp rum

Heat the sugar and water in a small saucepan over low heat until the sugar has dissolved. Let cool, stir in the rum and set aside.

Mousse:
6 oz semisweet chocolate, chopped
1/4 cup (62.5ml) whole milk
1 teaspoon espresso powder
1/2 stick (55gr) butter
1 egg yolk
1 cup (250ml) heavy cream, cold
1 tbsp kahlua
8g gelatine powder
15g water
30g Varlhona crunchy perles (optional)

In a bowl set over a pan of simmering water (make sure that the bowl fits snuggly over the pan and does not touch the water), melt together the chocolate, milk, espresso powder and butter. Remove from the heat and let cool to lukewarm. Meanwhile, sprinkle the gelatine over the water in a small bowl and let it bloom. Heat the bowl in a microwave for 10 seconds to liquefy the gelatine, stir until gelatine is dissolved. Whisk in the egg yolk, kahlua and cool gelatine mixture. In a mixer, whip the cream to medium peaks and fold it into the chocolate mixture. Lightly fold in the crunchy perles.
Ganache glaze:
70g semisweet chocolate, chopped
100g heavy cream
5g butter

Place the chopped chocolate in a bowl. Scald the cream and immediately pour it over the chocolate. Let it sit alone for 30 seconds, then stir until the mixture is smooth. Stir in the butter.

Assembly:
Prepare an 8-inch mousse ring (I don't have a mousse ring so I used a pan with a removable bottom). Place a cake layer on the bottom and soak the surface with the soaking syrup. Pour in the mousse and let it set for 10 minutes or so in the refridgerator. Soak both sides of the second layer with syrup and place it on the mousse. Pour over the ganache glaze and let the whole cake set, for at least 2-3 hours. Decorate as desired.

- I've actually made this cake before way way back in March for another friend. Last time, I added a crispy chocolate feuilltine layer to the mousse to add some extra texture, so you might want to add that if you make this cake.

Wednesday, June 17, 2009

11

It's Tea Time!

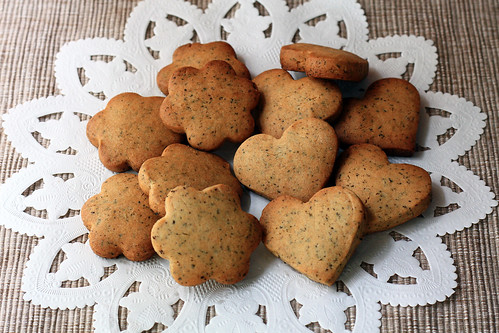
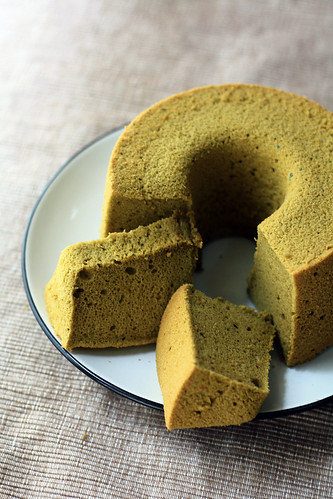
I love tea. I'd prefer it any time over soft drinks or juice. I love drinking many types of tea, from the slightly bitter Chinese Pu-erh tea after dinner, Japanese green tea (Matcha) whilst eating sushi, or a rich, creamy mug of Hong Kong milk tea. The post title refers to my two most recent bakes - Earl Grey Tea cookies and Matcha Chiffon Cake.


These cute little cookies are of the shortbread variety, but the method of making this is different to the pinwheel ones I made previously. I really love these cookies because when you take a first bite, it might seem that the tea flavour is not strong enough, but after a second, third bite, it tastes just like drinking a cup of milky Earl Grey Tea. They do not have a strong orange-y flavour either. You really can't resist munching on one...then another one...until the whole plateful is gone!


I first tried making chiffon cakes last year. At first I was really scared of whipping egg whites, but after making countless of these cakes (my mum loves them because they're not too sweet, and because of the soft and cottony texture), I think I've mastered the art of making a perfect chiffon. This particular matcha chiffon has a fresh and clean fragrance, and the ever-so-slight bitter aftertastes balances the sweetness perfectly. I've included some of my humble tips on making chiffon cakes below.


Both of these treats are great for snacking, and of course perfect consumed with a cup of your favourite tea during a relaxing afternoon! What is your favourite type of tea to use when baking?

Early Grey Tea Cookies
Adapted from Vanlily's blog (Original recipe in Chinese)
Makes 16-20 small cookies

1 teabag Earl Grey tea (I used Twinings)
1tbsp Milk
70g Butter, at room temperature
30g Icing sugar
Pinch Salt
120g All purpose flour
1/4tsp Baking soda

1. Put the milk into a small microwavable bowl and nuke it for around 10 seconds to warm it up. Cut open the tea bags, put the leaves into the milk. Cover and leave to infuse for around 30 minutes.
2. Beat butter and icing sugar with an electric mixer until soft and fluffy, beat in the tea-milk mixture
3. Sift in the salt, flour and baking soda. Gently fold into the mixture with a rubber spatula until a soft dough forms.
4. Cover the bowl with plastic wrap and chill for 30mins.
5. Meanwhile, preheat oven to 180C. Gently flour your work surface and rolling pin. Roll out the dough gently until around 5mm thick, use cookie cutters to cut our shapes and transfer to a parchment-lined baking sheet. Place the baking sheet, cookies and all into the freezer for around 5 minutes.
6. Bake for around 15-20minutes until pale golden. Remove and cool on a cooling rack, where they will crisp up.

Matcha Chiffon Cake
From Chiffon Cake Book by Junko Fukada (Original recipe in Chinese)
Makes one 17cm cake (plus some extra batter)

3 Egg yolks
80g Sugar
50ml Vegetable oil
60ml Water
80g Cake (low-protein) flour
10g Matcha (green tea powder)
4 Egg whites

1. Preheat oven to 180C. Whisk egg yolks, 1/3 of the sugar, oil and water together.
2. Pour in sifted flour and matcha, whisk until totally incorporated and no lumps remain.
3. Using an electric mixer, whip the egg whites until foamy. Pour in half the remaining sugar, beat for 2 more minutes, add in the rest of the sugar and beat until soft peaks form.
4.Place 1/3 of the beaten egg whites into the flour mixture. Use a whisk to quickly mix everything together.
5. Add in the rest of the egg whites, incorporate gently but quickly. When some white streaks remain, swap to a rubber spatula and fold gently until the mixture is homogeneous.
6. Pour the mixture into the chiffon cake tin (you may need to slightly grease it beforehand to prevent sticking, but I skip this step). Rap the tin against the table a few times to get rid of large air bubbles.
7. Bake for 20 minutes until a toothpick inserted comes out clean.
8. The cake must be cooled upside down; stick the tin on a tall heavy bottle, leave until cake is completely cool before removing it from the tin.

Tips for making chiffon cakes
- When mixing the yolk mixture, ensure that no lumps remain to ensure a smooth batter after adding egg whites. You don't want to be deflating the mixture whilst attempting to get rid of those lumps!
- An indication as to when the whites are ready, a small 'peak' will form when you pull up your beaters. After reaching that stage, whip for another minute on low speed to stabilise the air bubbles.
- Mix gently when incorporating the two mixtures. Usually, just to be on the safe side, I use a spatula upon the second addition.
- If your cake is being stubborn and refuses to leave the tin, use a thin sharp knife or thin offset spatula and run it around the cake. it should pop out really easily.


Blog Widget by LinkWithin