Showing posts with label baked. Show all posts

Wednesday, January 13, 2010

10

S'mores Brownies

smores brownies
Ok, I really shouldn't be blogging right now - but I miss it too much. I have one more exam, in fact, the hardest one - Chemistry tomorrow, then a TOK presentation (where me and my partner are planning an all nighter for) on Friday...then I'm free!

smores brownies
Meanwhile, take a look at these S'mores Brownies I made with my friends during YTH's birthday party! I've never had a S'more before, but the idea of chocolate, marshmallows and graham crackers is very appealing. I think the brownie showcases this flavour combination very well, and they were super easy to make. The digestive biscuits (I've never tried a graham cracker before either, and supermarkets here don't seem to stock them) add a great crunchy texture to the soft brownie and the sticky marshmallow.

smores browniesRecipe is adapted from Joy The Baker. I kept to all the measurements except that I drastically cut down amount of sugar - I think I used only a quarter to a third of the total amount.

smores browniesOh, and since this is the first post in 2010 at My Buttery Fingers, I wish everyone a (very belated) Happy New Year!

smores brownies

Wednesday, June 17, 2009

11

It's Tea Time!

I love tea. I'd prefer it any time over soft drinks or juice. I love drinking many types of tea, from the slightly bitter Chinese Pu-erh tea after dinner, Japanese green tea (Matcha) whilst eating sushi, or a rich, creamy mug of Hong Kong milk tea. The post title refers to my two most recent bakes - Earl Grey Tea cookies and Matcha Chiffon Cake.
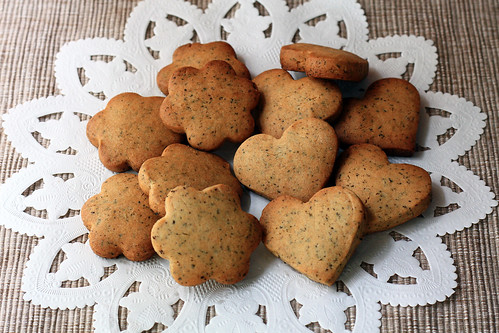

These cute little cookies are of the shortbread variety, but the method of making this is different to the pinwheel ones I made previously. I really love these cookies because when you take a first bite, it might seem that the tea flavour is not strong enough, but after a second, third bite, it tastes just like drinking a cup of milky Earl Grey Tea. They do not have a strong orange-y flavour either. You really can't resist munching on one...then another one...until the whole plateful is gone!


I first tried making chiffon cakes last year. At first I was really scared of whipping egg whites, but after making countless of these cakes (my mum loves them because they're not too sweet, and because of the soft and cottony texture), I think I've mastered the art of making a perfect chiffon. This particular matcha chiffon has a fresh and clean fragrance, and the ever-so-slight bitter aftertastes balances the sweetness perfectly. I've included some of my humble tips on making chiffon cakes below.
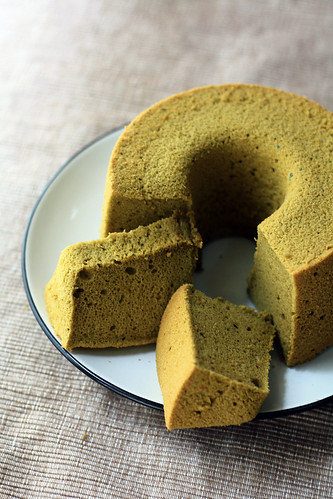

Both of these treats are great for snacking, and of course perfect consumed with a cup of your favourite tea during a relaxing afternoon! What is your favourite type of tea to use when baking?

Early Grey Tea Cookies
Adapted from Vanlily's blog (Original recipe in Chinese)
Makes 16-20 small cookies

1 teabag Earl Grey tea (I used Twinings)
1tbsp Milk
70g Butter, at room temperature
30g Icing sugar
Pinch Salt
120g All purpose flour
1/4tsp Baking soda

1. Put the milk into a small microwavable bowl and nuke it for around 10 seconds to warm it up. Cut open the tea bags, put the leaves into the milk. Cover and leave to infuse for around 30 minutes.
2. Beat butter and icing sugar with an electric mixer until soft and fluffy, beat in the tea-milk mixture
3. Sift in the salt, flour and baking soda. Gently fold into the mixture with a rubber spatula until a soft dough forms.
4. Cover the bowl with plastic wrap and chill for 30mins.
5. Meanwhile, preheat oven to 180C. Gently flour your work surface and rolling pin. Roll out the dough gently until around 5mm thick, use cookie cutters to cut our shapes and transfer to a parchment-lined baking sheet. Place the baking sheet, cookies and all into the freezer for around 5 minutes.
6. Bake for around 15-20minutes until pale golden. Remove and cool on a cooling rack, where they will crisp up.

Matcha Chiffon Cake
From Chiffon Cake Book by Junko Fukada (Original recipe in Chinese)
Makes one 17cm cake (plus some extra batter)

3 Egg yolks
80g Sugar
50ml Vegetable oil
60ml Water
80g Cake (low-protein) flour
10g Matcha (green tea powder)
4 Egg whites

1. Preheat oven to 180C. Whisk egg yolks, 1/3 of the sugar, oil and water together.
2. Pour in sifted flour and matcha, whisk until totally incorporated and no lumps remain.
3. Using an electric mixer, whip the egg whites until foamy. Pour in half the remaining sugar, beat for 2 more minutes, add in the rest of the sugar and beat until soft peaks form.
4.Place 1/3 of the beaten egg whites into the flour mixture. Use a whisk to quickly mix everything together.
5. Add in the rest of the egg whites, incorporate gently but quickly. When some white streaks remain, swap to a rubber spatula and fold gently until the mixture is homogeneous.
6. Pour the mixture into the chiffon cake tin (you may need to slightly grease it beforehand to prevent sticking, but I skip this step). Rap the tin against the table a few times to get rid of large air bubbles.
7. Bake for 20 minutes until a toothpick inserted comes out clean.
8. The cake must be cooled upside down; stick the tin on a tall heavy bottle, leave until cake is completely cool before removing it from the tin.

Tips for making chiffon cakes
- When mixing the yolk mixture, ensure that no lumps remain to ensure a smooth batter after adding egg whites. You don't want to be deflating the mixture whilst attempting to get rid of those lumps!
- An indication as to when the whites are ready, a small 'peak' will form when you pull up your beaters. After reaching that stage, whip for another minute on low speed to stabilise the air bubbles.
- Mix gently when incorporating the two mixtures. Usually, just to be on the safe side, I use a spatula upon the second addition.
- If your cake is being stubborn and refuses to leave the tin, use a thin sharp knife or thin offset spatula and run it around the cake. it should pop out really easily.


Tuesday, May 26, 2009

2

Chocolate Hazelnut Biscotti


Exams are over for me, but that does not mean that work is over (Biology IA, English World Lit Essay, Extended Essay...the list never ends). However, it does mean that I can manage to allocate a little more time for baking, instead of stuffing my face into a Biology or Chemistry or Maths textbook all the time.

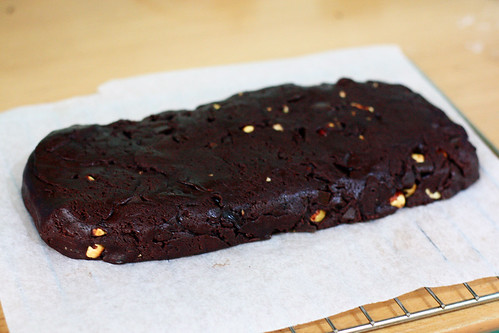
I had some hazelnuts that I had to use up. And I haven't made biscotti before, so Chocolate Hazelnut Biscotti it was! Biscotti, meaning 'twice-baked' in its Latin name, is an Italian cookie. The dough is shaped into a long, wide log and baked for once to cook the outside. It is then cooled, and sliced into long fingers and baked again to crisp up the interior.

The original recipe I used was for pistachio biscotti, but I replaced it with hazelnuts. Me, being the lazy person I am, didn't shape the dough on a floured surface, but I just patted the dough into a pile, turned it onto the parchment paper and just shaped it with my hand and spatula into a rough-ish log, as pictured above.

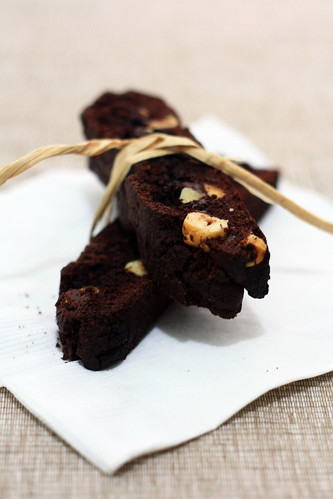
The final product was wonderful straight from the oven - because of my mediocre slicing skills, some of the thinner biscotti snapped and I tried the broken pieces. The cookie was nice and crunchy, with pockets of melted chocolate chips and the lovely aroma of hazelnuts. I ate a few for breakfast the next day (despite keeping in a Ziploc and an airtight container, they became a bit soft), dunked in milk, and my sister had them dunked into her coffee. A happy start to a school day!

Chocolate Hazelnut Biscotti

Adapted from Martha Stewart's Cookies via Use Real Butter

2 cups flour
1/2 cup unsweetened cocoa powder
1 tsp baking soda (I reduced to 1/2 tsp for my elevation)
1/4 tsp salt
6 tbsp unsalted butter, room temperature
1 cup sugar
2 large eggs
1 cup shelled pistachios (try 3/4 cup) - I used the equivalent amount of hazelnuts, which I toasted, skinned and halved.
1/2 cup semisweet chocolate chips (just under) - I used the full half cup :)

1. Preheat oven to 350°F
2. Line a baking sheet with parchment paper
2. Whisk together flour, cocoa powder, baking soda, and salt. Set aside.
3. Beat the butter and sugar together on medium speed until light and fluffy.
4. Add eggs, beating on low speed until well combined. Scrape the sides of the bowl if necessary.
5. Add the flour mixture and beat to form a stiff dough. Mix in the hazelnuts and chocolate chips until just combined.
6. Transfer the dough to the parchment paper and form into a slightly flattened log, about 12×4 inches. Bake until slightly firm, about 25 minutes. Let cool for 5 minutes.
7. Reduce the oven to 300°F. On a cutting board, with a sharp serrated knife, cut the biscotti diagonally into 1-inch thick slices.
8. Arrange the cookies cut side down on the baking sheet. Bake until crisp but slightly soft in the center, about 8 minutes.
9. Move to a wire rack and cool completely. Store in a container at room temperature up to 1 week. Makes 1 dozen.

Friday, May 22, 2009

15

Mini Chocolate Cupcakes with Lemon Cream Cheese Frosting

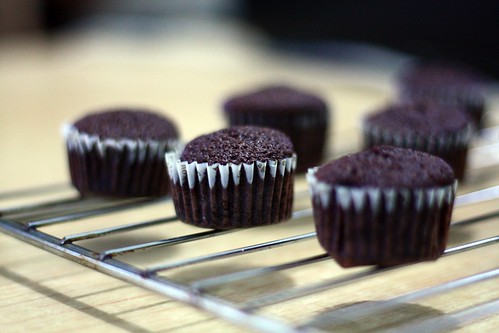
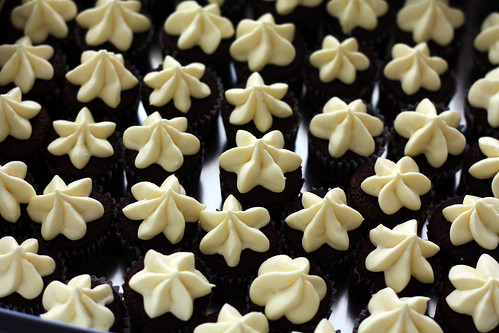
chocolate cupcakes lemon cream cheese frosting
Exams. Are. OVER!

I'm finally back to baking, after two long weeks of school exams. By the end of my first week of Higher exams, I was already dreaming of what to bake. I was browsing some of my bookmarked recipes during my revision time allocated for Maths! Should I make some refreshing Matcha ice cream? Or bake some chocolate chip cookies that I knew everyone would like? A nice and simple chiffon cake might be good. Ah or I can bake some bread again to get rid of my stress whilst kneading...

chocolate cupcakes lemon cream cheese frosting
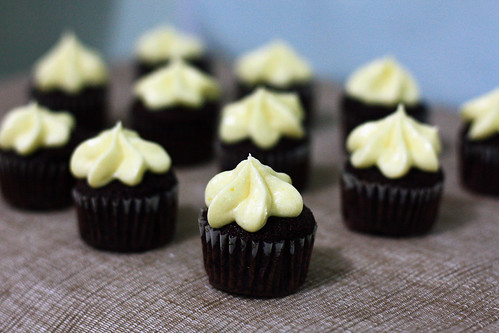
Finally, I settled on something I haven't made before -Mini Chocolate Cupcakes with Lemon Cream Cheese Frosting after stumbling by this post at Baking Obsession. I haven't made cream cheese frosting before so I though it'd be a nice try at something new!

chocolate cupcakes lemon cream cheese frosting
I didn't use the recipes stated on the site. The chocolate cupcake I used was from Cupcake Bakeshop. I've made this recipe several times, and it is my favourite basic chocolate cupcake so far - rich and chocolatey but not too heavy - a perfect pairing with any frosting. It is also a breeze to make! As for the frosting, I adapted the recipe from Simply Recipes.

chocolate cupcakes lemon cream cheese frosting
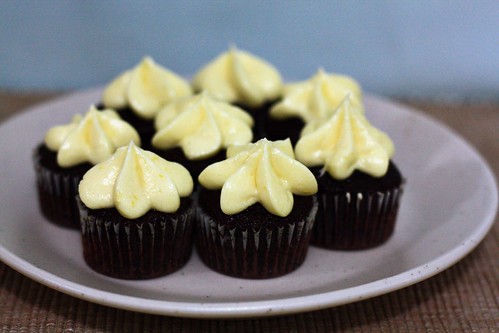
I brought these to school today (I baked 48 of these babies - I dare not think what will happen if my sister and I ate them all alone!) - and they we're a big hit. Everyone was squealing 'Omg they're sooo good!'. Which made me very happy, because at first I was scared that no-one would like the tangy frosting paired with the chocolate cupcake. I think this cupcake size is the best too - you won't feel guilty for picking up one...another one...and another one!

Baking really is the best stress relieving activity for me. Despite being very tired afterwards, it totally relaxed and forgot how I messed up some exams too :)

Chocolate Cupcakes
from Cupcake Bakeshop

Makes 48 mini cupcakes
1/2 cup (1 stick) butter, room temp
1-1/4 cups sugar
2 large eggs, room temp
3/4 cup flour
1/2 teaspoon baking powder
1/4 teaspoon baking soda
1/4 teaspoon salt
1/2 cup unsweetened cocoa powder
1/2 cup milk
1 teaspoons vanilla

1. Preheat oven to 375 degrees.
2. Beat butter until softened. Add sugar and beat until light and fluffy, about 3 minutes.
3. Add eggs, one at a time, beating until well combined.
4. Measure the flour, baking powder, baking soda, salt, and cocoa powder into a small sized bowl and whisk to combine.
5. Measure out the milk and vanilla and stir to combine
6. Add about a third of the dry ingredients to the butter/sugar and beat to combine. Add about a half of the milk/vanilla and beat to combine. Continue adding, alternating between dry and wet and finishing with the dry.
7. Scoop batter into cupcake cups about 2/3’s full. Turn oven down to 350 degrees and bake cupcakes for about 22-25 minutes (8-10 minutes for minis) or until a cake tester comes out clean.

Lemon Cream Cheese Frosting
Adapted from Simply Recipes

1/4 cup butter (1/2 stick) at room temperature
8oz Philly cream cheese (1 package) at room temperature
2 cups icing sugar, sifted (I used around 1 1/2 cups)
Grated zest of one large lemon
1-2 tsp lemon juice

1. With an electric mixer, beat the butter and cream cheese together, about 2 minutes on medium speed until very smooth. Scrape down the sides and bottom of the bowl to ensure even mixing.
2. Add the lemon zest and juice. Mix to combine. Slowly add the icing sugar. Keep adding until you get to your desired sweetness or consistency. (I chilled the frosting for 1/2 hour before using due to the hot/humid weather here, so piping would be more manageable)
3. Spoon into a piping bag fitted with a nozzle and decorate the cupcakes. (I used a large star tip).

Friday, May 1, 2009

3

Matcha and Chocolate

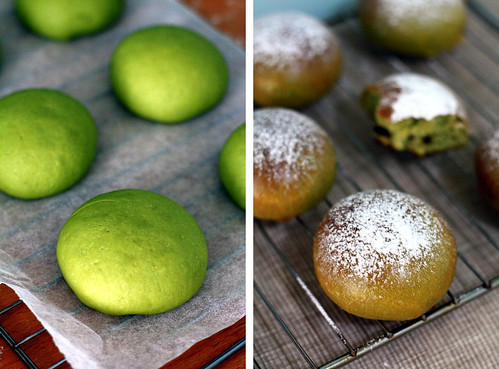
matcha, chocolate, buns, matcha chocolate buns, bread, green, food, bakingThis was made two weeks ago, during my Easter holidays. No, I wasn't having a wonderful time relaxing, but I was slaving on my Geography coursework (which is now finished, thankfully).

I needed some stress relief. I hadn't baked in ages. So I decided to make bread. You know, the kneading and punching of dough is the best way to vent your frustration, and despite all the arm power used to knead, it is actually very therapeutic.

Many may ask that bread is so easily available at bakeries, why bother spending hours kneading, proofing and shaping just to make a few measly buns? Well, I personally think that fresh, piping hot homemade buns are just the reason why I do it. And, because I still think that being able to make soft, fluffy and tasty bread makes me feel pro, so I'm satisfying my inner ego as well :)

Okay, back to the recipe. Every time I want to make bread, I always turn to Happy Home Baker for her recipes. This time I chose this recipe, which seemed easy enough to make without me needing to run down to the supermarket to buy whipping cream or other ingredients.

So, the final product was wonderful fresh from the oven. The chocolate chips go really well with the refreshing taste of matcha, and the texture of the buns were just what I was looking for. And I'm pretty pleased with the result, maybe because the bottoms were not over baked and didn't turn dark brown. I blame this on my tiny, temperamental oven; sometimes I need to decrease baking temperatures by almost 20'C to get things baking without getting charred!

So, this was my first official food post on this site. Thanks for visiting my blog, and comments are very much appreciated!
Blog Widget by LinkWithin