Showing posts with label cookies. Show all posts

Thursday, December 24, 2009

2

Last Minute Christmas Cookies

Actually this post is a little late - I was meant to publish this before I went Christmas carolling, but I couldn't upload my photos and I was running late, so here I am posting this on the early minutes of Christmas Day! But any rate, enjoy these cookies :)
---

Following on to my previous post - Yes, I did have time to cram in a few more cookie baking sessions! Since we only have a day or so left until Christmas, I thought I'd summarise the three other cookies I baked for this year's holidays in one, short post.

I think any of these recipes would be perfect as a last minute addition to your cookie can, or to be packed as gifts (I baked the latter two recipes in one morning and they are set to be given off tonight), or just to be bookmarked and made another time next year!

World Peace Cookies


Man, who hasn't heard of these before? A rich, crumbly cookie loaded with dark chocolate bits, everyone is bound to like them. The dough can be stored in the freezer, and baked straight from their frozen state after slicing, so you can enjoy fresh cookies anytime your heart desires this holiday! The recipe can be found on Smitten Kitchen.

Lemon Cranberry Shortbreads
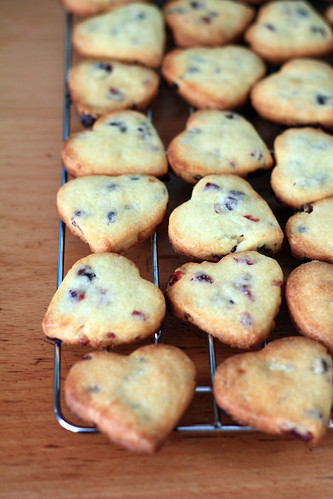

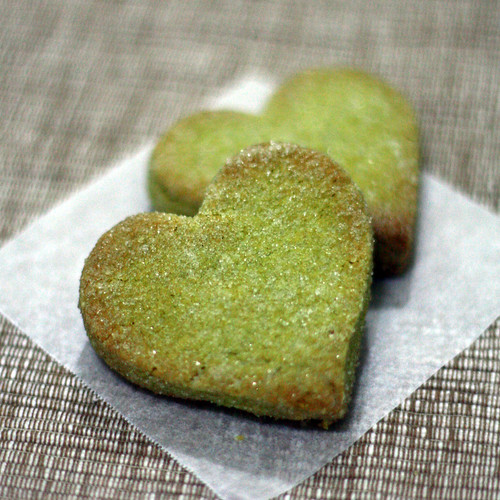
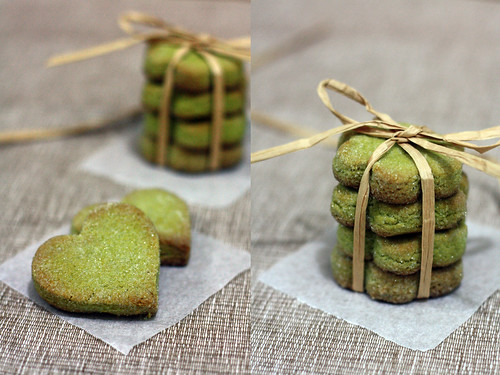
Recently I've learned to like dried cranberries, after eating a bun from a local bakery that had cranberries with linseeds. Anyway, I knew I had to bake these the moment I saw the recipe - I mean, a citrusy, fragrant lemony shortbread - one of my favourite flavours, since it balances the richness of the butter - is bound to appeal, and with my latest favourite food - dried cranberries added? It went straight onto my holiday cookies list. The original recipe asks for the dough to be pressed into a pan, baked and then sliced into bars. I didn't have such a big pan (even if I did it wouldn't fit into my puny oven anyway), so I chilled the dough, rolled it out and cut them into hearts instead.

Chocolate Shortbread Men
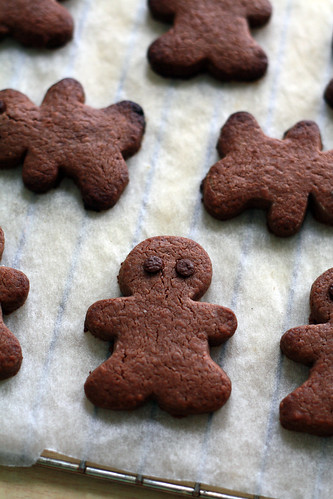

This can be said as my substitute for gingerbread men, since I really haven't
acquainted a taste for the spiced cookie yet. The shortbread recipe used to make these men have been tried out by me for a billion times - it is definitely fool proof. Only involving four basic ingredients, the dough is very versatile indeed and tastes wonderful. I've included the original recipe below and some of the variations I've tried before.

And lastly, a warm Merry Christmas to you all! Whilst I may be hiding behind my books and revising for my mock exams this holiday, I hope everyone of you will enjoy the holiday with your loved ones!

Lemon Cranberry Shortbreads
Adapted from dandysugar

3 lemons
3/4
cup (1 1/2 sticks) (170g) butter, at room temperature
1/4
cup (50g) granulated sugar
1/2
cup (60g) confectioners’ sugar
2
cups (250g) all-purpose flour
1/2
cups (60g) dried cranberries, roughly chopped
1/8 teaspoon salt


1. Preheat oven to 300° F (150 C). Line a baking tray with baking paper, set aside.
2. Grate all the zest from the lemons and combine with the granulated sugar in a small bowl. Rub the two together until sugar is moist and fragrant.
3. In a large bowl, cream the butter and sugars together until creamy. Add flour and mix on low speed until a crumbly dough appears. Add the cranberries and use your hands to form a soft dough. Shape the dough into a disk, wrap in plastic wrap and chill for 1 hour
.
4. Roll out the dough tp around 1/2 cm (1/4 inch) thickness. Cut out shapes, transfer onto the lined tray and bake for 10-12 mintues until golden brown. Cool on a wire rack before packing.


Basic Shortbread Recipe

Adapted from BBC Good Food

325g plain flour
200g chilled salted butter
125g/4½oz golden caster sugar
2 tsp good-quality vanilla extract
2 large free range egg yolks


1.Tip the flour into a food processor. Cut the butter into small pieces and drop them into the bowl, then whizz until the mixture looks like breadcrumbs.
Add the sugar, vanilla and egg yolks and whizz to a small dough. Chill the dough for an hour.
For those like me who don't have a food processor:
Put the flour into a large bowl, and cut butter into 1cm cubes. Rub the butter into the flour until incorporated and the mix looks like coarse breadcrumbs. Mix in the sugar, vanilla and egg yolks and use your hands to press everything into a dough. If it is too dry, add a couple drops of water. Chill the dough for an hour (or shape into a log beforehand for slice/bake cookies).
2. Preheat oven to 180 C. Roll out the dough and cut out shapes or slice the dough, arrange on lined cookie sheets. Bake for 15-20minutes until golden brown.

Variations:
Chocolate: Replace 2tbsp of the flour with cocoa powder. Decorate cookies with chocolate chips if desired.
Lemon: Grate in the zest of one lemon into the sugar and rub until moist and fragrant before combining with everything else. Omit the vanilla.
Coffee: Add in 1-2 tsp espresso powder to the dough along with the sugar.
Pinwheel Cookies
Saturday, December 19, 2009

11

Christmas Stained Glass Cookies

Every year at Christmas, I try to bake or make something special for my friends. The last few days of school before the holidays just seems incomplete without giving out my edible presents to everyone - it's equally important as singing in the Carol Concert, writing Christmas cards and adorning ourselves in Christmas colours! Last year I made Kahlua and plain chocolate truffles, and the year before were iced shortbread cookies. Because I'm school life is still pretty hectic now, I thought I'd stick to simple cookies that everyone would be sure to like.

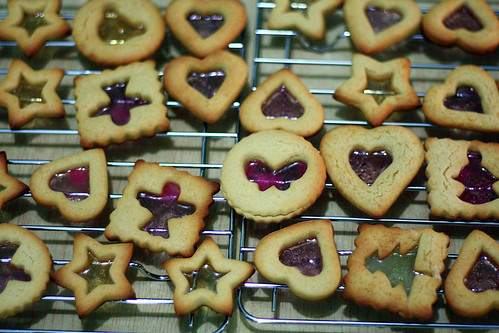
First up are Stained Glass Cookies, the classical combination of shortbread with a clear pane of coloured sugar that lets whatever light shine through. I vividly remember seeing these cookies in a cookbook way back at my primary school library, and wondering how on earth do you make cookies with a translucent red, yellow or green centres. Back then, hammering fruit candies in a plastic seemed very daunting to the 10-year old me, which is probably why I haven't attempted these Christmas cookies until now.
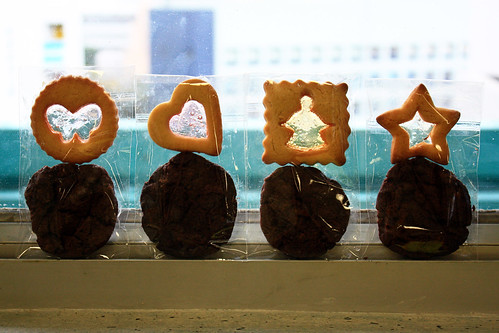
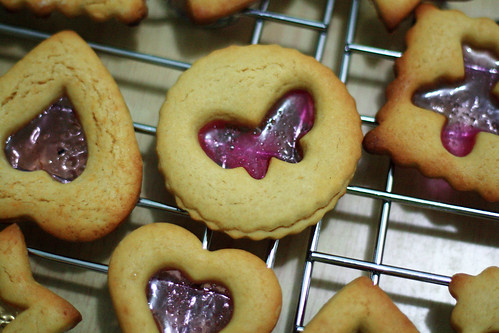
I must admit that making these cookies were very fiddly indeed - the clumsy me just had to let something slip along the way, so I had candy shards falling onto the floor (well at least it wasn't the hammer falling onto my toes) and fingers accidentally touching hot trays from the oven. Sometimes I messed up the smaller cookie cutout and had to scrap that and start rolling again. The cookies are removed from the oven halfway through the baking time to put the candy in the space (this avoids the colours being discoloured and too many bubbles forming), and pushed into every nook and cranny using a toothpick.

But the end product was worth all the effort. Even though my cookies were not as pretty as the ones I saw in that cookbook, and the colours were not as vivid as I envisioned it to be (maybe because the Fox fruit candies I used were light in colour), I was thankful that they actually looked like a cookie with a window of glass in the middle. I couldn't help but grin with satisfaction as saw the beautiful cookies as I pulled out each batch.

To be honest, I took a bit of risk in making these cookies as the purist within me kept on saying that the buttery and crumbly cookie would clash with the fruity flavours of the candy, but my taste buds and my everyone that tasted it confirmed that it did not. The flavours melded together well and was a delight to eat up those stars, angels and hearts.

I also had fun in tricking some of my friends when they asked 'Oh my goodness, how did you transparent thing in the middle? It's so pretty!!', and I informed them that it was glass - and some believed! Of course, I assured them that it was just candy, or else no-one would have dared to try them!

And on the last note, I'd like to thank the readers who commented on my last post - it did give me a lot of encouragement to blog regularly (fingers crossed) again - I really appreciate it! Here's a virtual cookie for you, you and you for reading My Buttery Fingers :)

Stained Glass Cookies
Adapted from Simply Recipes

Makes 20-40 cookies, depending on size (I got 44 cookies)

1/2 cup (1 stick. 114g) butter
1/2 cup (100g) sugar
1/4 cup (36g) brown sugar
1 tablespoon maple syrup (Original recipe called for molasses - I don't have or know what it is, would anybody like to enlighten me?)
1/2 teaspoon vanilla extract
1 egg
2 cups (250g) flour
1/4 teaspoon salt
3/4 teaspoon baking powder
30-40 hard candies, preferably in several flavors/colors (I used Fox fruit candies)

1. Pre-heat oven to 375°F (190C). Line two baking sheets with parchment paper or Silpat.
2. In a large bowl, using an electric mixer, cream together butter and sugars until fluffy, about 2 minutes. Add maple syrup and vanilla extract, mixing until incorporated. Add egg and mix until light and smooth, about 1 minute on medium speed.
3. Sift together flour, salt, and baking powder. Fold dry ingredients into wet mixture. Use electric mixer to blend just until flour is incorporated. Divide dough in half and flatten into two disks. Wrap disks in plastic wrap and refrigerate at least an hour and up to 2 days.
4. Remove any wrappers on candies and separate them by color into plastic bags (Place a towel in between to avoid bag tearing). Using a mallet to crush candies (they don't need to be all powdered - slightly larger shards will still melt fine).
5. Place one disk onto a floured surface (Elise suggests rolling in between waxed paper, which is of course less messy -but I stick to rolling on a floured surface to save paper) and roll to 1/4-inch (0.5cm) thickness. Use cookie cutters to cut dough into desired shapes.
6. Transfer cookies to prepared baking sheets, about 1 inch apart. Using a smaller cookie cutter or a knife, cut shapes into centers of cookies, reserving these center bits to add into extra dough. If cookies will be hung as ornaments or decorations, poke a small hole in the top of each cookie before baking
7. Bake for 4 minutes and remove from oven. Use a spoon to sprinkle the crushed candy into the hollowed-out centers of the cookies, using a toothpick to fill up to the edges. Carefully remove candy that has landed onto the cookie to avoid colouring of the dough.
8. Bake for 5-6 minutes more. The candy should be melted and bubbling and the cookies just barely beginning to brown. Remove baking sheets from oven and place on wire racks to cool. Allow cookies to cool on pans at least 10 minutes; otherwise, the candy centers may separate from the dough. When cookies are completely cooled, remove and store in an airtight container. String with ribbon if you want to hang as an ornament.

Friday, November 6, 2009

5

Alfajores


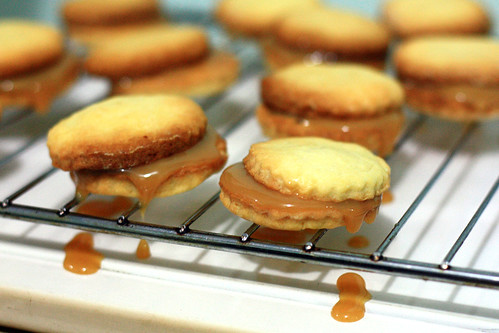
It seems like my excuses to bake are getting more and more ridiculous. This time, it's something along the lines of "I made two cans of dulce de leche and I can't go on eating it on toast every morning for a month even though it tastes great. Therefore I must bake alfajores." I'm glad that I decided to bake them, but another baking glitched occured!

On a whim, I decided to make dulce de leche again, using the boiling can method. I've tried the oven method, but I think that it's a more waste of energy as the oven has to be on for a long time, whilst the boiling method allows you to make a few cans at once AND I can actually do homework whilst it cooks by itself! Win-win! Yes, some say that boiling the cans are prone to explosion - but fortunately it hasn't happened to me yet, so I'm sticking to the pot method.

But the first time I made dulce de leche, I was so anxious for the result I forgot to let the cans cool before opening them, so the moment my can opener cut through the top, a squirt of hot, sweet, sticky caramelised milk spewed out. Thank God it hit the wall and not my face.


So one day, me being a less-than-attentive student during English class, I got distracted and typed in 'alfajores' into food blog search, spending a a good 15minutes sifting through the pages until I found a recipe that sounded like my imagination of an alfajor - a slightly crunchy shortbread with a tender crumb, melding into the lovely sweet, caramelly filling.


The components of my dream alfajor were made without any problems. The cookies were perfectly fine - buttery, tender and all. The dulce de leche was heavenly - I ate a good portion of a can just by the spoon or on saltine crackers. But my final product was a bit disastrous.


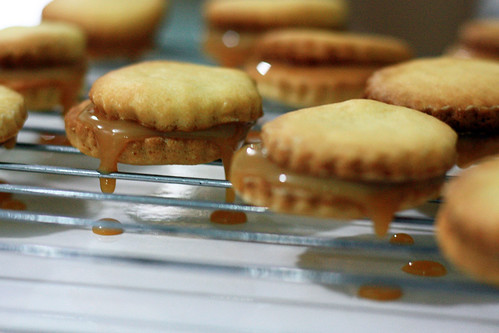
I have no idea why, but after I sandwiched the cookies together, the filling seemed to 'melt' and a few seconds later, the cookies were sliding off each other! I frantically tried adjust them properly, and used much less filling in my remaining ones - but they still slipped off. I have no idea why, maybe my cookies weren't completely cool yet. Or maybe because I store my dulce de leche in fridge, the temperature difference was too big so it softened quickly. Aghh - I was a bit annoyed at that point as my dream alfajores have been ruined, not to mention that there was dulce de leche dripping everywhere :(

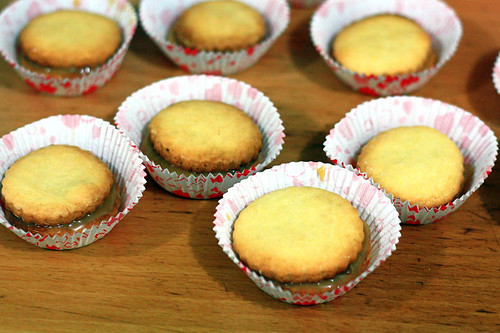
But despite their ugly appearance, the alfajores were really delicious! It was everything I imagined it to taste like. To make them more easy to handle and eat (as by now, the filling has leaked to coat the sides sticky), I placed each alfajor into a paper muffin case to give out at school.


Some friends asked what the filling was, and I think I answered a tad too enthusiastically as I started to babble on about how good dulce de leche is, how easy it is to make, and urging everyone to make it. I also had a very intersting conversation in Biology class where I insisted on the correct pronounciation of 'alfajores' (ah-faa-ho-res) and 'dulce de leche' (dul-chay-de-lay-chay), as well as asking my friend who studies Spanish how to say "Ugly But Tasty Alfajores"...if I had remembered what she said, it would have been the title of this post!


Alfajores
Adapted from Desert Candy

Makes around 16 sandwich cookies

115g butter, room temperature
55g sugar
1 egg
1tbsp dark rum
1/2tsp vanilla essence
140g all-purpose flour
65g cornstarch
1tsp baking powder
1/4tsp salt

around 1/2 cup dulce de leche, for filling (see below)

1. In a large bowl, with a mixer on medium speed, beat the butter and sugar until smooth. Add the egg, rum and vanilla and beat until well blended.
2. In a medium bowl, mix the flour, cornstarch, salt and baking powder. Beat into butter mixture until well blended. Press the dough into a disk, wrap in plastic wrap, and chill until firm, about 30 minutes.
3. Preheat oven to 170º C. Unwrap dough. On a lightly floured surface, with a floured rolling pin, roll out dough to about 1/8 inch thick. With a floured, 2- to 3-inch round cutter, cut out cookies. Place about 1 inch apart on greased or lined baking sheets. Gather excess dough into a ball, re-roll, and cut out remaining cookies. Chill cookies in the freezer for around 5 minutes until dough is firm.
4. Bake until cookie edges just begin to brown, about 10-15 minutes. Let the cookies cool on sheets for 5 minutes, then use a spatula to transfer them to racks to cool completely.
5. Turn half the cooled cookies bottom side up and spread each with around a teaspoon dulce de leche. Top with remaining cookies. Cookies are best on the second day, they keep well for 2 weeks in an air-tight container at room temperature.

Dulce de Leche
Place one can of condensed milk (or any number of cans you can fit in your pot) into a large pot and fill with water until the cans are completely submerged. Turn on the stove and let the water boil. After water has boiled, turn down to low heat and let the heat work its magic - remove after 2.5 hours. Make sure the cans are always completely submerged during cooking.

Let the cans cool completely before opening to avoid hot sticky caramel landing on yourself or anywhere else. Then, take a spoon and eat a spoonful of bliss before transferring the rest into a jar to keep in the fridge.

Sunday, September 27, 2009

16

I'm Back, with Matcha and Cocoa Snowballs!

It's been a month. A month since school started, meaning a long lonely month without any baking done. I miss my spatula dearly. I miss carefully weighing out ingredients. I miss the familiar 'ding' sound the oven makes when the baking time is over. I miss taking photos of the end product and then munching it away with satisfaction.

Being a Year 13 student is not easy, the work just comes crashing on us like waves and never stops. Even baking has to step aside as I prioritise university applications, personal statements, tests and internal assessments first.

The list is endless.


But thankfully, I finally got the chance to breathe, take a break and bake something last week. My friend C., whom I've known since kindergarten, keeps on reminding me during our French lessons to bake and update my blog. She's one of the few people that reads my blog (she even showed her mum!), and it's always nice to know that other people appreciate what I do. So a shout out here to C. - Thank you for all the encouragement! :D

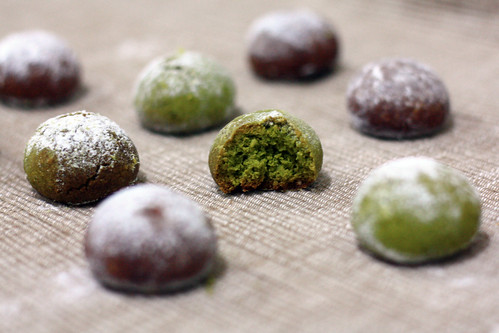
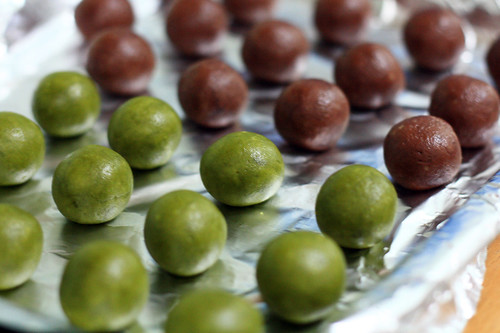
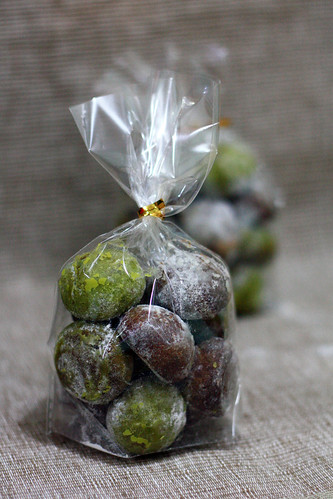
The name of these little treats might be a little confusing - the snowballs, in fact are just matcha and cocoa cookies dusted in icing sugar, so they resemble snowballs. But texture wise, they resemble snow too - because they melt in your mouth. They are so addictive it's hard not to pop these small little cookies into your mouth one by one until they're all gone!


They are incredibly easy to make, and I really enjoyed making them as I weighed the dough out equally and rolled them in my palms until each was a perfect sphere. Unfortunately, maybe the oven temperature was not correct or maybe because I didn't chill the dough overnight, they flattened out a bit so they are more like, snow domes. The dough is quite versatile too - I'd imagine that the matcha and cocoa powder can be swapped with espresso powder to create a coffee flavour.


Once they were properly cool and well dusted with icing sugar, I packaged them into small plastic bags as (extremely belated) birthday gifts - one for C., and the other for A., whom I chat to every single Biology lesson. So, Happy 17th to those girls!

Right, so back to work for now. I hope that I'll get to do some more baking soon!

Matcha and Cocoa Snowball Cookies
Adapted from Vanlily Sweetie Life (original recipe in Chinese)

Makes 25-30 (both flavours combined)

90g Butter, at room temperature
Pinch salt
30g Icing sugar
50g Ground almonds
100g Cake flour
6g Matcha powder
10g Cocoa powder
Icing sugar, for dusting

1. Using a wooden spoon, beat the softened butter and icing sugar until well combined.
2. Sift in the ground almonds and cake flour, mix well.
3. Spilt the dough in half. Gently knead the matcha powder into one portion, and the cocoa powder into the other portion.
4. Wrap the two doughs separately with plastic wrap and chill for 30 minutes. (original recipe says to chill overnight)
5. Preheat oven to 170 C.
6. Working with one dough at a time, take 10g of dough and shape into balls. Place them on a parchment lined baking sheet. Repeat until all the dough is shaped.
7. Bake for 15-30 minutes until lightly coloured.
8. Let cool for a while, and transfer them to a cooling rack. Whilst the cookies are still warm, dust them with icing sugar.
9. When thoroughly cool, dust again with icing sugar and store in an airtight container.

Saturday, August 22, 2009

14

Matcha Shortbreads + 7 Things

I'm back to school! Year 13, my last year of high school. We started school on Friday (strange, eh?) and on Thursday I was so sick of writing my extended essay I decided to ditch it and went to bake instead. I think I definitely deserved that baking session because I was working non-stop for the last week already!

matcha green tea shortbread cookies
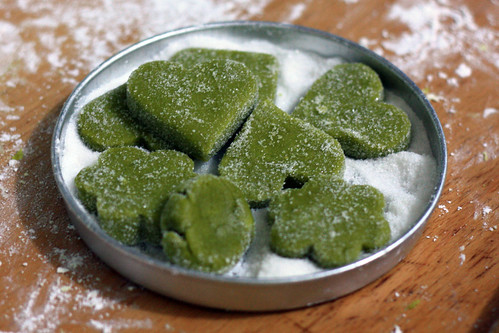
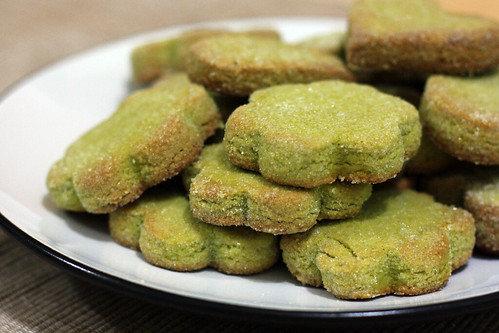
I digress. Back to these shortbreads, these wonderful shortbreads. I know that they were all the rage around two years ago amongst many food bloggers, and I am the extremely untrendy latecomer that chose to bake these two years later on a whim. But I'm glad I did, because after the first bite, the recipe went straight to my keepers list. And of course I'm talking about the famous Kelli's Green Tea Sweets!

matcha green tea shortbread cookiesThey are buttery and crumbly, and the green tea flavour was prominent enough to be noticed, but not overpowering that the whole thing tastes bitter. And the texture is lovely too - delicate and melt-in your mouth, but surprisingly both the dough and baked cookie held up really well. The shade of green came out perfectly - I thought that the matcha might have lost its colour after baking - I think the colour is very pretty! Along with the teeny crunch from the granulated sugar, it's currently ranking high in my favourite cookie list.

matcha green tea shortbread cookies---
I also recieved the 'Kreativ Blogger' award from 17 and Baking (another teenage baker - yay!). Thanks Elissa!

I'm supposed to write 7 things about myself...

1. I'm planning to study Biochemistry. Yeah, that's what I want to study at uni. Wish my luck in my uni applications (which are starting like....now!) - I am currently working through my personal statement.

2. I wish I could write better. I wish I was able to write more enticing posts, describe food better, but unfortunately, writing is not my forte at all!

3. I have a younger sister. Her name is Venus, and she eats alot of the stuff I make. We laugh at silly things together.

4. The thing I really hate in the world now is IB. Yes, I cannot express my hatred for this thing enough. The workload is so high it's incomprehensible. Normally on a school day, I sleep at 12 at the earliest, and the worst so far - I've stayed up until 3am, working.

5. I'm a Scout! Yep, I am currently a member of my Venture Scout troop, in a Scouts group I've been at since I was 10. I really love camping, because it's just so relaxing and fun when you go crazy with your friends in the middle of nowhere.

6. I really, really, really want to learn how to make macarons. I've only had 3 macarons before in my whole life, and I want to try making them. Unfortunately, after years of thinking 'I'll make it during the holidays' I still haven't gotten round to making them. - Sigh -

7. I love The Pioneer Woman. Pioneer Woman Cooks! was the first food blog I read, I still remember that the post was the Chocolate Sheet cake. Now, I read all the sections of her site, and I secretly wish I can live at a her ranch too.

Aaaand, I'm passing this along to Happy Home Baker, Florence of Do What I Like, Elyn of e's joie and Doreen of Desserts. Yum.
---

matcha green tea shortbread cookies
Have you tried these matcha shorbreads yet? If not, I think you should go make them now!
Alright, I'm going back to work - I'll try to squish in a few posts about some of my other bakes/makes from summer soon!

Matcha Shortbreads
From Lovescool

3/4 cup (2.25 oz; 90g) Confectioners sugar
5 oz (142g) Unsalted butter, cut into cubes
1 3/4 cup (8.5 oz; 219g) All-purpose flour (I used cake flour because I ran out of All purpose)
3 Large egg yolks
1.5 TBS Matcha (powdered green tea)
1 cup (200g) Granulated sugar (for coating)

1. Preheat the oven to 350F (175 C). Line a sheet pan with parchment paper.
2. Whisk the confectioner’s sugar and green tea together in a bowl. Add the butter and green tea/sugar mixture to the bowl of a stand mixer fitted with the paddle attachment. Mix until smooth and light in color.
3. Add the flour and mix until well combined.
4. Add the egg yolks and mix just until the eggs are fully incorporated and a mass forms.
5. Form the dough into a disk and chill in the refrigerator until firm (about 30 minutes).
6. Roll the dough out to ½” (around 1cm) thickness.
7. Cut the dough with a leaf cookie cutter.
8. Toss each cut cookie in a bowl of granulated sugar to coat.
9. Place the sugar-coated cookie on a parchment lined pan. Bake at 350F (175 C) for 12-15 minutes, or until slightly golden around the edges.


Matcha Shortbread Cookies on Foodista

Wednesday, June 17, 2009

11

It's Tea Time!

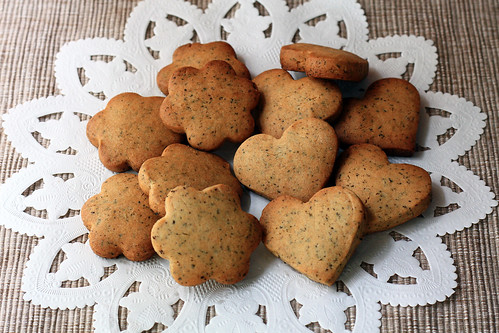
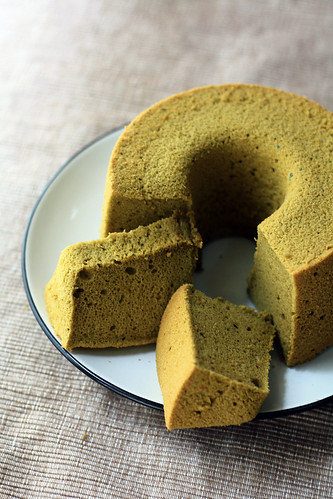
I love tea. I'd prefer it any time over soft drinks or juice. I love drinking many types of tea, from the slightly bitter Chinese Pu-erh tea after dinner, Japanese green tea (Matcha) whilst eating sushi, or a rich, creamy mug of Hong Kong milk tea. The post title refers to my two most recent bakes - Earl Grey Tea cookies and Matcha Chiffon Cake.


These cute little cookies are of the shortbread variety, but the method of making this is different to the pinwheel ones I made previously. I really love these cookies because when you take a first bite, it might seem that the tea flavour is not strong enough, but after a second, third bite, it tastes just like drinking a cup of milky Earl Grey Tea. They do not have a strong orange-y flavour either. You really can't resist munching on one...then another one...until the whole plateful is gone!


I first tried making chiffon cakes last year. At first I was really scared of whipping egg whites, but after making countless of these cakes (my mum loves them because they're not too sweet, and because of the soft and cottony texture), I think I've mastered the art of making a perfect chiffon. This particular matcha chiffon has a fresh and clean fragrance, and the ever-so-slight bitter aftertastes balances the sweetness perfectly. I've included some of my humble tips on making chiffon cakes below.


Both of these treats are great for snacking, and of course perfect consumed with a cup of your favourite tea during a relaxing afternoon! What is your favourite type of tea to use when baking?

Early Grey Tea Cookies
Adapted from Vanlily's blog (Original recipe in Chinese)
Makes 16-20 small cookies

1 teabag Earl Grey tea (I used Twinings)
1tbsp Milk
70g Butter, at room temperature
30g Icing sugar
Pinch Salt
120g All purpose flour
1/4tsp Baking soda

1. Put the milk into a small microwavable bowl and nuke it for around 10 seconds to warm it up. Cut open the tea bags, put the leaves into the milk. Cover and leave to infuse for around 30 minutes.
2. Beat butter and icing sugar with an electric mixer until soft and fluffy, beat in the tea-milk mixture
3. Sift in the salt, flour and baking soda. Gently fold into the mixture with a rubber spatula until a soft dough forms.
4. Cover the bowl with plastic wrap and chill for 30mins.
5. Meanwhile, preheat oven to 180C. Gently flour your work surface and rolling pin. Roll out the dough gently until around 5mm thick, use cookie cutters to cut our shapes and transfer to a parchment-lined baking sheet. Place the baking sheet, cookies and all into the freezer for around 5 minutes.
6. Bake for around 15-20minutes until pale golden. Remove and cool on a cooling rack, where they will crisp up.

Matcha Chiffon Cake
From Chiffon Cake Book by Junko Fukada (Original recipe in Chinese)
Makes one 17cm cake (plus some extra batter)

3 Egg yolks
80g Sugar
50ml Vegetable oil
60ml Water
80g Cake (low-protein) flour
10g Matcha (green tea powder)
4 Egg whites

1. Preheat oven to 180C. Whisk egg yolks, 1/3 of the sugar, oil and water together.
2. Pour in sifted flour and matcha, whisk until totally incorporated and no lumps remain.
3. Using an electric mixer, whip the egg whites until foamy. Pour in half the remaining sugar, beat for 2 more minutes, add in the rest of the sugar and beat until soft peaks form.
4.Place 1/3 of the beaten egg whites into the flour mixture. Use a whisk to quickly mix everything together.
5. Add in the rest of the egg whites, incorporate gently but quickly. When some white streaks remain, swap to a rubber spatula and fold gently until the mixture is homogeneous.
6. Pour the mixture into the chiffon cake tin (you may need to slightly grease it beforehand to prevent sticking, but I skip this step). Rap the tin against the table a few times to get rid of large air bubbles.
7. Bake for 20 minutes until a toothpick inserted comes out clean.
8. The cake must be cooled upside down; stick the tin on a tall heavy bottle, leave until cake is completely cool before removing it from the tin.

Tips for making chiffon cakes
- When mixing the yolk mixture, ensure that no lumps remain to ensure a smooth batter after adding egg whites. You don't want to be deflating the mixture whilst attempting to get rid of those lumps!
- An indication as to when the whites are ready, a small 'peak' will form when you pull up your beaters. After reaching that stage, whip for another minute on low speed to stabilise the air bubbles.
- Mix gently when incorporating the two mixtures. Usually, just to be on the safe side, I use a spatula upon the second addition.
- If your cake is being stubborn and refuses to leave the tin, use a thin sharp knife or thin offset spatula and run it around the cake. it should pop out really easily.


Saturday, June 13, 2009

8

Back to Basics

Sometimes the most basic baked goods - in this case, muffins and cookies - are good enough to satisfy cravings for sweet things or satisfy my sudden urge to bake during a busy week.

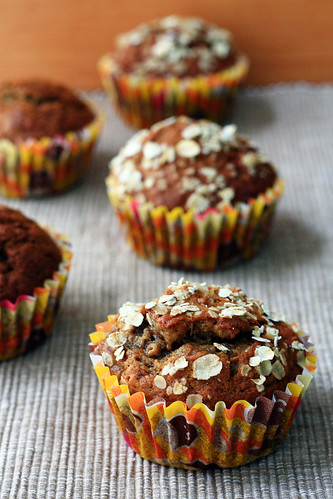
banana coffee muffins
These muffins are Banana Coffee Muffins, with a sprinkling of oatmeal. The best way to use up spotty, ripe bananas! Initially I was a bit afraid of adding coffee into these (as I don't think coffee goes well with fruit), but I decided to be daring and throw that in. Also because I've been recently obsessed with oatmeal, I added some into the mix and sprinkled some on top - just to pretend that I'm 'health conscious'.

banana coffee muffins
The muffins were delicious piping hot out of the oven with a noticeable, but not overpowering hint of coffee. The oatmeal also added some extra texture - something different from the tender crumb of the muffins.

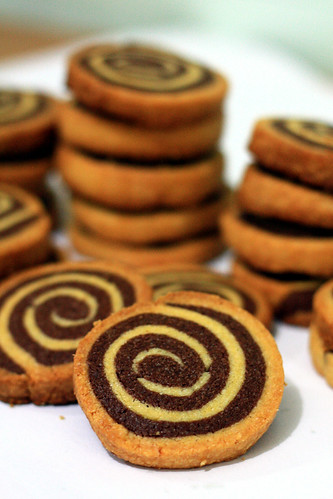
chocolate vanilla pinwheel shortbread cookies
The Pinwheel Shortbread Cookies were baked for the last day of lessons at school. The recipe is my all time favourite shortbread recipe (see below) that I've used for many many times before with success. They are quite rich and buttery with a slightly crunchy texture. Many of my friends thought they were really cool - some even thought they were store bought!

chocolate vanilla pinwheel shortbread cookies
Banana Coffee Muffins
Adapted from Simply Recipes
Makes 12 muffins

3 ripe bananas, smashed
1/3 cup (75g) melted butter
2/3 cup (120g) sugar
1 egg, beaten
1 teaspoon vanilla
2tbsp instant coffee powder, mixed with 2 tbsp hot water
1 teaspoon baking soda
Pinch of salt
1 1/2 cup (190g) flour
1oz (30g) oatmeal, plus more for sprinkling

1. Preheat the oven to 350°F. With a wooden spoon, mix butter into the mashed bananas in a large mixing bowl.
2. Mix in the sugar, egg, espresso and vanilla.
3.Sprinkle the baking soda and salt over the mixture and mix in.
4. Add the flour, mix until it is just incorporated. Gently mix in the oatmeal.
5. Pour mixture into a prepared muffin tin. Sprinkle more oatmeal on top if desired. Bake for 25-30 minutes. Check for doneness with a toothpick inserted into the center of a muffin. If it comes out clean, it's done. Cool on a rack.

These muffin liners are cute, no?

Pinwheel Shortbread Cookies
Adapted from BBC Good Food

Vanilla Dough
160g plain flour
100g salted butter, cold, cut into 1cm cubes
50g sugar
1tsp vanilla essence
1 large egg yolk

Chocolate Dough
140g plain flour
20g cocoa powder
100g salted butter, cold, cut into 1cm cubes
50g sugar
1 large egg yolk

1. Prepare the vanilla dough. Place flour and butter into mixing bowl, rub together until mixture resembles coarse breadcrumbs and the butter is completely worked into the flour. Add vanilla and egg yolk, mix together gently until a ball of dough forms. If it is too dry, sprinkle in a few drops of water. Alternatively, place all the butter and flour food processor and pulse together until butter disappears, add the rest of the ingredients and pulse until a dough forms. Wrap dough with cling film and chill whilst you prepare the chocolate dough.
2. Prepare the chocolate dough as above, adding the cocoa in with the flour.
3. Unwrap the vanilla dough and place into a large Ziploc bag. Roll out into a square with uniform thickness. Repeat with the chocolate dough.
4. Place the chocolate dough on top of the vanilla dough and roll up tightly, Swiss-roll style, but gently so you don't deform the log. Chill for 1 hour.
5. Preheat oven to 180C. Line a baking tray with parchment.
6. Remove dough from the fridge. Slice into generous 5mm (1/4 inch) slices and place them slightly apart on baking sheet.
7. Bake for 20 minutes until the biscuits are just turning pale golden around the edges, then transfer to a wire rack to cool. The biscuits will keep fresh for up to one week stored in an airtight tin.

chocolate vanilla pinwheel shortbread cookies

Tuesday, May 26, 2009

2

Chocolate Hazelnut Biscotti


Exams are over for me, but that does not mean that work is over (Biology IA, English World Lit Essay, Extended Essay...the list never ends). However, it does mean that I can manage to allocate a little more time for baking, instead of stuffing my face into a Biology or Chemistry or Maths textbook all the time.

I had some hazelnuts that I had to use up. And I haven't made biscotti before, so Chocolate Hazelnut Biscotti it was! Biscotti, meaning 'twice-baked' in its Latin name, is an Italian cookie. The dough is shaped into a long, wide log and baked for once to cook the outside. It is then cooled, and sliced into long fingers and baked again to crisp up the interior.

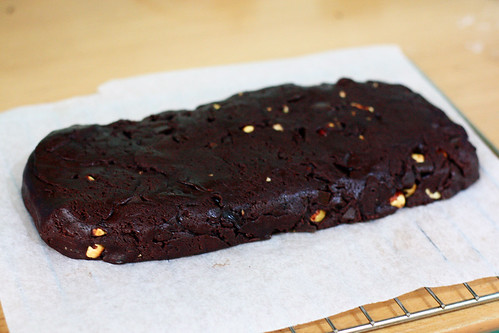
The original recipe I used was for pistachio biscotti, but I replaced it with hazelnuts. Me, being the lazy person I am, didn't shape the dough on a floured surface, but I just patted the dough into a pile, turned it onto the parchment paper and just shaped it with my hand and spatula into a rough-ish log, as pictured above.

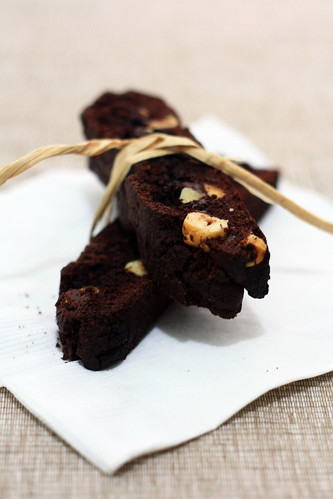
The final product was wonderful straight from the oven - because of my mediocre slicing skills, some of the thinner biscotti snapped and I tried the broken pieces. The cookie was nice and crunchy, with pockets of melted chocolate chips and the lovely aroma of hazelnuts. I ate a few for breakfast the next day (despite keeping in a Ziploc and an airtight container, they became a bit soft), dunked in milk, and my sister had them dunked into her coffee. A happy start to a school day!

Chocolate Hazelnut Biscotti

Adapted from Martha Stewart's Cookies via Use Real Butter

2 cups flour
1/2 cup unsweetened cocoa powder
1 tsp baking soda (I reduced to 1/2 tsp for my elevation)
1/4 tsp salt
6 tbsp unsalted butter, room temperature
1 cup sugar
2 large eggs
1 cup shelled pistachios (try 3/4 cup) - I used the equivalent amount of hazelnuts, which I toasted, skinned and halved.
1/2 cup semisweet chocolate chips (just under) - I used the full half cup :)

1. Preheat oven to 350°F
2. Line a baking sheet with parchment paper
2. Whisk together flour, cocoa powder, baking soda, and salt. Set aside.
3. Beat the butter and sugar together on medium speed until light and fluffy.
4. Add eggs, beating on low speed until well combined. Scrape the sides of the bowl if necessary.
5. Add the flour mixture and beat to form a stiff dough. Mix in the hazelnuts and chocolate chips until just combined.
6. Transfer the dough to the parchment paper and form into a slightly flattened log, about 12×4 inches. Bake until slightly firm, about 25 minutes. Let cool for 5 minutes.
7. Reduce the oven to 300°F. On a cutting board, with a sharp serrated knife, cut the biscotti diagonally into 1-inch thick slices.
8. Arrange the cookies cut side down on the baking sheet. Bake until crisp but slightly soft in the center, about 8 minutes.
9. Move to a wire rack and cool completely. Store in a container at room temperature up to 1 week. Makes 1 dozen.

Blog Widget by LinkWithin