Showing posts with label mushrooms. Show all posts

Saturday, May 29, 2010

3

Chicken and Mushroom Risotto


Well, I'm finally back - I've officially finished the IB Diploma on Monday and my summer holiday has started! But strangely enough, and I really don't know exactly why - I haven't been dying to bake after exams. (Gasp!)

Maybe it's because prom is coming up next week and I want to make sure my dress fits, or because there's no one to share my bakes with, or because I gained an absymal number of pounds from too much snacking during revision, or simply because I was just exhausted after 4 weeks of hell and all I wanted to do was just...sleep.


However I did do some cooking. I really ought to try a few new dishes this summer, and learn a few Chinese dishes off my mum, because once I'm off to uni I'll have to feed myself, and I can't just eat brownies and cookies all day! At the moment I'm very keen on trying some Japanese and Korean dishes. Anyway, I made this Chicken and Mushroom Risotto for dinner the other day and it was not bad at all!


It's the first time I've made risotto using the stir-stir-stir-over-the-stove method (I tried oven-baked risotto before) and I must say it's pretty tiring, standing over the stove for almost an hour making this dish! It just seemed forever before the rice would absorb the stock become soft.


But the result was totally worth it. Even without the addition of cream, the risotto was still perfectly creamy but not heavy, the rice was done just right - soft with just a bit of bite. I used shiitake and white button mushrooms which gave a lovely blend of mushroom flavours. I can't wait to make risotto again - probably one with sun dried tomatoes next!

(Also fingers crossed that my baking crave will come back soon :S I really want to use this summer well and try baking new things!)


Chicken and Mushroom Risotto
Serves 4

250g arborio rice
1 small onion, chopped
2 cloves garlic, minced
300g mushrooms, sliced
4 chicken fillets, cut into bite size pieces
1L chicken stock
20g butter
3 tbsp olive oil
40g parmesan, grated
salt and pepper to taste

1. Fry the chicken pieces in 2tbsp olive oil until golden brown and cooked. Transfer to a plate and set aside.
2. Heat the remaining oil and butter in a large pan, add the garlic and onions and cook until onion is translucent. Meanwhile, in a small saucepan, bring the stock to a simmer.
3. Add the sliced mushrooms to the onions and stir around to coat them with oil. Cook until mushrooms soften and release their juices.
4. Stir in the rice. A ladle at a time, add in the hot chicken stock and stir the mushroom-rice mixture until all the stock is absorbed. Repeat until rice is cooked - chewy, but not yet mushy - taste to check.
5. Season risotto with salt and pepper, and stir in the cooked chicken pieces. Stir in the grated parmesan. Plate up the risotto, and sprinkle on more parmesan prior to serving.
Friday, May 29, 2009

8

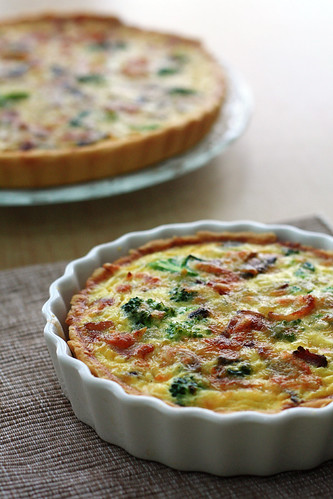
Bacon Brocolli Mushroom Quiche


I still vividly remember the first ever time I tasted quiche. It was year 10 food tech lesson, we were making mini quiches - tiny tiny ones baked in mini muffin moulds. We used ready-made Pampas shortcrust pastry, and the filling was simply milk, egg, cheddar and bacon bits. I was initially a bit skeptic about some custardy-looking filling in a pastry shell. But I was blown away after I popped one of those in my mouth. It was really tasty, even if its just a simplified Quiche Lorraine with bacon bits.


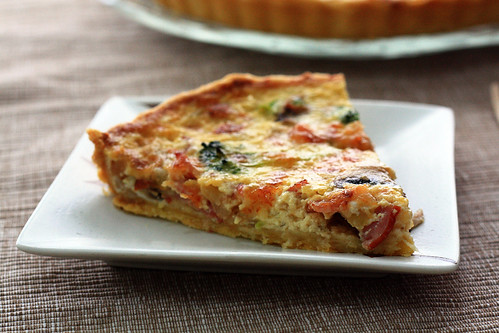
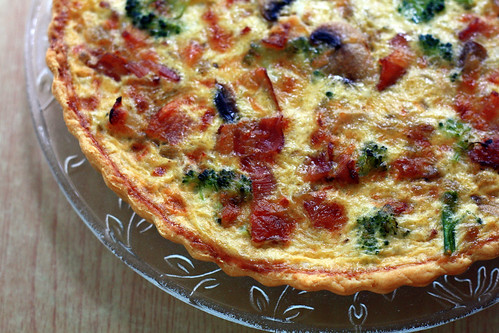
Yesterday, it was Dragon Boat Festival for us Chinese people, and as a public holiday, we had a day off school. I wanted to bake, of course! But something savoury. Initially I had planned to make this quiche for lunch...but I slept way over and ended up waking at 11am instead of 9. So this became our afternoon tea instead. This is the second time I've made a proper quiche before, and also the first time with milk only (i.e. no cream), but surprisingly the filling was still creamy, and filled with broccoli, bacon, mushroom, onion and Gruyere - it was delicious (and lower in fat, and healthy too, with the veggies added)! My mum, sister and I finished a whole 23-cm tart in 15 minutes flat!


The recipe was from Use Real Butter (one of my favourite food blogs - especially the extemely detailed posts for Chinese food, Kaweah and the stunning scenery photos of the Rockies!). But then I realised I didn't have shortening at home, so I switched to a shortcrust pastry recipe from BBC Good Food instead. I rolled out the pastry very thinly, because I'm scared of uncooked soggy crusts. I also baked it in one 23-cm tart and one 17-cm dish.

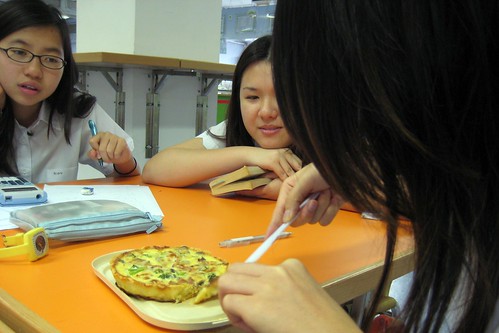
I took the small one (in the white dish) for lunch today, reheated in the microwave - still yummy! Pictured above are my friends snagging bits of my quiche haha. I was suprised that the pastry didn't go soggy though. Much better than the boring canteen lunch boxes (they almost dish up the same stuff everyday...I much prefer homemade food nowadays).

Quiche

Shortcrust Pastry Shell
Adapted from BBC Good Food

175g plain flour
80g cold butter , cut into pieces
1 egg yolk
5 tsp cold water
Pinch salt

1. Processor Method: put the flour, butter, egg yolk and 4 tsp cold water into a food processor. Using the pulse button, process until the mix binds.
Hand Method: Using a pastry cutter or your fingers, work/rub the butter into the flour until it dissapears - it should resemble coarse breadcrumbs. Make a well int the centre, sprinkle in the salt and add the yolk and water. Using your hands or a wooden spoon, gently mix until a ball of dough forms.
2. Tip the pastry onto a lightly floured surface, gather into a smooth ball, then roll out as thinly as you can.
3. Line a 23 x 2.5cm loose-bottomed, fluted flan tin, easing the pastry into the base (I also lined a 17-cm dish with the pastry). Trim the pastry edges with scissors (save any trimmings) so it sits slightly above the tin (if it shrinks, it shouldn't now go below the level of the tin).
4.Press the pastry into the flutes, lightly prick the base with a fork, then chill for 10 mins. Put a baking sheet in the oven and heat oven to 180 C
.
5. Line pastry case with foil, shiny side down, fill with dry beans and bake on the hot sheet for 15 mins. Remove foil and beans and bake for 4-5 mins more until the pastry is pale golden. If you notice any small holes or cracks, patch up with pastry trimmings. You can make up to this point a day ahead.


Filling
Adapted from Use Real Butter

3 eggs, beaten
1 1/2 cups milk
4 strips bacon, cooked and crumbled
1/2 medium onion, minced and sautéed
5 white button mushrooms, sliced and sautéed
1/2 head broccoli, chopped and blanched
1 cup gruyère, shredded
1 tbsp flour
1/4 tsp salt

Reduce oven to 160 C. In a large bowl, stir together the eggs, milk, onion, bacon, broccoli, mushrooms, and salt. In a separate bowl, reserve 2 tbsp of the cheese and toss the remaining cheese and flour together. Add the cheese to the rest of the ingredients and mix well. Pour into pie crust, sprinkle on the reserved cheese and bake 35-40 minutes (Mine only took 30minutes). Let quiche rest out of the oven for 15 minutes before serving (As Jen says, resting prevents any oozing of filling)

Blog Widget by LinkWithin