Saturday, April 10, 2010

18

Caramel Macchiato Cupcakes

I can't live without coffee, and I'm not joking at all. I need caffeine to keep me awake and pump me up for revision purposes. But I don't just drink coffee for stimulatory purposes, I also enjoy the flavour of coffee and the enticing aroma always makes me feel awake despite all the sleep deprivation IB students are subscribed to.

Recently my favourite coffee is the Caramel Macchiato from McCafe (don't judge me - McCafe is actually not bad! And its prices are more reasonable than Starbucks for a student...). The bit I look most forward to is sipping the foam layer that is drizzled with caramel, and then slowly enjoying the caramel-infused coffee.
During the week of school just before Easter holidays, I had my very last high school Chemistry lesson, and one lunchtime during that week our teacher took us out for lunch at Starbucks. I had an iced caramel macchiato and it immediately confirmed my plan of baking caramel macchiato cupcakes for my last Chem lesson, especially when I've had this teacher for 4 years already!

The coffee cupcake was amazingly tender, moist and soft with a strong coffee aroma and taste. The sprinkle of cacao nibs gave the cake a chocolatey undertone. The cupcakes were great to eat on their own fresh from the oven!

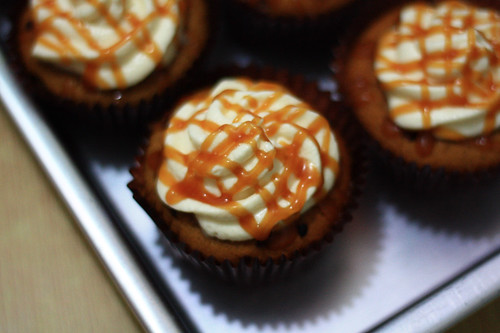
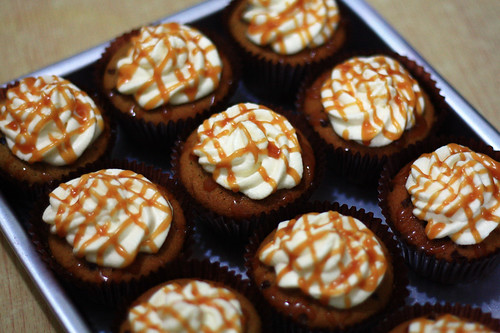
The cakes were then topped with a luscious mountain of vanilla-kahlua infused whipped cream and generously drizzled with homemade caramel sauce. The lightly-textured cream rounded off the ensemble of coffee and caramel flavours very well. All my friends agreed that the cream was the best part - almost a replica of Starbucks' whipped cream, I think we all wanted to have extra servings of the cream! These were well received by everyone...maybe because it's was the famillar scent of our best friend Coffee?!? :)

My teacher had two of these cupcakes and he said that they were amazing - I couldn't be more happier. Sometimes the feeling is just so great when you receive compliments for something you've made, especially when you put in effort, patience and love - which I think will definitely be conveyed to the person eating it!


Caramel Macchiato Cupcakes
Based on recipe from FoodMayhem

Makes around 14 cupcakes

Coffee Cupcake
s
2 1/2 (313g) cups all-purpose flour
2 tsp baking powder
1/2 tsp salt
3/4 (180ml) cup strongly brewed coffee, cooled to warm
1/4 (60ml) cup milk
1 tbsp Kahlua
12 tbsp (170g) unsalted butter, softened
1 cup (200g) sugar
3 eggs
1 rounded tsp instant espresso
Cacao nibs, for sprinkling

Whipped Cream Topping
200g (around 1 cup) whipping cream
3 tbsp (40g) sugar
1tsp vanilla extract
1-2 tsp Kahlua (Optional. Don't put too much, or the cream will be too soft for piping)

Caramel Sauce
(this makes more than needed, use remaining as an ice-cream topper or a mix-in for coffee)
1/2 cup (100g) sugar
3 tbsp (43g) unsalted butter, cut into pieces
4 tbsp (60g) heavy cream

Make Coffee Cupcakes
1. Place rack in the middle of the oven and preheat to 350 F/175 C.Place paper liners in muffin tin.
2. Stir together flour, baking powder, and salt in a small bowl and set aside. Combine coffee, milk, and Kahlua in a cup and set aside.
3. Cream butter and sugar together in a stand mixer (with the paddle attachment) or large bowl with a hand mixer on medium speed, until light and fluffy, about 5 minutes. Beat eggs in one at a time.
4. Reduce speed to low and beat in one-third of the flour mixture, then half of the liquid mixture. Scrape down sides, then beat in another third of flour mixture, then the rest of the liquid, then the remaining flour mixture. Mix in the instant espresso.
5. Fill cupcake liners until 3/4 full. Sprinkle on some cacao nibs if using.
6. Bake for 15-18 minutes or until toothpick comes out clean. Allow to cool in the pan for 10 minutes, before removing them to a wire rack. Cool completely before frosting.

Make Caramel Sauce
1. Warm the cream up in a small microwaveable bowl in the microwave. Set aside.
2. Spread sugar evenly across the bottom of a heavy bottomed saucepan and put over medium-high flame. Try not to touch the sugar but watch carefully as it melts.
3. As soon as it is browning, you can start to stir. When it looks like all of it has browned lightly, remove the pot from heat and stir in butter. Be careful because it will bubble up.
3. Bring it back to the flame and stir for a few seconds until smooth. Remove from the heat again and add the warmed heavy cream, again careful of violent bubbling. Stir rapidly until smooth. Set aside and allow to cool to lukewarm.

Make Whipped Cream Topping and Assemble
(Do not make this until the cupcakes are thoroughly cooled)
1. Whip the cream and sugar until soft peaks form. Add in vanilla and Kahlua and whip until medium peaks form.
2. Transfer to a piping bag with a star tip and pipe on top of each cupcake.
4. Drizzle the cool caramel sauce over the cupcakes with a spoon, or for a neater pattern, transfer to a squeeze bottle and pipe over. Serve immediately or store in the fridge for up to one day.
Friday, April 2, 2010

4

Chocolate Raspberry Cake


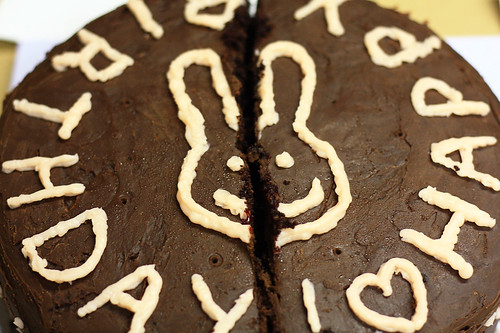
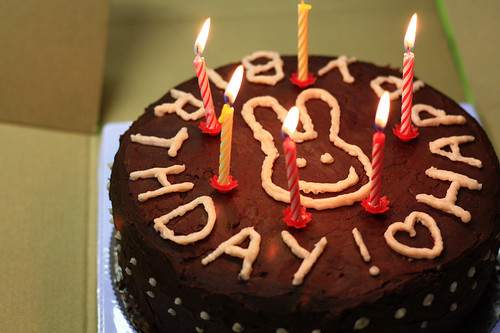
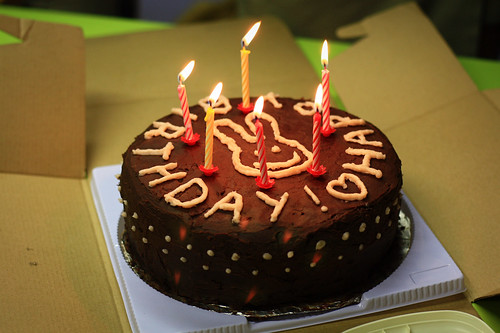
Once upon a time, Wendy had a friend, M. that loves bunnies. She had her 18th birthday a few weeks ago in March. Although officially an adult, she still adores bunnies, but Wendy reckons that she loves chocolate more. So Wendy baked her a chocolate birthday cake...with a silly looking bunny piped on top. M. was happy with her belly full of chocolate cake and a devoured bunny. The End.


Sorry for the lame paragraph above. I am now neck deep into revision for final exams (well at least I should be - only 1 month left!), and my head is full of things to do with chemical reactions, biological processes and mathematical equations and surprisingly, not of cakes, cookies and desserts. Not even chocolate, let alone words and inspiration for blogging. As I tweeted a while ago, this "update-once-a-month" habit is not exactly healthy...I promise to make up for it during summer!

But I did bake a chocolate cake with raspberry filling for M.'s 18th, and it was delicious. The chocolate cake layers were not too heavy yet was full of chocolate flavour, and the tangy raspberry filling paired it really well by balancing the sweetness. The smooth and rich dark chocolate ganache frosting rounded each decadent slice of cake off perfectly.


The decoration is a little childish and haphazard...if I had the time I'd probably spend time experimenting with fondant and colours and mould a 3D fondant bunny on a bed of green grass and purple flowers, but the reality is that I had no time and resorted to piping things with a pink-tinted buttercream. Hey, at least the bunny did look like a bunny! :p

My only complaint that the cake layers are very fragile - I mean very fragile...when handling the layers I broke off quite a huge chunk of one layer and had to cement it on the cake using the ganache. Also, when the cake is sliced, there were a lot of loose crumbs (see above photo), so it seemed like we were eating chocolate soil - but scrumptions chocolate soil!


Nevertheless, I love this raspberry-chocolate combination - I can already foresee raspberry ice cream with chocolate chunks, raspberry-chocolate mousse, or raspberry cream cheese muffins with chocolate chunks....mmmmm!


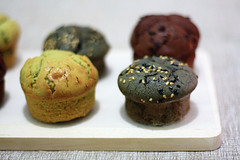
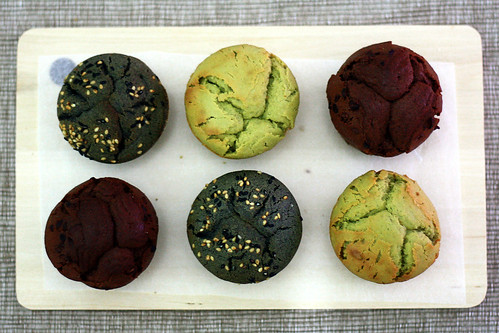
P.S. - Referring my last post, the Matcha Mochi Cakes - as I said I would bake different flavours after my French Orals, and I did! (But totally forgot about posting the variations on) The chocolate and black sesame variations are now on, so if you enjoyed those mochi cakes as much as I did - have an encore with different flavours :)


Chocolate Raspberry Layer Cake

Adapted from Smitten Kitchen

Printable Version

For me, this made a 9-inch three layer cake

For cake layers

3oz (85g) fine-quality semisweet chocolate such as Callebaut ( I used Varlhona)
1 1/2cups (355ml) hot brewed coffee
2cups (400g) sugar
2 1/2 (313g) cups all-purpose flour
1 1/2 cups (130g) unsweetened cocoa powder (not Dutch process)
2 teaspoons baking soda
3/4 teaspoon baking powder
1 1/4 teaspoons salt
3 large eggs
3/4 cup (177ml) vegetable oil
1 1/2 cups (355ml) well-shaken buttermilk
3/4 teaspoon vanilla

For ganache frosting
1/2 pound (227g) fine-quality semisweet chocolate such as Callebaut
1/2 cup (119g) heavy cream
1 tablespoons sugar
1 tablespoons light corn syrup (I replaced with golden syrup)
1/4 stick (28g() unsalted butter

For raspberry filling
(I'd probably halve this next time; I had alot left over)
2 10-ounce bag (567g)frozen raspberries, thawed (I used the same amount of raspberry puree as fresh or even frozen raspberries are very expensive here)
1/2 cup (100g) sugar
2 tablespoons cornstarch

Special equipment: two 10- by 2-inch round cake pans (I baked three 9-inch layers)

Make cake layers: Preheat oven to 300°F/150°C. and grease pans. Line bottoms with rounds of wax paper and grease paper.

Finely chop chocolate and in a bowl combine with hot coffee. Let mixture stand, stirring occasionally, until chocolate is melted and mixture is smooth.

Into a large bowl sift together sugar, flour, cocoa powder, baking soda, baking powder, and salt. In another large bowl with an electric mixer beat eggs until thickened slightly and lemon colored (about 3 minutes with a standing mixer or 5 minutes with a hand-held mixer). Slowly add oil, buttermilk, vanilla, and melted chocolate mixture to eggs, beating until combined well. Add sugar mixture and beat on medium speed until just combined well.

Divide batter between pans and bake in middle of oven until a tester inserted in center comes out clean, 1 hour to 1 hour and 10 minutes.

Cool layers completely in pans on racks. Run a thin knife around edges of pans and invert layers onto racks. Carefully remove wax paper and cool layers completely. Cake layers may be made 1 day ahead and kept, wrapped well in plastic wrap, at room temperature.

Make frosting: Finely chop chocolate. In a 1 1/2- to 2-quart saucepan bring cream, sugar, and corn syrup to a boil over moderately low heat, whisking until sugar is dissolved. Remove pan from heat and add chocolate, whisking until chocolate is melted. Cut butter into pieces and add to frosting, whisking until smooth.

Transfer frosting to a bowl and cool, stirring occasionally, until spreadable (depending on chocolate used, it may be necessary to chill frosting to spreadable consistency). (Deb says that stirring this over a bowl of ice water does a great job of cooling it off quickly and evenly.)

Make Filling: Puree the raspberries in a food processer, blender or immersion blender. Press the puree through a fine-mesh strainer with the back of a spoon, removing the seeds. Heat the puree in a small pot with the sugar and cornstarch until mixture boils, stirring constantly. As it boils, it should quickly thicken. Let it cool completely.

Assemble: Place one cake layer on serving plate/board. Spread some of the raspberry filling (around 1/2 cup) on one layer. Gently top with another layer, and spread with more filling. (I had alot of filling left over; it can be served with cheesecake or over icecream). Spread the chocolate ganache frosting on top of the cake and sides.

The cake keeps, covered and chilled, for 3 days. Bring cake to room temperature before serving.

Friday, March 5, 2010

27

Matcha Mochi Cakes


2nd April 2010 Edit: New flavour variations added below - so now it's Matcha or Black Sesame or Chocolate Mochi Cakes! Enjoy :)


Hi everyone! It's been almost a month since the last post, but I won't go on talking about how busy I was (read: IB) but instead, I'm going to talk about these lovely Matcha Mochi Cakes I made yesterday...because baking is the most interesting aspect of my life :)


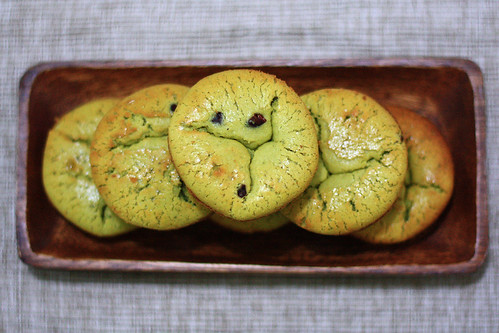
It was just another library day when I was inspired to bake these cakes. My friends A., P. and I were going to the library the other day, and he wanted to get some food so we went to a bakery nearby. Upon seeing a tray of little cakes labelled 'Green Tea Mochi Cake', it rang a bell in my head - I remembered that I had seen a recipe before for mochi cake! I had a bite of the cake - it had a slightly chewy texture that I loved and immediately proclaimed that I had to recreate the cake. And here it is!


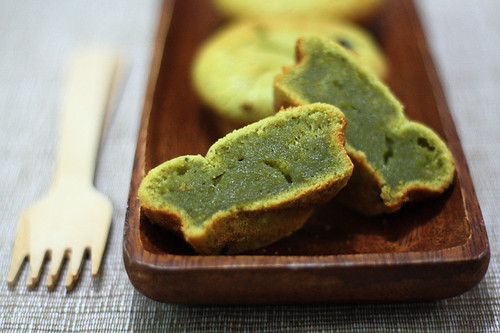
Please don't be intimated with the name - it almost seems oxymoronic, as mochi is usually chewy whilst cakes are meant to be fluffy in texture - but it really is the texture of the cake that makes it unique. These cakes really combines the best of both Western and Asian dessert worlds - baked in a cupcake pan, it resembles a normal cupcake on the outside.


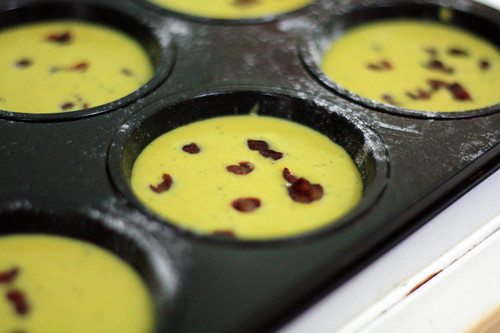
When you bite through, you first break through a layer of fine cake crumbs on the outside, and then your teeth gets to sink into the soft, chewy centre that greatly resembles a Japanese mochi. The red beans dotted within also adds a bit of contrast, lending a mellow sweetness to the cake that blends really well with the matcha. P. also added that the cake's subtle smell of glutinous flour reminded him of traditional Chinese nian gao (the orange rice cakes eaten during CNY).


I'm not going to lie, this cake shot straight up to my favourites list upon my first bite; not to boast but I think this version is better than the one from the bakery! I'm hooked and I cannot wait for next week after my French orals where I will bake these again, since mum has alot of glutinous flour left over from making homemade radish cake and nian gao for CNY.


Tuesday, February 9, 2010

5

My New Favourite Brownie

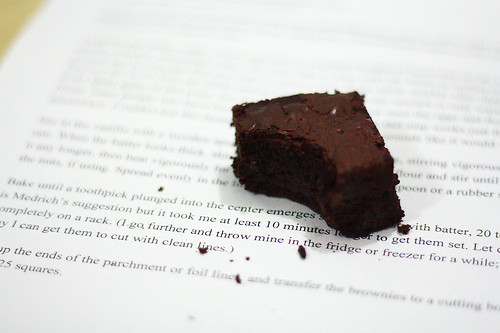
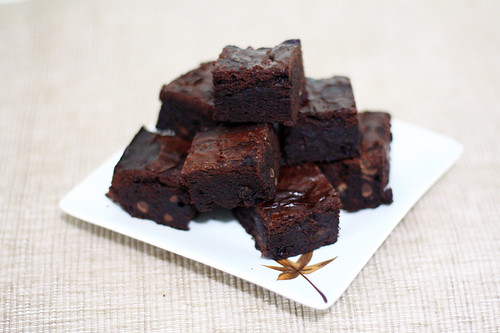
I think I've found my favourite brownie recipe. It contains no 'chocolate' as such but is made with cocoa powder - but still yielded amazing results! I've been tempted to try this recipe since seeing it on Lemonpi, but held it off until a few days ago, when you know, I missed mixing and weighing ingredients - this baking itch that just had to be scratched. I wanted to bake something that can be done quickly, but also giving satisfying results.

Maybe some may start question - "a good brownie? with no chocolate? Is that possible?!" Well it is indeed! I love this brownie recipe to bits! I hate to admit, but I think that the best brownie texture comes from Betty Crocker's brownie mix - it has the chewy, semi-crispy crust that I associate with perfect brownies - but a) call me a food snob, but I never bake with mixes and b) brownies from box mix have near to no chocolate flavour at all, just a bland crumb coloured brown that is not appealing at all.


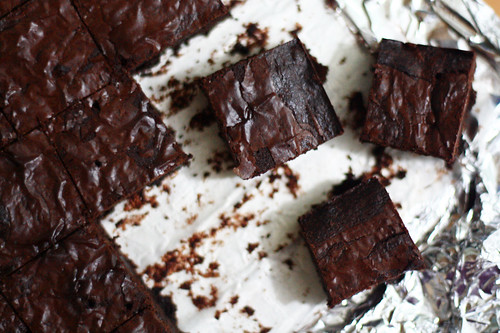
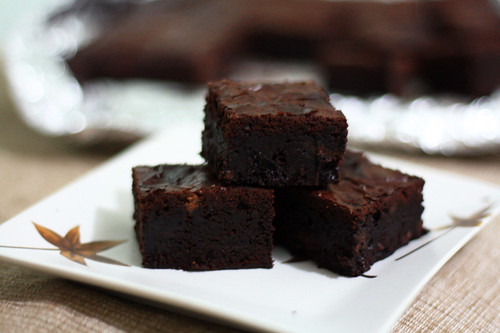
But oh my, this brownies hit all the right criteria for the brownie I'm searching for. It has that delicate crust on top, and the crumb is not cakey but not too fudgy and cloying either - it was just...perfect. The chocolate flavour was right there, and I cut down some sugar so the sweetness was just right. I really can't believe that humble cocoa powder can give such great results -another reassurance that I don't need to spend a fortune on good chocolate for good brownies and I don't need to turn to box mix to get that perfect brownie texture! Since they are so easy and take so little time (probably shorter than time spent writing this post) and equipment to make, I'm seriously considering that I bake these once every few weeks to share at school or something - everyone loves brownies and I'm sure it's bound to put a smile on their face if you share!


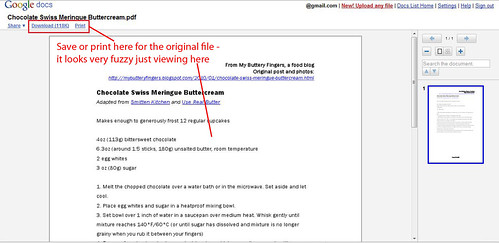
Regarding printable recipes: it seems that the file is very blurry, but if you click 'Download' or Print' on the top left corner, you can save/pring the actual file which is perfectly readable.


Cocoa Brownies
Adapted from Alice Medrich’s Bittersweet, via Smitten Kitchen
and Lemonpi
Printable Version

Makes 16 or 25 brownies, depending on size you cut them

10 tablespoons (1 1/4 sticks, 5 ounces or 141 grams) unsalted butter
1 1/4 cups (9 7/8 ounces, 280 grams) sugar (I cut this down to 200g – 1 cup/ 7oz)
3/4 cup plus 2 tablespoons (2 7/8 ounces, 82 grams) unsweetened cocoa powder (natural or Dutch-process; I used Valrhona)
1/4 teaspoon salt
1/2 teaspoon pure vanilla extract
2 large eggs, cold
1/2 cup (66 grams, 2 3/8 ounces) all-purpose flour
2/3 cup walnut or pecan pieces (optional)
I also added in around two tablespoons of mini chocolate chips I wanted to use up

1. Position a rack in the lower third of the oven and preheat the oven to 325°F/160°C.
2. Line the bottom and sides of an 8×8-inch square baking pan with parchment paper or foil, leaving an overhang on two opposite sides.
3. Combine the butter, sugar, cocoa, and salt in a medium heatproof bowl and set the bowl in a wide skillet of barely simmering water. Stir from time to time until the butter is melted and the mixture is smooth and hot enough that you want to remove your finger fairly quickly after dipping it in to test.
4. Remove the bowl from the skillet and set aside briefly until the mixture is only warm, not hot. (It will look somewhat gritty or lumpy, it’s fine)
5. Stir in the vanilla with a wooden spoon. Add the eggs one at a time, stirring vigorously after each one.
6. When the batter looks thick, shiny, and well blended, add the flour and stir until you cannot see it any longer, then beat vigorously for 40 strokes with the wooden spoon or a rubber spatula. Stir in the nuts, if using. Spread evenly in the lined pan.
7. Bake until a toothpick plunged into the centre emerges slightly moist with batter, around 20 to 25 minutes. Let cool completely on a rack.
8. Lift up the ends of the parchment or foil liner, and transfer the brownies to a cutting board. Cut into 16 or 25 squares.


Saturday, January 23, 2010

19

Chocolate Swiss Meringue Buttercream


In the first month of 2010, four of my friends have already turned 18. I made these cupcakes the other day for them, as super belated birthday presents as it was impossible for me to bake during exams.

Coming to think of it, 2010 is going to be a very special - a roller-coaster year for me. I'll be sitting my IB final exams. I'll be graduating from high school, after seven years there. I'm determined to have a crazy, fruitful, fun and full-of-baking summer to make up for last year. I'll be saying farewell to my friends I've known for many, many years, some whom I have been pals with since we were 4 years old, and we will be parting our own ways to enter the next stage of our lives at university. I myself am likely to be going overseas for university, and enter a journey myself into a foreign country which I am very excited for. (Wait - What if there are no kitchens in the residencies, let along an oven? Oh no!)

And finally, of course I'll be turning 18, an adult, too - I wonder if anyone will be there to bake me a cake...

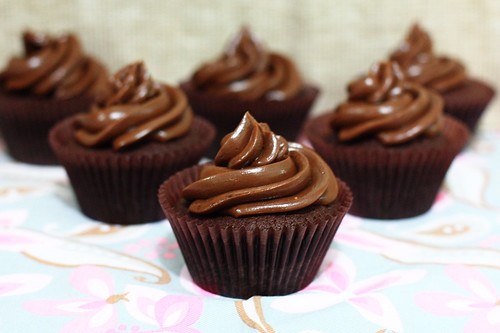
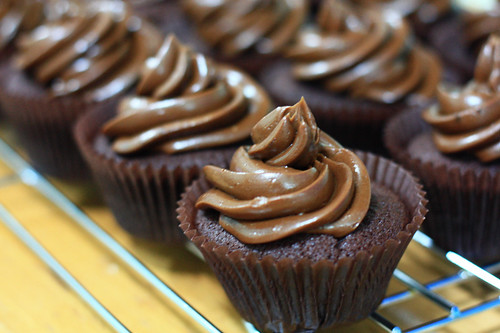
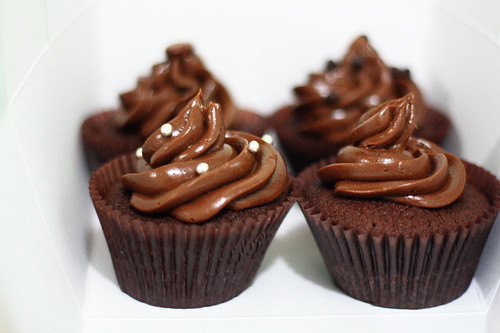
...Back to these cupcakes. Who could resist a light yet chocolatey cupcake rounded off with a swirl of shiny, intensely chocolatey frosting. This is my first time making Swiss Meringue Buttercream, and it was a success! As per usual, I was a little scared to try the recipe before, as it requires whipping for at least 15 minutes and I was afraid that my ageing hand-held mixer might give up on the job. In the end, I had nothing to be afraid of - after 10 minutes of whipping the egg whites with the butter, watching it turn into a slosh, and then voila - clotting into a silky smooth buttercream.


As for the flavour of the buttercream, I was impressed! Unlike classic buttercreams, it was not cloyingly sweet or rich as the bittersweet chocolate alleviated some of the sweetness. It also had lovely light marshmallowy touch to it, and the texture was just a perfect match to the cupcake itself. Not to mention that it pipes like a dream too - even an incompetent cupcake decorator like myself thought that it was very easy to work it. A few friends and I do think that it's still a tad too buttery, so maybe next time I'll cut the butter down.

I used my favourite chocolate cupcake recipe, and once again it did not disappoint. They are really easy to whip up, and even though it only uses cocoa powder, if you use the best-quality cocoa you can get your hands on (I use Valrhona), the end result is still amazingly chocolatey and its light texture means that it's a great compliment to many frostings and fillings.

And on a final note, I've decided to add printable versions (PDF format) of recipes from posts from now on! I will also convert the ingredient measurements into metric measurements (or vice versa if necessary). I personally always work by metric weight, and since I convert the units for every recipe anyway, I might as well post it up too. The online converter I use can be found here - I find it a very handy tool, as it converts measurements specifically for each food. I hope the new feature will be useful to you, and please do notify me if you spot any mistakes - I'll be happy to correct them!

Chocolate Cupcakes

From Cupcake Bakeshop

Printable Version


Makes 12-15 regular cupcakes, or around 40 mini cupcakes

1/2 cup (1 stick, 113g) butter, room temperature
1 1/4 cups (200g) sugar
2 large eggs, room temperature
3/4 cup (103g) all-purpose flour
1/2 teaspoon baking powder
1/4 teaspoon baking soda
1/4 teaspoon salt
1/2 cup (43g) unsweetened cocoa powder
1/2 cup (120ml) milk
1 teaspoons vanilla

1. Preheat oven to 375°F (190°C).
2. Beat butter until softened. Add sugar and beat until light and fluffy, about 3 minutes.
3. Add eggs, one at a time, beating until well combined.
4. Measure the flour, baking powder, baking soda, salt, and cocoa powder into a small sized bowl and whisk to combine.
5. Measure out the milk and vanilla and stir to combine
6. Sift in about a third of the dry ingredients to the butter/sugar and beat to combine. Add about a half of the milk/vanilla and beat to combine. Continue adding, alternating between sifted dry and wet and finishing with the dry.
7. Scoop batter into cupcake cups about 2/3’s full. Do not fill with more than that or cupcakes will overflow. Turn oven down to 350°F (170°C) degrees and bake cupcakes for about 22-25 minutes or until a cake tester comes out clean.

Chocolate Swiss Meringue Buttercream
Adapted from Smitten Kitchen and Use Real Butter

Printable Version


Makes enough to generously frost 12 regular cupcakes

4oz (113g) bittersweet chocolate
6.3oz (around 1.5 sticks, 180g) unsalted butter, room temperature [I think I will cut down to 150g next time)
2 egg whites
3 oz (80g) sugar

1. Melt the chopped chocolate over a water bath or in the microwave. Set aside and let cool.
2. Place egg whites and sugar in a heatproof mixing bowl.
3. Set bowl over 1 inch of water in a saucepan over medium heat. Whisk gently until mixture reaches 140°F/60°C (or until sugar has dissolved and mixture is no longer grainy when you rub it between your fingers)
4. Remove from heat and using an electric mixer, whisk on medium speed until egg whites are cool to touch (this takes a while – should be cooler than your hand).
5. Continue beating, gradually add soft butter by tablespoon pieces and continue to beat. It will first look watery or separated, but after 10-15 minutes, it will come together.
6. Once desired, pipe-able consistency has been reached, fold in cooled chocolate until well incorporated.
Blog Widget by LinkWithin