Wednesday, April 21, 2010

6

A Temporary Farewell

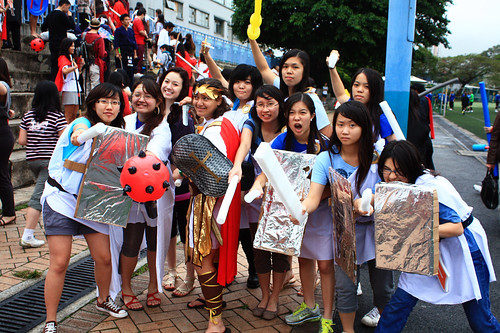
For those who check out my Flickr photostream from time to time, you may have seen a sudden bombardment of random school photos - class photos, photos of people dressed up as soliders or fictional characters and photos with 200-odd heads peeking at you.

As you may have guessed, last week was my last ever week of high school and the whole of Year 13 dressed up according to different themes for each day - we had "Uniform with a Twist Day", "Fictional Characters Day" (my friends and I dressed up as red card soldiers from Alice in the Wonderland), "LAIRE Day" (which is basically everyone dressing up as warriors of sorts and we had a whole year 'battle' at lunchtime) and on the last day, we all wore our KGV Class of 2010 shirts that one of our classmates designed.

I guess the title of this post has two meanings. To my readers, I'm going to be having my first exam in exactly 13 days from today, so I will be initiating a baking and blogging ban on myself. It's going to be hard on me, but these exams, strictly speaking is going to determine the next phase of my life - university. Maybe it's the Chinese genes or something, I'm quite a study freak, so in the next 6 weeks my life is going to be revolved around study notes and past papers. My last exam is on May 24th and I promise that I'll be posting then, so a temporary farewell!
To my year group and myself, it's sure been hard to say farewell to high school. After all, it is the place we have gone to everyday and grown up in for the last 7 years. We've all changed so much, matured so much, experienced so much and learned so much more than we would have imagined upon of first step into KGV. To quote from our Head Girl's extremely fitting speech on our last assembly - "I came to this school a one man wolf pack." I think this line really says it all, and I am so glad that in these 7 years I have met so many people, made friends with so many people, cried and laughed and argued with and baked for so many people!

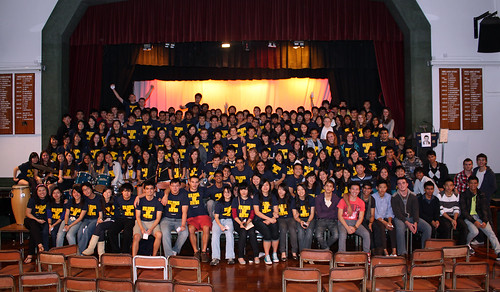
I really could not ask for anymore; I'm sure this is going to be a temporary farewell, even though we all part our ways for our next phase in life, I'm going to remember my high school life in my heart and that will certainly never leave me. And here I'd like to make a shout out: "Thank you, KGV Class of 2010 for making my high school life truly memorable, I had the time of my life. I wish everyone of you the best of luck in the future. I love you all!!"

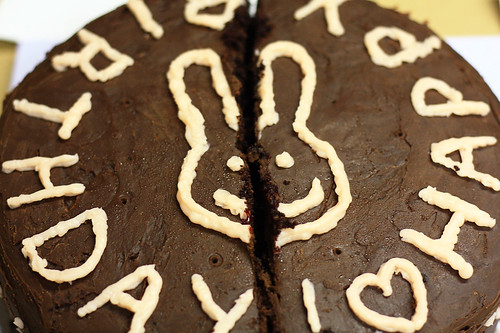
And of course, I wouldn't have imagined to not bake anything for my last ever high school lessons! Here are the things I baked throughout the week, and coming to think of it...it's the last ever time I will for my classmates and friends :(

For our English Tea Party, I made a fruit tart - a sweet tart crust filled with vanilla bean pastry cream and topped with strawberries and peaches. My teacher also baked us a cheesecake, YTH baked chocolate cupcakes and we also had crisps, and Earl Grey tea to make it a real 'tea' party!

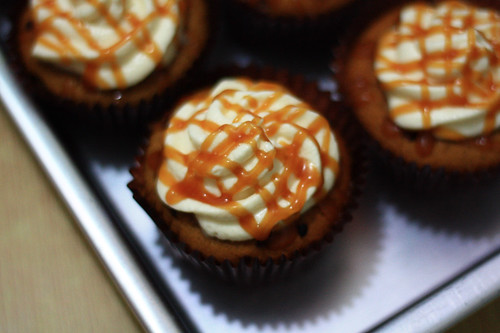
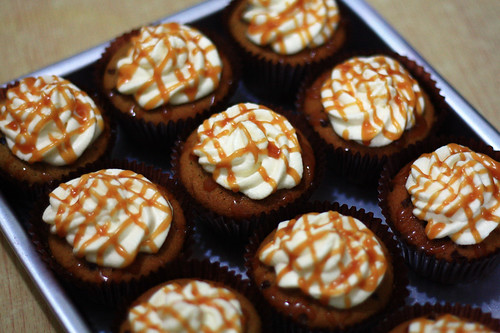
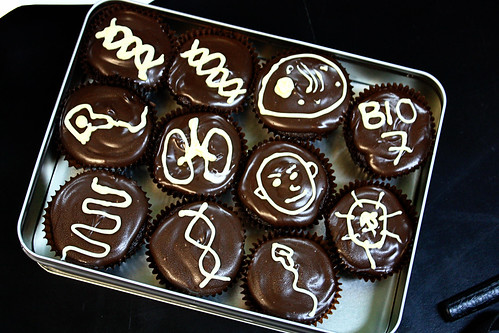
For Biology, I baked some chocolate cupcakes. I tried to make a caramel cream cheese frosting, but it failed as the caramel was bitter (I just fail with wet caramels) so I woke up at 5am to make another frosting. Because I was totally still half asleep and lacking creative juices at that time, I decorated them with white chocolate piped into some diagrams we learn in Biology. They're so badly done I'd probably get no marks, but Biologists, can you guess what they are? :)

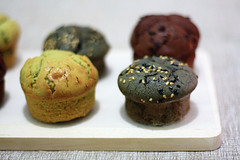
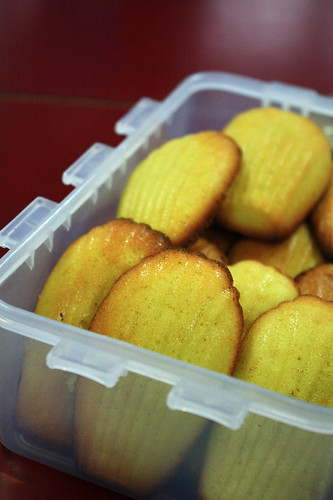
For French, I baked madeleines. I took the fuss to bake them early in the morning too, so they tasted really fresh when we had them. I love the lemony flavour of classic madeleines as it balances the butter and sugar out. Can't stop munching on them!


I also baked some Chocolate Coffee Sandwich Cookies. The filling is a white chocolate ganache with some instant coffee. I totally forgot to take photos of these, so photo courtesy of my friend A. (form class buddy :D) Recipe from Joy the Baker.

Well this is it for now...I'll be back in late May!!

Saturday, April 10, 2010

18

Caramel Macchiato Cupcakes

I can't live without coffee, and I'm not joking at all. I need caffeine to keep me awake and pump me up for revision purposes. But I don't just drink coffee for stimulatory purposes, I also enjoy the flavour of coffee and the enticing aroma always makes me feel awake despite all the sleep deprivation IB students are subscribed to.

Recently my favourite coffee is the Caramel Macchiato from McCafe (don't judge me - McCafe is actually not bad! And its prices are more reasonable than Starbucks for a student...). The bit I look most forward to is sipping the foam layer that is drizzled with caramel, and then slowly enjoying the caramel-infused coffee.

During the week of school just before Easter holidays, I had my very last high school Chemistry lesson, and one lunchtime during that week our teacher took us out for lunch at Starbucks. I had an iced caramel macchiato and it immediately confirmed my plan of baking caramel macchiato cupcakes for my last Chem lesson, especially when I've had this teacher for 4 years already!

The coffee cupcake was amazingly tender, moist and soft with a strong coffee aroma and taste. The sprinkle of cacao nibs gave the cake a chocolatey undertone. The cupcakes were great to eat on their own fresh from the oven!

The cakes were then topped with a luscious mountain of vanilla-kahlua infused whipped cream and generously drizzled with homemade caramel sauce. The lightly-textured cream rounded off the ensemble of coffee and caramel flavours very well. All my friends agreed that the cream was the best part - almost a replica of Starbucks' whipped cream, I think we all wanted to have extra servings of the cream! These were well received by everyone...maybe because it's was the famillar scent of our best friend Coffee?!? :)

My teacher had two of these cupcakes and he said that they were amazing - I couldn't be more happier. Sometimes the feeling is just so great when you receive compliments for something you've made, especially when you put in effort, patience and love - which I think will definitely be conveyed to the person eating it!


Caramel Macchiato Cupcakes
Based on recipe from FoodMayhem

Makes around 14 cupcakes

Coffee Cupcake
s
2 1/2 (313g) cups all-purpose flour
2 tsp baking powder
1/2 tsp salt
3/4 (180ml) cup strongly brewed coffee, cooled to warm
1/4 (60ml) cup milk
1 tbsp Kahlua
12 tbsp (170g) unsalted butter, softened
1 cup (200g) sugar
3 eggs
1 rounded tsp instant espresso
Cacao nibs, for sprinkling

Whipped Cream Topping
200g (around 1 cup) whipping cream
3 tbsp (40g) sugar
1tsp vanilla extract
1-2 tsp Kahlua (Optional. Don't put too much, or the cream will be too soft for piping)

Caramel Sauce
(this makes more than needed, use remaining as an ice-cream topper or a mix-in for coffee)
1/2 cup (100g) sugar
3 tbsp (43g) unsalted butter, cut into pieces
4 tbsp (60g) heavy cream

Make Coffee Cupcakes
1. Place rack in the middle of the oven and preheat to 350 F/175 C.Place paper liners in muffin tin.
2. Stir together flour, baking powder, and salt in a small bowl and set aside. Combine coffee, milk, and Kahlua in a cup and set aside.
3. Cream butter and sugar together in a stand mixer (with the paddle attachment) or large bowl with a hand mixer on medium speed, until light and fluffy, about 5 minutes. Beat eggs in one at a time.
4. Reduce speed to low and beat in one-third of the flour mixture, then half of the liquid mixture. Scrape down sides, then beat in another third of flour mixture, then the rest of the liquid, then the remaining flour mixture. Mix in the instant espresso.
5. Fill cupcake liners until 3/4 full. Sprinkle on some cacao nibs if using.
6. Bake for 15-18 minutes or until toothpick comes out clean. Allow to cool in the pan for 10 minutes, before removing them to a wire rack. Cool completely before frosting.

Make Caramel Sauce
1. Warm the cream up in a small microwaveable bowl in the microwave. Set aside.
2. Spread sugar evenly across the bottom of a heavy bottomed saucepan and put over medium-high flame. Try not to touch the sugar but watch carefully as it melts.
3. As soon as it is browning, you can start to stir. When it looks like all of it has browned lightly, remove the pot from heat and stir in butter. Be careful because it will bubble up.
3. Bring it back to the flame and stir for a few seconds until smooth. Remove from the heat again and add the warmed heavy cream, again careful of violent bubbling. Stir rapidly until smooth. Set aside and allow to cool to lukewarm.

Make Whipped Cream Topping and Assemble
(Do not make this until the cupcakes are thoroughly cooled)
1. Whip the cream and sugar until soft peaks form. Add in vanilla and Kahlua and whip until medium peaks form.
2. Transfer to a piping bag with a star tip and pipe on top of each cupcake.
4. Drizzle the cool caramel sauce over the cupcakes with a spoon, or for a neater pattern, transfer to a squeeze bottle and pipe over. Serve immediately or store in the fridge for up to one day.

Friday, April 2, 2010

4

Chocolate Raspberry Cake


Once upon a time, Wendy had a friend, M. that loves bunnies. She had her 18th birthday a few weeks ago in March. Although officially an adult, she still adores bunnies, but Wendy reckons that she loves chocolate more. So Wendy baked her a chocolate birthday cake...with a silly looking bunny piped on top. M. was happy with her belly full of chocolate cake and a devoured bunny. The End.


Sorry for the lame paragraph above. I am now neck deep into revision for final exams (well at least I should be - only 1 month left!), and my head is full of things to do with chemical reactions, biological processes and mathematical equations and surprisingly, not of cakes, cookies and desserts. Not even chocolate, let alone words and inspiration for blogging. As I tweeted a while ago, this "update-once-a-month" habit is not exactly healthy...I promise to make up for it during summer!

But I did bake a chocolate cake with raspberry filling for M.'s 18th, and it was delicious. The chocolate cake layers were not too heavy yet was full of chocolate flavour, and the tangy raspberry filling paired it really well by balancing the sweetness. The smooth and rich dark chocolate ganache frosting rounded each decadent slice of cake off perfectly.


The decoration is a little childish and haphazard...if I had the time I'd probably spend time experimenting with fondant and colours and mould a 3D fondant bunny on a bed of green grass and purple flowers, but the reality is that I had no time and resorted to piping things with a pink-tinted buttercream. Hey, at least the bunny did look like a bunny! :p

My only complaint that the cake layers are very fragile - I mean very fragile...when handling the layers I broke off quite a huge chunk of one layer and had to cement it on the cake using the ganache. Also, when the cake is sliced, there were a lot of loose crumbs (see above photo), so it seemed like we were eating chocolate soil - but scrumptions chocolate soil!


Nevertheless, I love this raspberry-chocolate combination - I can already foresee raspberry ice cream with chocolate chunks, raspberry-chocolate mousse, or raspberry cream cheese muffins with chocolate chunks....mmmmm!


P.S. - Referring my last post, the Matcha Mochi Cakes - as I said I would bake different flavours after my French Orals, and I did! (But totally forgot about posting the variations on) The chocolate and black sesame variations are now on, so if you enjoyed those mochi cakes as much as I did - have an encore with different flavours :)


Chocolate Raspberry Layer Cake

Adapted from Smitten Kitchen

Printable Version

For me, this made a 9-inch three layer cake

For cake layers

3oz (85g) fine-quality semisweet chocolate such as Callebaut ( I used Varlhona)
1 1/2cups (355ml) hot brewed coffee
2cups (400g) sugar
2 1/2 (313g) cups all-purpose flour
1 1/2 cups (130g) unsweetened cocoa powder (not Dutch process)
2 teaspoons baking soda
3/4 teaspoon baking powder
1 1/4 teaspoons salt
3 large eggs
3/4 cup (177ml) vegetable oil
1 1/2 cups (355ml) well-shaken buttermilk
3/4 teaspoon vanilla

For ganache frosting
1/2 pound (227g) fine-quality semisweet chocolate such as Callebaut
1/2 cup (119g) heavy cream
1 tablespoons sugar
1 tablespoons light corn syrup (I replaced with golden syrup)
1/4 stick (28g() unsalted butter

For raspberry filling
(I'd probably halve this next time; I had alot left over)
2 10-ounce bag (567g)frozen raspberries, thawed (I used the same amount of raspberry puree as fresh or even frozen raspberries are very expensive here)
1/2 cup (100g) sugar
2 tablespoons cornstarch

Special equipment: two 10- by 2-inch round cake pans (I baked three 9-inch layers)

Make cake layers: Preheat oven to 300°F/150°C. and grease pans. Line bottoms with rounds of wax paper and grease paper.

Finely chop chocolate and in a bowl combine with hot coffee. Let mixture stand, stirring occasionally, until chocolate is melted and mixture is smooth.

Into a large bowl sift together sugar, flour, cocoa powder, baking soda, baking powder, and salt. In another large bowl with an electric mixer beat eggs until thickened slightly and lemon colored (about 3 minutes with a standing mixer or 5 minutes with a hand-held mixer). Slowly add oil, buttermilk, vanilla, and melted chocolate mixture to eggs, beating until combined well. Add sugar mixture and beat on medium speed until just combined well.

Divide batter between pans and bake in middle of oven until a tester inserted in center comes out clean, 1 hour to 1 hour and 10 minutes.

Cool layers completely in pans on racks. Run a thin knife around edges of pans and invert layers onto racks. Carefully remove wax paper and cool layers completely. Cake layers may be made 1 day ahead and kept, wrapped well in plastic wrap, at room temperature.

Make frosting: Finely chop chocolate. In a 1 1/2- to 2-quart saucepan bring cream, sugar, and corn syrup to a boil over moderately low heat, whisking until sugar is dissolved. Remove pan from heat and add chocolate, whisking until chocolate is melted. Cut butter into pieces and add to frosting, whisking until smooth.

Transfer frosting to a bowl and cool, stirring occasionally, until spreadable (depending on chocolate used, it may be necessary to chill frosting to spreadable consistency). (Deb says that stirring this over a bowl of ice water does a great job of cooling it off quickly and evenly.)

Make Filling: Puree the raspberries in a food processer, blender or immersion blender. Press the puree through a fine-mesh strainer with the back of a spoon, removing the seeds. Heat the puree in a small pot with the sugar and cornstarch until mixture boils, stirring constantly. As it boils, it should quickly thicken. Let it cool completely.

Assemble: Place one cake layer on serving plate/board. Spread some of the raspberry filling (around 1/2 cup) on one layer. Gently top with another layer, and spread with more filling. (I had alot of filling left over; it can be served with cheesecake or over icecream). Spread the chocolate ganache frosting on top of the cake and sides.

The cake keeps, covered and chilled, for 3 days. Bring cake to room temperature before serving.
Blog Widget by LinkWithin