Saturday, June 27, 2009

7

A Spoonful of Summer

Last week, school closed early for the summer because a student caught swine flu, which meant my summer holiday started a week early. The first thing I did was go camping at the beach, have a barbeque, go to the beach for the second time, make this and two other ice creams (coming soon!). Temperatures are getting as high as 32 C already. Now, summer is truly in the air.

strawberry sorbet
If you go to to any supermarket here now, you'll see staff arranging cartons and cartons of huge strawberries onto the fruit aisle. In Hong Kong, practically everything we eat is imported, and these strawberries are from America. So before everything is gone, I grabbed a carton, lined up to pay for it, and began to brainstorm as to what to do with these juicy jewels.

strawberry sorbet
Eventually, I chose a recipe out of my new ice cream book and decided to attempt sorbet for the first time. Surprisingly, this recipe has an ingredient that I haven't seen before in ice creams or sorbets - gelatine. But I think it was the addition of it that made the texture cottony soft and not overly frozen. A scoop of this is packed with the sweetness of strawberries, the tanginess of lemon juice, and lightly spiked with a little booze. What's more, it's also low in fat.

strawberry sorbet
Now go grab some strawberries, churn yourself a batch of this refreshing dessert and cool off from the heat!

Strawberry Sorbet
Adapted from Ice Cream Book by Junko Fukuda (Original recipe in Chinese)

30ml + 3tbsp Water (measured separately)
70g Sugar
300g Strawberries, hulled and halved
2 tsp Lemon Juice
1tbsp Rum
5g Gelatine

*Amounts of sugar and lemon juice can be adjusted accordingly to suit the strawberry's sweetness or tartness

1. Place the 3tbsp water in a small, microwaveable bowl and sprinkle on the gelatine. Leave for it to bloom.
2. In a small saucepan, place the sugar and the remaining water and cook until the sugar is dissolved. Set aside to cool.
3. Place the strawberries, lemon juice, rum and the cold syrup into a blender. Whizz until the the mixture is homogeneous. Transfer into a large bowl.
4. Place the gelatine mixture into the microwave and heat it on medium for around 30 seconds (or less) until the gelatine is thoroughly dissolved. Slowly mix it into the strawberry mixture.
5. Place the bowl on top of an ice bath and cool, stirring occasionally. The mixture should thicken slightly.
6. Churn the mixture for around 20 minutes or until frozen.

Friday, June 19, 2009

14

First Ice Cream of 2009

What time is it?


Summer time!

Sorry for the bad 'joke'. I quote my friend for this...but it did make me laugh! But back to the point. Its summer time, its time for the beach, time for 10 hours of sleep, which also means time for ice cream!

I've had an ice cream maker at home for ages, but I never really tried making proper ice cream until last summer. I tried out many new things last summer because my holiday was super long (since I just had my GCSE exams) and had nothing much to do, so I baked a lot and tried many new things!


The first flavour of ice cream up this year is something special that I haven't tried before - Goma (Black Sesame) Ice Cream. This Japanese flavour gives off a rich nutty aroma, contrasting with the creamy texture of the ice cream. Two forms of black sesame is used to enhance the flavour - sesame paste and ground sesame seeds, which resulted into an ice cream that is way more flavourful than the store-bought ones. Even my mum who doesn't have much of a sweet tooth loved it!

Pardon me for the poor photos - it's actually really hard to take good photos of ice cream here because of the hot and humid weather (even the aircon doesn't help much). But do try this ice cream flavour - it's just so good. See, the bowl was licked clean precisely one minute after the photo shoot!


Goma (black sesame) Ice Cream
Adapted from Ice Cream Book, by Junko Fukuda (original recipe in Chinese)

60g Black sesame paste
180ml Milk
2 Egg yolks
70g + 2tbsp sugar (measure separately)
120ml Whipping cream
1tbsp Ground black sesame seeds

1. In a large bowl, whisk together 2 tbsp of sugar with the black sesame paste until smooth.
2. In a separate large bowl, whisk together 70g sugar and the egg yolks until pale yellow.
3. Heat the milk in a small saucepan until just about to boil.
4. Mix the yolks and the milk, adding the milk in small portions (so you don't end up with scrambled eggs!)
5. Pour the mixture (the custard) back into the pan. Heat the mixture over low heat, stirring constantly until the mixture thickens - it should coat the back of a wooden spoon.
6. Strain the custard. Mix the custard with the black sesame mixture, adding the custard in small portions (or the mixture will separate).
7. Place the bowl over an ice bath to cool, stirring occasionally. Chill the mixture until thoroughly cold.
8. Mix the cream and ground sesame seeds into the cold ice cream mixture.
9. Churn the ice cream in an ice cream maker, for around 20 minutes (time may differ according to your machine).
10. Transfer to an air tight container and chill until ice cream sets.

Click here to see the ice cream maker I have (links to amazon). I wouldn't recommend it though, because for some reason the lid doesn't fit on properly to the bottom canister, and the whole top bit wobbles when I switch the machine on.


This was the brand of sesame paste I used. I think I'll use the remaining to make a black sesame chiffon cake.

Wednesday, June 17, 2009

11

It's Tea Time!

I love tea. I'd prefer it any time over soft drinks or juice. I love drinking many types of tea, from the slightly bitter Chinese Pu-erh tea after dinner, Japanese green tea (Matcha) whilst eating sushi, or a rich, creamy mug of Hong Kong milk tea. The post title refers to my two most recent bakes - Earl Grey Tea cookies and Matcha Chiffon Cake.


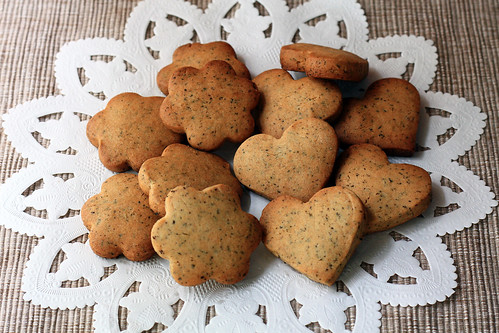
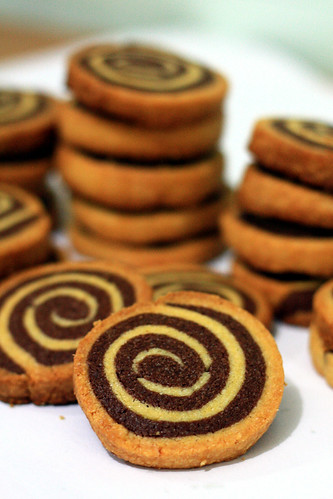
These cute little cookies are of the shortbread variety, but the method of making this is different to the pinwheel ones I made previously. I really love these cookies because when you take a first bite, it might seem that the tea flavour is not strong enough, but after a second, third bite, it tastes just like drinking a cup of milky Earl Grey Tea. They do not have a strong orange-y flavour either. You really can't resist munching on one...then another one...until the whole plateful is gone!


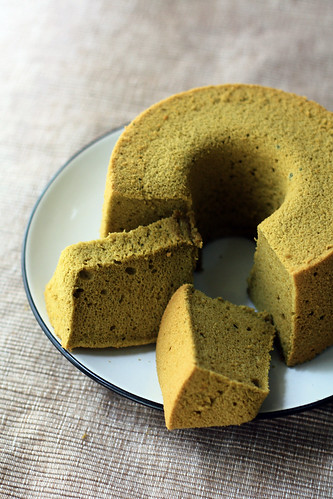
I first tried making chiffon cakes last year. At first I was really scared of whipping egg whites, but after making countless of these cakes (my mum loves them because they're not too sweet, and because of the soft and cottony texture), I think I've mastered the art of making a perfect chiffon. This particular matcha chiffon has a fresh and clean fragrance, and the ever-so-slight bitter aftertastes balances the sweetness perfectly. I've included some of my humble tips on making chiffon cakes below.


Both of these treats are great for snacking, and of course perfect consumed with a cup of your favourite tea during a relaxing afternoon! What is your favourite type of tea to use when baking?

Early Grey Tea Cookies
Adapted from Vanlily's blog (Original recipe in Chinese)
Makes 16-20 small cookies

1 teabag Earl Grey tea (I used Twinings)
1tbsp Milk
70g Butter, at room temperature
30g Icing sugar
Pinch Salt
120g All purpose flour
1/4tsp Baking soda

1. Put the milk into a small microwavable bowl and nuke it for around 10 seconds to warm it up. Cut open the tea bags, put the leaves into the milk. Cover and leave to infuse for around 30 minutes.
2. Beat butter and icing sugar with an electric mixer until soft and fluffy, beat in the tea-milk mixture
3. Sift in the salt, flour and baking soda. Gently fold into the mixture with a rubber spatula until a soft dough forms.
4. Cover the bowl with plastic wrap and chill for 30mins.
5. Meanwhile, preheat oven to 180C. Gently flour your work surface and rolling pin. Roll out the dough gently until around 5mm thick, use cookie cutters to cut our shapes and transfer to a parchment-lined baking sheet. Place the baking sheet, cookies and all into the freezer for around 5 minutes.
6. Bake for around 15-20minutes until pale golden. Remove and cool on a cooling rack, where they will crisp up.

Matcha Chiffon Cake
From Chiffon Cake Book by Junko Fukada (Original recipe in Chinese)
Makes one 17cm cake (plus some extra batter)

3 Egg yolks
80g Sugar
50ml Vegetable oil
60ml Water
80g Cake (low-protein) flour
10g Matcha (green tea powder)
4 Egg whites

1. Preheat oven to 180C. Whisk egg yolks, 1/3 of the sugar, oil and water together.
2. Pour in sifted flour and matcha, whisk until totally incorporated and no lumps remain.
3. Using an electric mixer, whip the egg whites until foamy. Pour in half the remaining sugar, beat for 2 more minutes, add in the rest of the sugar and beat until soft peaks form.
4.Place 1/3 of the beaten egg whites into the flour mixture. Use a whisk to quickly mix everything together.
5. Add in the rest of the egg whites, incorporate gently but quickly. When some white streaks remain, swap to a rubber spatula and fold gently until the mixture is homogeneous.
6. Pour the mixture into the chiffon cake tin (you may need to slightly grease it beforehand to prevent sticking, but I skip this step). Rap the tin against the table a few times to get rid of large air bubbles.
7. Bake for 20 minutes until a toothpick inserted comes out clean.
8. The cake must be cooled upside down; stick the tin on a tall heavy bottle, leave until cake is completely cool before removing it from the tin.

Tips for making chiffon cakes
- When mixing the yolk mixture, ensure that no lumps remain to ensure a smooth batter after adding egg whites. You don't want to be deflating the mixture whilst attempting to get rid of those lumps!
- An indication as to when the whites are ready, a small 'peak' will form when you pull up your beaters. After reaching that stage, whip for another minute on low speed to stabilise the air bubbles.
- Mix gently when incorporating the two mixtures. Usually, just to be on the safe side, I use a spatula upon the second addition.
- If your cake is being stubborn and refuses to leave the tin, use a thin sharp knife or thin offset spatula and run it around the cake. it should pop out really easily.


Saturday, June 13, 2009

8

Back to Basics

Sometimes the most basic baked goods - in this case, muffins and cookies - are good enough to satisfy cravings for sweet things or satisfy my sudden urge to bake during a busy week.

banana coffee muffins
These muffins are Banana Coffee Muffins, with a sprinkling of oatmeal. The best way to use up spotty, ripe bananas! Initially I was a bit afraid of adding coffee into these (as I don't think coffee goes well with fruit), but I decided to be daring and throw that in. Also because I've been recently obsessed with oatmeal, I added some into the mix and sprinkled some on top - just to pretend that I'm 'health conscious'.

banana coffee muffins
The muffins were delicious piping hot out of the oven with a noticeable, but not overpowering hint of coffee. The oatmeal also added some extra texture - something different from the tender crumb of the muffins.

chocolate vanilla pinwheel shortbread cookies
The Pinwheel Shortbread Cookies were baked for the last day of lessons at school. The recipe is my all time favourite shortbread recipe (see below) that I've used for many many times before with success. They are quite rich and buttery with a slightly crunchy texture. Many of my friends thought they were really cool - some even thought they were store bought!

chocolate vanilla pinwheel shortbread cookies
Banana Coffee Muffins
Adapted from Simply Recipes
Makes 12 muffins

3 ripe bananas, smashed
1/3 cup (75g) melted butter
2/3 cup (120g) sugar
1 egg, beaten
1 teaspoon vanilla
2tbsp instant coffee powder, mixed with 2 tbsp hot water
1 teaspoon baking soda
Pinch of salt
1 1/2 cup (190g) flour
1oz (30g) oatmeal, plus more for sprinkling

1. Preheat the oven to 350°F. With a wooden spoon, mix butter into the mashed bananas in a large mixing bowl.
2. Mix in the sugar, egg, espresso and vanilla.
3.Sprinkle the baking soda and salt over the mixture and mix in.
4. Add the flour, mix until it is just incorporated. Gently mix in the oatmeal.
5. Pour mixture into a prepared muffin tin. Sprinkle more oatmeal on top if desired. Bake for 25-30 minutes. Check for doneness with a toothpick inserted into the center of a muffin. If it comes out clean, it's done. Cool on a rack.

These muffin liners are cute, no?

Pinwheel Shortbread Cookies
Adapted from BBC Good Food

Vanilla Dough
160g plain flour
100g salted butter, cold, cut into 1cm cubes
50g sugar
1tsp vanilla essence
1 large egg yolk

Chocolate Dough
140g plain flour
20g cocoa powder
100g salted butter, cold, cut into 1cm cubes
50g sugar
1 large egg yolk

1. Prepare the vanilla dough. Place flour and butter into mixing bowl, rub together until mixture resembles coarse breadcrumbs and the butter is completely worked into the flour. Add vanilla and egg yolk, mix together gently until a ball of dough forms. If it is too dry, sprinkle in a few drops of water. Alternatively, place all the butter and flour food processor and pulse together until butter disappears, add the rest of the ingredients and pulse until a dough forms. Wrap dough with cling film and chill whilst you prepare the chocolate dough.
2. Prepare the chocolate dough as above, adding the cocoa in with the flour.
3. Unwrap the vanilla dough and place into a large Ziploc bag. Roll out into a square with uniform thickness. Repeat with the chocolate dough.
4. Place the chocolate dough on top of the vanilla dough and roll up tightly, Swiss-roll style, but gently so you don't deform the log. Chill for 1 hour.
5. Preheat oven to 180C. Line a baking tray with parchment.
6. Remove dough from the fridge. Slice into generous 5mm (1/4 inch) slices and place them slightly apart on baking sheet.
7. Bake for 20 minutes until the biscuits are just turning pale golden around the edges, then transfer to a wire rack to cool. The biscuits will keep fresh for up to one week stored in an airtight tin.

chocolate vanilla pinwheel shortbread cookies

Blog Widget by LinkWithin